James C. Kessler - Fundamentals of Fixed Prosthodontics
Здесь есть возможность читать онлайн «James C. Kessler - Fundamentals of Fixed Prosthodontics» — ознакомительный отрывок электронной книги совершенно бесплатно, а после прочтения отрывка купить полную версию. В некоторых случаях можно слушать аудио, скачать через торрент в формате fb2 и присутствует краткое содержание. Жанр: unrecognised, на английском языке. Описание произведения, (предисловие) а так же отзывы посетителей доступны на портале библиотеки ЛибКат.
- Название:Fundamentals of Fixed Prosthodontics
- Автор:
- Жанр:
- Год:неизвестен
- ISBN:нет данных
- Рейтинг книги:3 / 5. Голосов: 1
-
Избранное:Добавить в избранное
- Отзывы:
-
Ваша оценка:
Fundamentals of Fixed Prosthodontics: краткое содержание, описание и аннотация
Предлагаем к чтению аннотацию, описание, краткое содержание или предисловие (зависит от того, что написал сам автор книги «Fundamentals of Fixed Prosthodontics»). Если вы не нашли необходимую информацию о книге — напишите в комментариях, мы постараемся отыскать её.
Fundamentals of Fixed Prosthodontics — читать онлайн ознакомительный отрывок
Ниже представлен текст книги, разбитый по страницам. Система сохранения места последней прочитанной страницы, позволяет с удобством читать онлайн бесплатно книгу «Fundamentals of Fixed Prosthodontics», без необходимости каждый раз заново искать на чём Вы остановились. Поставьте закладку, и сможете в любой момент перейти на страницу, на которой закончили чтение.
Интервал:
Закладка:
The bite fork is placed back in the mouth, and the patient is instructed to close to hold it securely between the maxillary and mandibular arches. The patient is then asked to grasp both arms of the facebow and guide the plastic earpieces into the external auditory meati, much as one would guide the earpieces of a stethoscope ( Fig 5-4). The shaft of the nasion relator is extended while the facebow is adjusted up or down to center the plastic nosepiece on the patient’s nasion, and the thumbscrew is tightened ( Fig 5-5). Next, the thumbscrew is tightened on the top of the facebow ( Fig 5-6).
The Quick Lock Toggle is slipped into the slot on the bite fork with the head of the thumbscrew facing downward, and the screw is tightened ( Fig 5-7). The Quick Lock Toggle is stabilized, and the T screw is tightened ( Fig 5-8). The facebow record is now complete ( Fig 5-9).
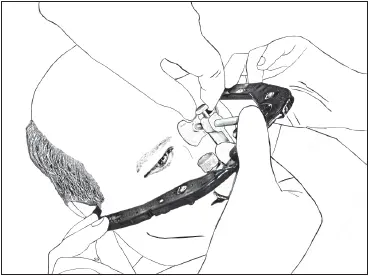
Fig 5-5The shaft of the nasion relator is extended, and the thumbscrew is tightened.
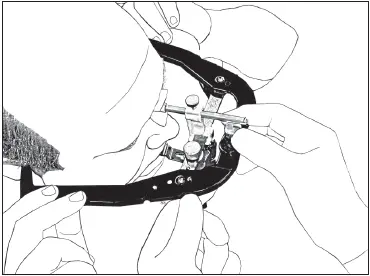
Fig 5-6The thumbscrew on the top of the facebow is tightened.
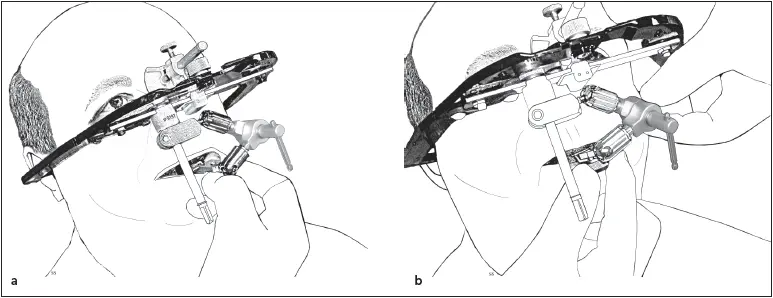
Fig 5-7The Quick Lock Toggle is slipped into the slot on the bite fork (a) , and the thumbscrew is tightened (b) .
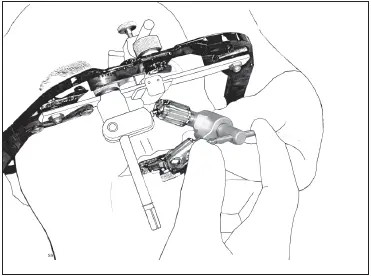
Fig 5-8The Quick Lock Toggle is stabilized, and the T screw is tightened.
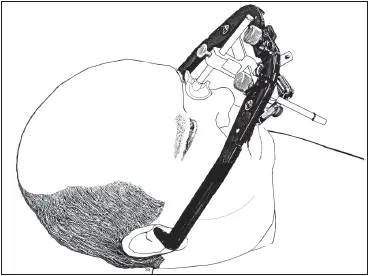
Fig 5-9Completed facebow record.

Fig 5-10The thumbscrew is loosened, and the nasion relator is withdrawn.
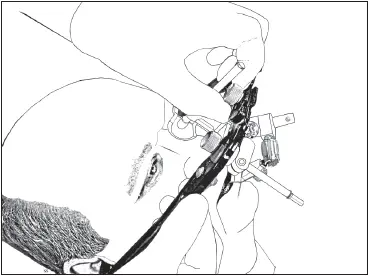
Fig 5-11The thumbscrew on the top of the facebow is loosened.
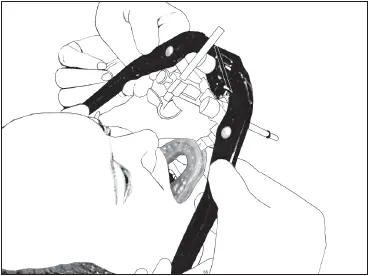
Fig 5-12The patient is instructed to open, and the facebow record is removed.
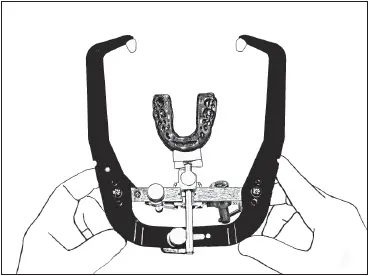
Fig 5-13The space between the facebow and the bite fork is checked for uniformity.
The thumbscrew is loosened, and the plastic nasion relator is withdrawn ( Fig 5-10). Then the thumbscrew on the top surface of the facebow is loosened by a quarter turn ( Fig 5-11). As the patient slowly opens the mouth, the entire assembly is carefully removed from the head ( Fig 5-12). The T screw is rechecked and securely tightened while the Quick Lock Toggle is stabilized. It is sometimes difficult to adequately tighten the T screw while the facebow is on the patient’s head. It is confirmed that the bite fork is evenly spaced inside the facebow ( Fig 5-13). The transfer assembly is removed from the facebow, and the support bar is reinstalled ( Fig 5-14). The bite fork is rinsed with running tap water, and the plastic earpieces, the facebow assembly, and the bite fork ( Fig 5-15) are disinfected with a hospital-grade disinfectant. The transfer assembly and bite fork are stored in an unsealed sterilization bag until it is time to mount the maxillary cast ( Fig 5-16).
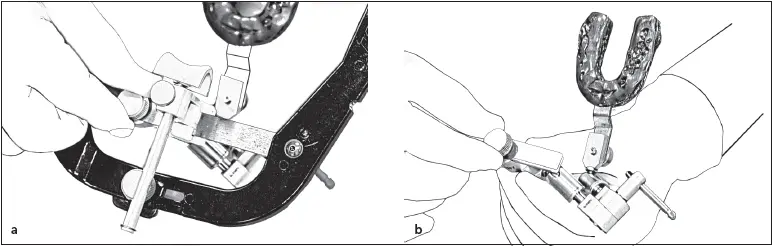
Fig 5-14The transfer assembly is removed from the facebow (a) , and the support bar is placed in position (b) .
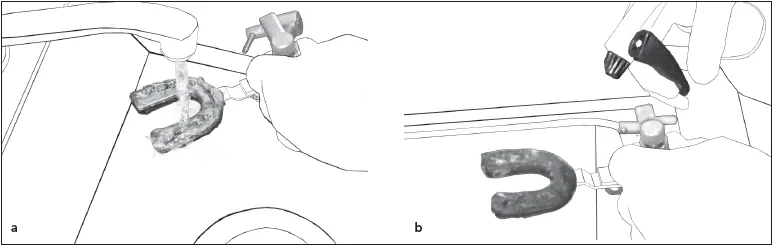
Fig 5-15The bite fork is rinsed with running water (a) and sprayed with disinfectant (b) .
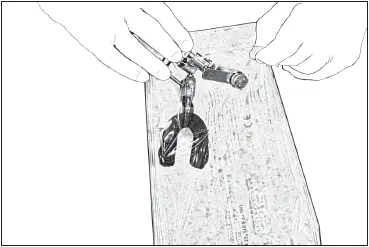
Fig 5-16The transfer assembly and attached bite fork are stored in an open sterilization bag.
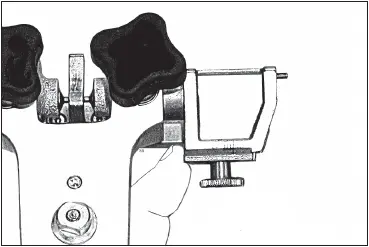
Fig 5-17The immediate lateral translation guide is moved to zero on each condylar guide.

Fig 5-18The transfer base is placed on the articulator (a) and stabilized with a metal mounting disk (b) .
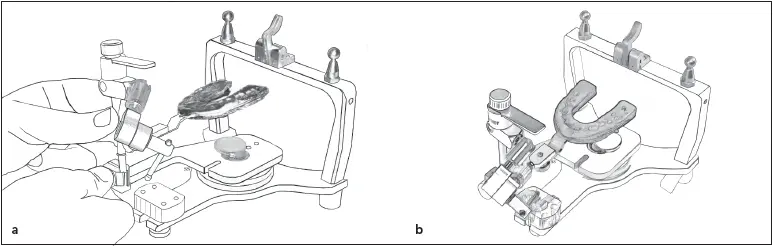
Fig 5-19 (a) The vertical shaft of the transfer assembly is placed in the transfer assembly. (b) After tightening the clamp screw.
Mounting the maxillary cast
The articulator is prepared to receive the cast. The upper and lower members of the articulator are separated. The immediate lateral translation guide on the front of each condylar guide is moved outward to a setting of zero ( Fig 5-17). This will prevent any lateral movement during mounting of the casts. A clean mounting plate is firmly secured to the upper member of the articulator. The incisal guide pin is removed. The transfer base is placed on the lower member of the articulator and secured by placing one of the metal mounting disks on the lower member magnet ( Fig 5-18). The vertical rod of the transfer assembly is inserted into the transfer base, and the clamp screw is tightened ( Fig 5-19).
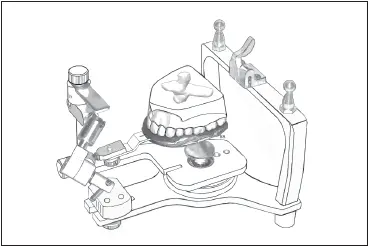
Fig 5-20The maxillary cast is seated in the bite fork registration.
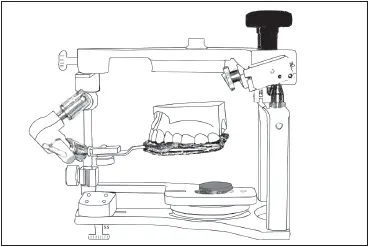
Fig 5-21The space between the base of the maxillary cast and the upper member of the articulator is checked.
Читать дальшеИнтервал:
Закладка:
Похожие книги на «Fundamentals of Fixed Prosthodontics»
Представляем Вашему вниманию похожие книги на «Fundamentals of Fixed Prosthodontics» списком для выбора. Мы отобрали схожую по названию и смыслу литературу в надежде предоставить читателям больше вариантов отыскать новые, интересные, ещё непрочитанные произведения.


Обсуждение, отзывы о книге «Fundamentals of Fixed Prosthodontics» и просто собственные мнения читателей. Оставьте ваши комментарии, напишите, что Вы думаете о произведении, его смысле или главных героях. Укажите что конкретно понравилось, а что нет, и почему Вы так считаете.