James C. Kessler - Fundamentals of Fixed Prosthodontics
Здесь есть возможность читать онлайн «James C. Kessler - Fundamentals of Fixed Prosthodontics» — ознакомительный отрывок электронной книги совершенно бесплатно, а после прочтения отрывка купить полную версию. В некоторых случаях можно слушать аудио, скачать через торрент в формате fb2 и присутствует краткое содержание. Жанр: unrecognised, на английском языке. Описание произведения, (предисловие) а так же отзывы посетителей доступны на портале библиотеки ЛибКат.
- Название:Fundamentals of Fixed Prosthodontics
- Автор:
- Жанр:
- Год:неизвестен
- ISBN:нет данных
- Рейтинг книги:3 / 5. Голосов: 1
-
Избранное:Добавить в избранное
- Отзывы:
-
Ваша оценка:
Fundamentals of Fixed Prosthodontics: краткое содержание, описание и аннотация
Предлагаем к чтению аннотацию, описание, краткое содержание или предисловие (зависит от того, что написал сам автор книги «Fundamentals of Fixed Prosthodontics»). Если вы не нашли необходимую информацию о книге — напишите в комментариях, мы постараемся отыскать её.
Fundamentals of Fixed Prosthodontics — читать онлайн ознакомительный отрывок
Ниже представлен текст книги, разбитый по страницам. Система сохранения места последней прочитанной страницы, позволяет с удобством читать онлайн бесплатно книгу «Fundamentals of Fixed Prosthodontics», без необходимости каждый раз заново искать на чём Вы остановились. Поставьте закладку, и сможете в любой момент перейти на страницу, на которой закончили чтение.
Интервал:
Закладка:
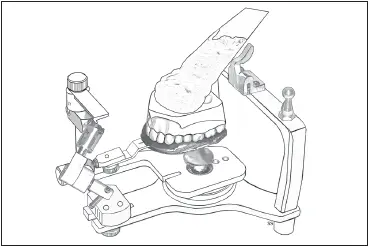
Fig 5-22Mounting stone is applied to the base of the cast.
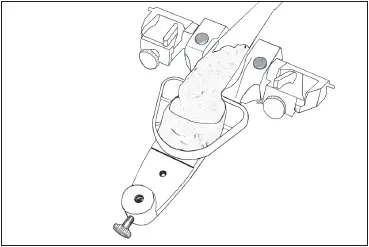
Fig 5-23A small amount of mounting stone is applied to the mounting plate on the upper member.
The bottom of the maxillary cast is indexed, and then the cast is soaked, tooth side up, in a plaster bowl. There should not be enough water to cover the teeth. The cast is carefully seated into the bite fork registration ( Fig 5-20). The upper member of the articulator is placed on the lower portion of the articulator so that the front of the upper frame rests on the transfer assembly support bar ( Fig 5-21). This is done to ensure that the cast does not contact the mounting plate while the upper member is fully seated on the lower member of the articulator. At this time, the amount of mounting stone required to mount the cast to the upper mounting plate is estimated.
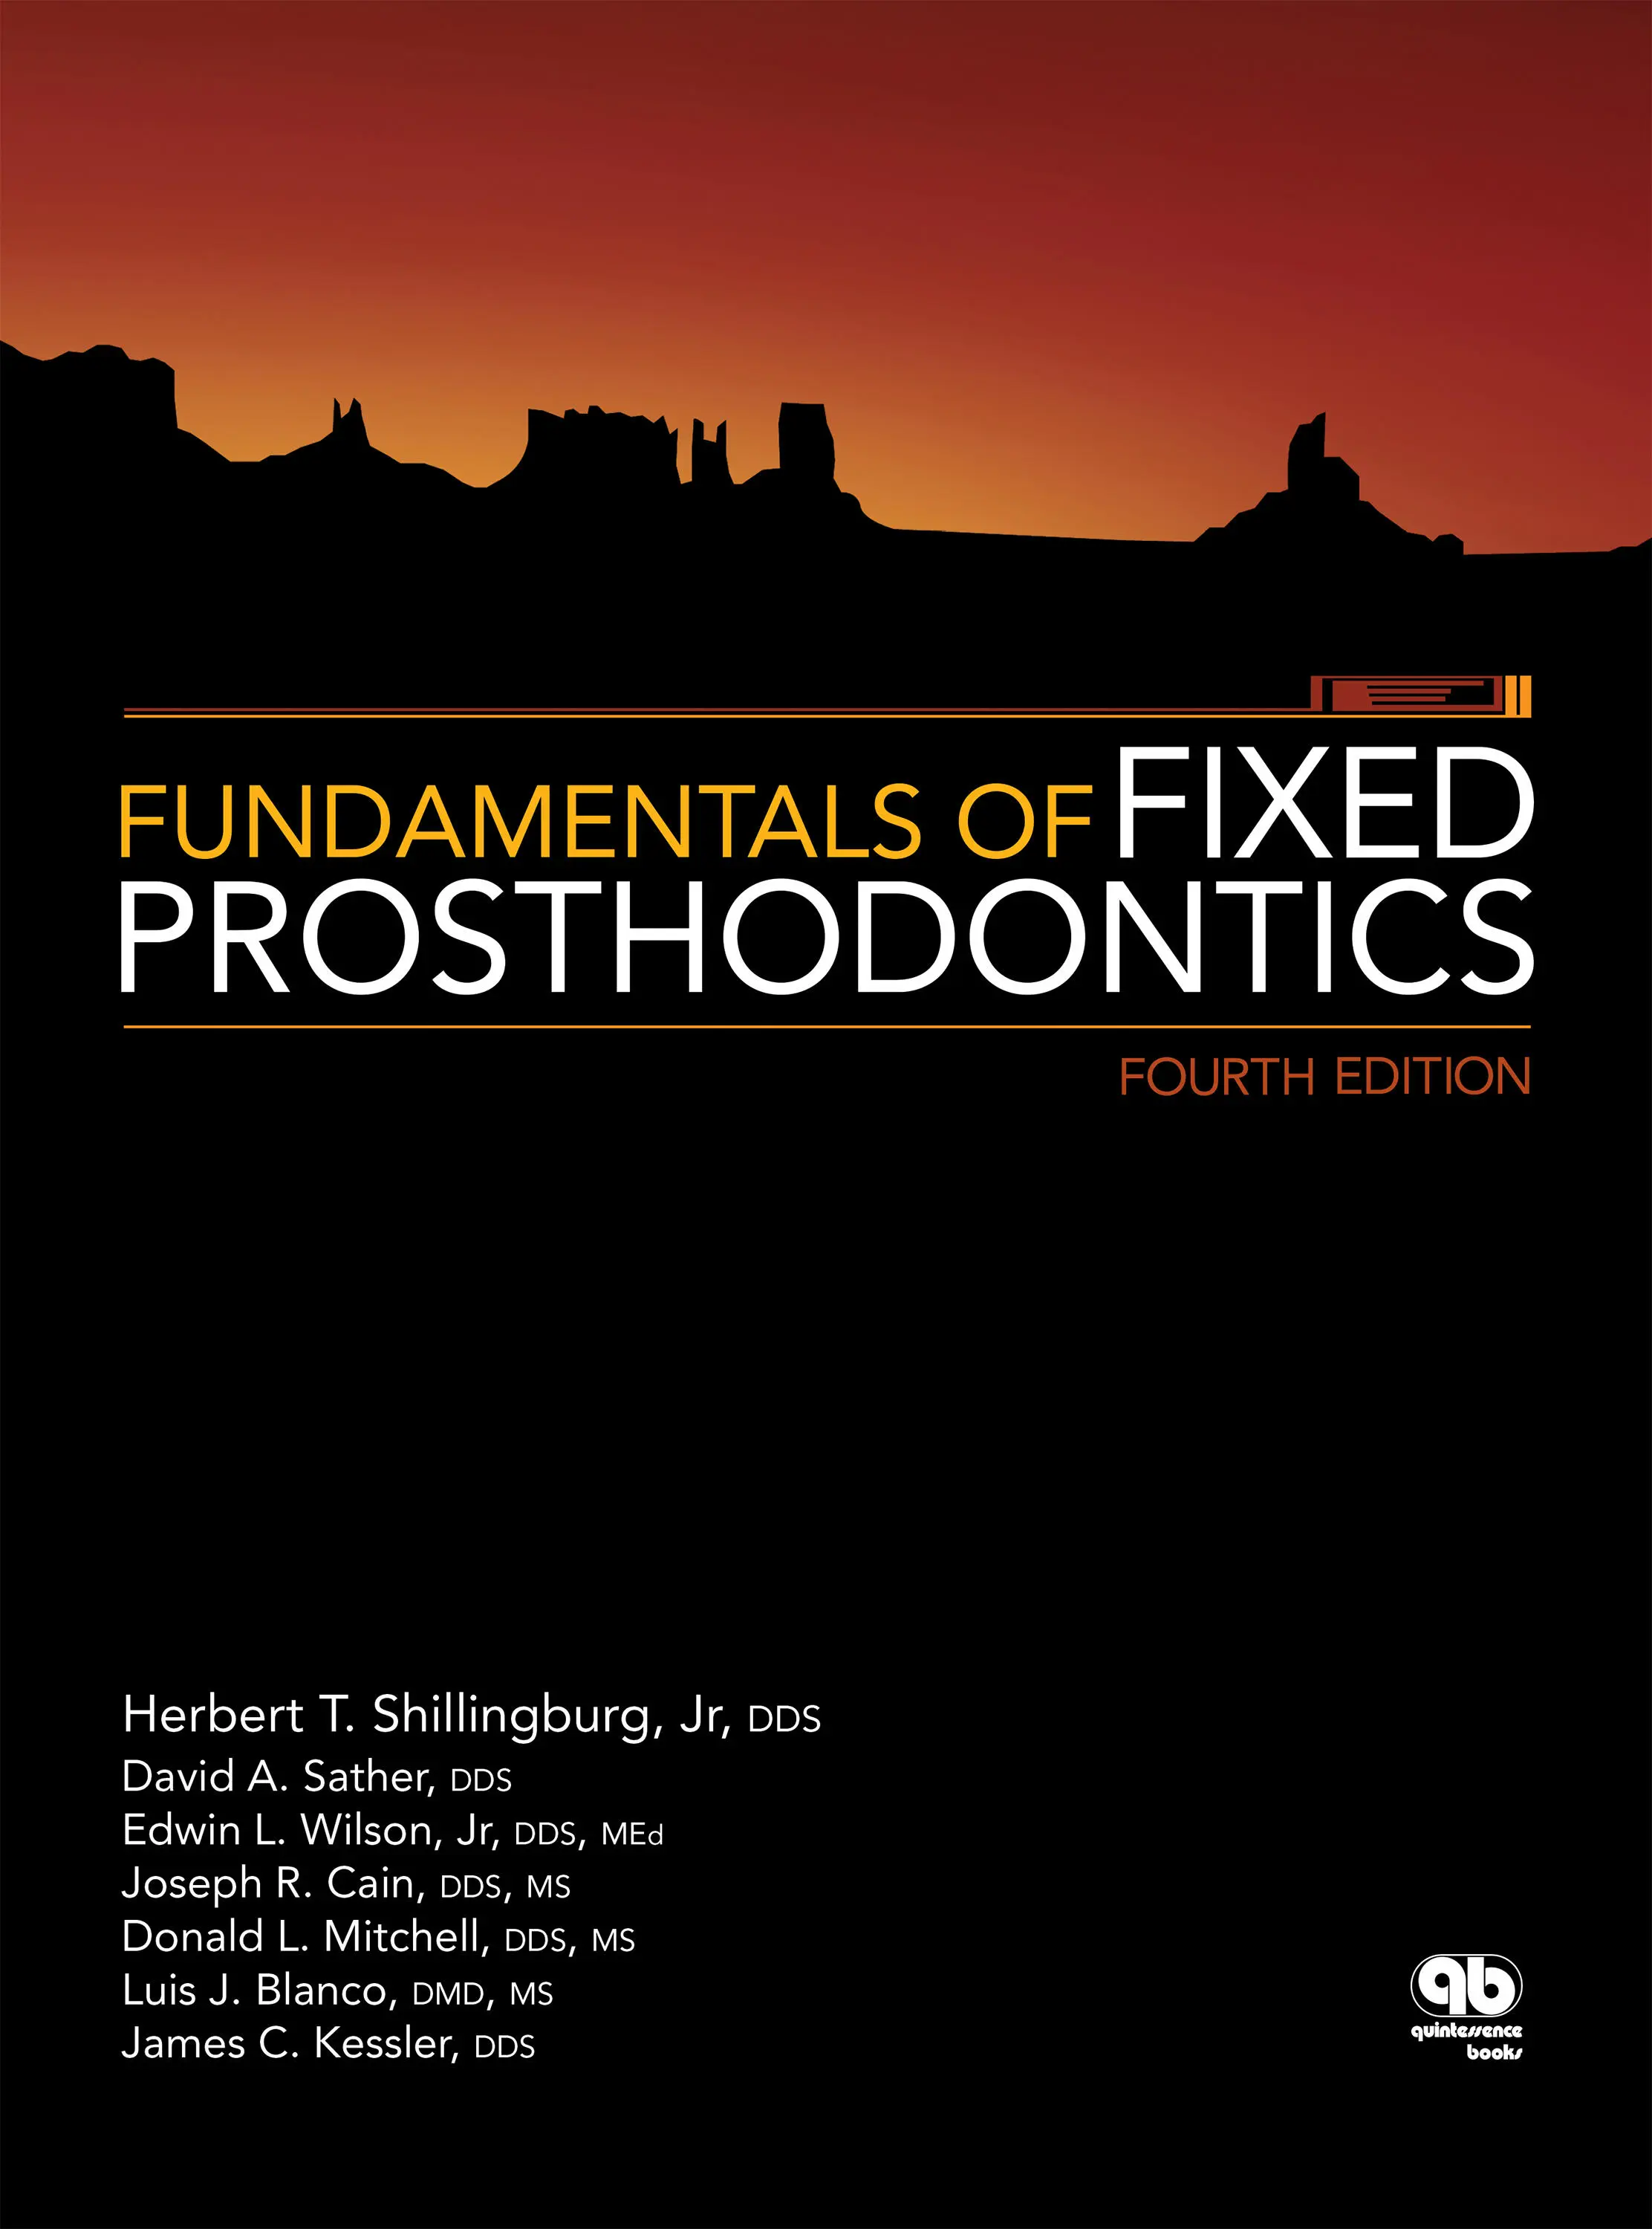
Mounting stone is mixed to a thick, creamy consistency. The upper frame of the articulator is lifted, and a golf ball–sized mound of stone is applied to the base of the cast ( Fig 5-22). A small amount of mounting stone is applied to the mounting plate on the upper member also ( Fig 5-23). Using one hand for support to prevent any movement of the facebow fork or cast, the upper member of the articulator is placed on the condyles, and the anterior portion is lowered until contact is made with the support bar ( Fig 5-24). This will force the mounting plate into the soft mounting stone. The centric latch is engaged to ensure that the condyles are in the correct position and contact the posterior and superior walls of the condylar fossae ( Fig 5-25).
The mounting stone should engage undercuts on the base of the cast and the mounting plate. If necessary, more mounting stone is added into these areas to ensure adequate retention for mounting. When the stone has completely set, the transfer base and transfer assembly are removed from the articulator ( Fig 5-26). Once the mounting of the maxillary cast is completed, the transfer assembly is separated from the bite fork. The transfer assembly is disinfected with a hospital-grade disinfectant and stored until the next use. All registration material is removed from the bite fork, which is then placed in a sealed sterilization bag and submitted for steam sterilization.
Fig 5-24The upper member of the articulator is placed on the condyles (a) and lowered against the support bar (b) .
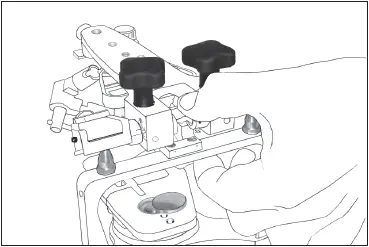
Fig 5-25The centric latch is engaged to lock the upper member of the articulator in the correct position.
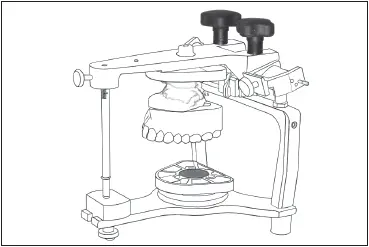
Fit 5-26The maxillary cast has been mounted on the articulator with the transfer base and transfer assembly removed.
Mounting the mandibular cast
The incisal guide pin is replaced in the upper frame of the articulator with the rounded end down and set at a 2-mm opening. (The second mark above the circumferential line of the pin is aligned with the top edge of the bushing.) The centric latch is snapped closed at the rear center of the articulator (see Fig 5-25). The upper frame of the articulator (with maxillary cast attached) is placed upside down on the laboratory bench with the incisal guide pin extending over the front edge of the bench. The centric relation interocclusal record is set on the maxillary cast. The teeth should seat completely into the depressions in the record.
The mandibular cast is now positioned in the interocclusal record, and it is confirmed that the teeth are fully seated. The maxillary and mandibular casts should not contact at any location. The mandibular cast is removed and soaked, tooth side up, in a plaster bowl for approximately 2 minutes. There should not be enough water in the bowl to cover the teeth.
After the cast has soaked, it is reseated into the record. Mounting stone is mixed to the consistency of thick cream, and a golf ball–sized mound of stone is placed on the bottom of the cast. A small portion of stone is applied to the mounting plate on the lower frame, and the lower frame is hinged down into the soft stone until contact is made between the incisal guide pin and the incisal guide block. The mandibular cast is held to steady it in the interocclusal record until the mounting stone has set ( Fig 5-27). The centric latch is rechecked to be sure it has remained closed.
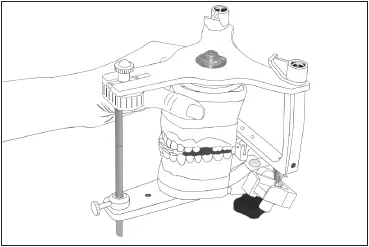
Fig 5-27The mandibular cast is steadied by hand while the mounting stone sets.
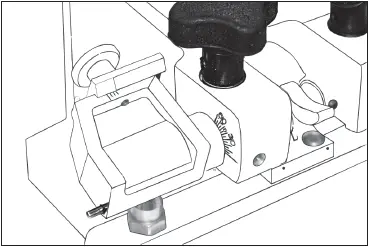
Fig 5-28The condylar inclination is set at 0 degrees.
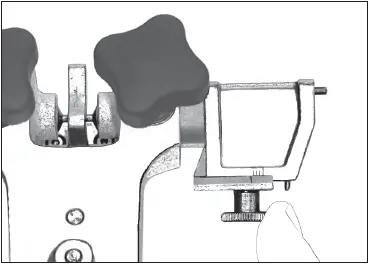
Fig 5-29The lateral translation controls are set at maximum opening.
These features are checked:
Each condylar element should be against the posterior and superior walls of its condylar guide.
The maxillary and mandibular casts should be completely seated in the interocclusal record.
The mounting stone should be engaged in the undercuts on both the base of the cast and on the mounting plate.
The mounting stone is allowed to set completely. Then the mounting accuracy is confirmed by opening the articulator, removing the interocclusal record, and raising the incisal guide pin 2.5 cm (1 inch). A 5-cm (2-inch) strip of no. 10 red-inked silk ribbon is placed between the posterior teeth on both sides, and the teeth are lightly tapped with the condyles retruded. This will leave red dots at centric relation position, as mentioned in chapter 4.
The pieces of 28-gauge green wax are removed from the storage cup and carefully placed over the maxillary cast. If the red dots show through the perforations in the wax, the accuracy of the mounting procedure has been confirmed. If they do not show through, the procedure should be rechecked and the error corrected.
Both casts are removed, with their respective mounting plates, from the articulator. More mounting stone is mixed, and all voids between the casts and mounting plates are filled. The mounting stone is smoothed over using a finger to give it a neat appearance. There must be no stone on the surface of the mounting plate that contacts the articulator frame. The neatness of the casts (or lack thereof) is interpreted by the technician and the patient as an indicator of how much the dentist cares about the work that he or she is doing.
Setting condylar guidance
Интервал:
Закладка:
Похожие книги на «Fundamentals of Fixed Prosthodontics»
Представляем Вашему вниманию похожие книги на «Fundamentals of Fixed Prosthodontics» списком для выбора. Мы отобрали схожую по названию и смыслу литературу в надежде предоставить читателям больше вариантов отыскать новые, интересные, ещё непрочитанные произведения.


Обсуждение, отзывы о книге «Fundamentals of Fixed Prosthodontics» и просто собственные мнения читателей. Оставьте ваши комментарии, напишите, что Вы думаете о произведении, его смысле или главных героях. Укажите что конкретно понравилось, а что нет, и почему Вы так считаете.