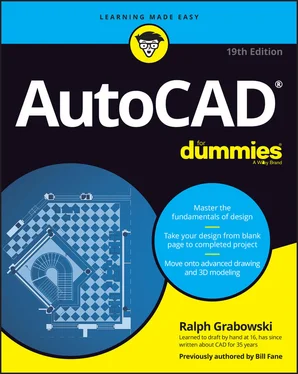
Ralph Grabowski - AutoCAD For Dummies
Здесь есть возможность читать онлайн «Ralph Grabowski - AutoCAD For Dummies» — ознакомительный отрывок электронной книги совершенно бесплатно, а после прочтения отрывка купить полную версию. В некоторых случаях можно слушать аудио, скачать через торрент в формате fb2 и присутствует краткое содержание. Жанр: unrecognised, на английском языке. Описание произведения, (предисловие) а так же отзывы посетителей доступны на портале библиотеки ЛибКат.
- Название:AutoCAD For Dummies
- Автор:
- Жанр:
- Год:неизвестен
- ISBN:нет данных
- Рейтинг книги:5 / 5. Голосов: 1
-
Избранное:Добавить в избранное
- Отзывы:
-
Ваша оценка:
- 100
- 1
- 2
- 3
- 4
- 5
AutoCAD For Dummies: краткое содержание, описание и аннотация
Предлагаем к чтению аннотацию, описание, краткое содержание или предисловие (зависит от того, что написал сам автор книги «AutoCAD For Dummies»). Если вы не нашли необходимую информацию о книге — напишите в комментариях, мы постараемся отыскать её.
AutoCAD For Dummies
AutoCAD For Dummies
AutoCAD For Dummies — читать онлайн ознакомительный отрывок
Ниже представлен текст книги, разбитый по страницам. Система сохранения места последней прочитанной страницы, позволяет с удобством читать онлайн бесплатно книгу «AutoCAD For Dummies», без необходимости каждый раз заново искать на чём Вы остановились. Поставьте закладку, и сможете в любой момент перейти на страницу, на которой закончили чтение.
Интервал:
Закладка:
If you’re an experienced user, you’ll probably be an index-flipper who looks for the missing information needed to complete a specific task. You can probably find the index on your own, but I encourage you to browse through this book anyway, with a highlighter or sticky notes in hand, so that you can find those particularly important places when you need them again.
Whichever route you choose, I hope that you enjoy your time with AutoCAD For Dummies . A-a-and, you’re off!
Part 1
Getting Started with AutoCAD
IN THIS PART …
Find your way around the AutoCAD screen.
Discover the half-dozen commands that will account for much of your AutoCAD activities.
See the big picture: from how to start a drawing to printing it.
Correctly set up AutoCAD and create templates for drawing success.
Navigate through your drawing by panning and zooming.
Chapter 1
Introducing AutoCAD and AutoCAD LT
IN THIS CHAPTER
 Launching AutoCAD
 Creating your first drawing in AutoCAD
 Seeing the complete picture
 Understanding the difference between pixels and vectors
 Comprehending the Cartesian coordinate system
This chapter helps ease you into using AutoCAD to create engineering drawings. Although it’s not uncommon to feel overwhelmed the first time you see AutoCAD, rest assured that you don’t need to learn all the controls that you see in the default environment to be an efficient user of the program.
After a brief introduction to the program, I take you through an exercise to show you just how easy it can be to use AutoCAD. The exercise is followed up with some key concepts that you should understand when using AutoCAD, including how it differs from most other computer applications.
 When you’re starting out with AutoCAD, heed this quote from The Hitchhiker’s Guide to the Galaxy:
Don’t panic!
Launching AutoCAD
The first thing you need to do to start using AutoCAD is to launch the AutoCAD program (well, duh!) and, if necessary, maximize its screen display. AutoCAD has so many tools and palettes that you’ll almost always want to use it in full-screen mode. Follow these steps:
1 Launch AutoCAD.As indicated in the Introduction, I assume that you have a working knowledge of how to use your version of Windows, including how to launch applications. Depending on your version of Windows and how it is set up, you might have to double-click a desktop icon or find a suitable entry in the Start → [All] Programs menu or Start → All Apps menu on the start screen. The wording of the selections varies depending on the version of AutoCAD and Windows.
2 Start a new drawing.Click the rectangular New button towards the upper-left corner of the screen.
3 If necessary, expand AutoCAD to full-screen mode.Click the middle Windows button in the upper-right corner of the application window.
4 If necessary, expand the graphic area (the big, gray area in the middle) to full-screen size.Click the middle button in the upper-right corner, near the compass rosette.
5 Place the cursor in the gray graphics area (midscreen), and then press the Esc key twice to make sure that no commands are active.Now you’re ready to start drawing in AutoCAD, as shown in Figure 1-1.
 Your screen may look a little different from Figure 1-1 depending on your version of AutoCAD and Windows and your screen resolution. Note too that although you'll draw using white on dark gray (refer to Figure 1-1), I drew using black on white (see Figure 1-2), and my menu icons have a white background compared to your gray background. I made the color change so that the figures would be clearer on the printed page.

FIGURE 1-1:Your AutoCAD, ready to draw!

FIGURE 1-2:My AutoCAD, ready to draw!
Drawing in AutoCAD
AutoCAD offers a wide range of commands to create, modify, and annotate 2D and 3D designs. Don’t feel as though you need to learn and master every one of the approximately 1,300 (and counting) commands and options that AutoCAD offers to be a proficient drafter; most veteran drafters probably use only 20 or so commands for most basic drafting tasks.
The following simple exercise introduces a few of the commonly used commands to establish the size of your drawing area as well as the commands for creating straight line segments and circles.
You can start a command by clicking its button on the Ribbon menu, which is across the top of the screen, or by entering the command's name in the command line, which is the light-gray text-entry area at the bottom of the screen that reads Type a command .
In this exercise and others in this book, AutoCAD’s command line entries look like this, and you type the commands and responses shown in bold. Press Enter or the spacebar after each command or response that you type.
 You don’t even have to move the cursor to the command line. As you type, AutoCAD tries to guess which command you want and displays a list of possibilities at the command line, even when the cursor is on the Ribbon menu area. When you see the command you want, simply click it in the list.
 In the following exercise, don’t add spaces on either side of a comma! In most situations, AutoCAD treats pressing the spacebar the same as pressing Enter, which makes keyboard entry fast and easy but messes things up when you do it at the wrong time. In addition, make sure you use a comma as the X,Y separator and the period (.) as the decimal delimiter, and don’t use a thousands separator (,). Some parts of the world use the comma as the decimal separator and the space as the thousands delimiter, either of which confuses AutoCAD to no end.
In this first exercise I ask you to do things without explaining why. Trust me; all will become clear in later chapters:
1 Set up an appropriate size for the drawing: LIMITSReset Model space limits:Specify lower left corner or [ON/OFF] <0.0000,0.0000>: 0,0Specify upper right corner <12.0000,9.0000>: 60,40Now, to be able to see the entire drawing area, type the letters Z A and press Enter. Note that there must be a space between the Z and the A.
Читать дальшеИнтервал:
Закладка:
Похожие книги на «AutoCAD For Dummies»
Представляем Вашему вниманию похожие книги на «AutoCAD For Dummies» списком для выбора. Мы отобрали схожую по названию и смыслу литературу в надежде предоставить читателям больше вариантов отыскать новые, интересные, ещё непрочитанные произведения.
Обсуждение, отзывы о книге «AutoCAD For Dummies» и просто собственные мнения читателей. Оставьте ваши комментарии, напишите, что Вы думаете о произведении, его смысле или главных героях. Укажите что конкретно понравилось, а что нет, и почему Вы так считаете.


