Irena Sailer - Fixed Restorations
Здесь есть возможность читать онлайн «Irena Sailer - Fixed Restorations» — ознакомительный отрывок электронной книги совершенно бесплатно, а после прочтения отрывка купить полную версию. В некоторых случаях можно слушать аудио, скачать через торрент в формате fb2 и присутствует краткое содержание. Жанр: unrecognised, на английском языке. Описание произведения, (предисловие) а так же отзывы посетителей доступны на портале библиотеки ЛибКат.
- Название:Fixed Restorations
- Автор:
- Жанр:
- Год:неизвестен
- ISBN:нет данных
- Рейтинг книги:3 / 5. Голосов: 1
-
Избранное:Добавить в избранное
- Отзывы:
-
Ваша оценка:
Fixed Restorations: краткое содержание, описание и аннотация
Предлагаем к чтению аннотацию, описание, краткое содержание или предисловие (зависит от того, что написал сам автор книги «Fixed Restorations»). Если вы не нашли необходимую информацию о книге — напишите в комментариях, мы постараемся отыскать её.
The book is divided into four parts: basic information regarding materials and production processes, step-by-step clinical procedures with extensive case presentations, long-term outcomes, and management of complications. With over 2000 clinical images and diagrams, backed up with the scientific evidence for recommendations, the best practice for tooth- and implant-supported fixed restorations is clearly described. The vast clinical and technical knowledge and experience of the authors has resulted in a unique textbook that will aid in decision making regarding material selection and procedures for all patients in need of fixed restorations.
Fixed Restorations — читать онлайн ознакомительный отрывок
Ниже представлен текст книги, разбитый по страницам. Система сохранения места последней прочитанной страницы, позволяет с удобством читать онлайн бесплатно книгу «Fixed Restorations», без необходимости каждый раз заново искать на чём Вы остановились. Поставьте закладку, и сможете в любой момент перейти на страницу, на которой закончили чтение.
Интервал:
Закладка:
The chosen blueprints, saved as .STL files, are then exported to a 3D printing machine that will fabricate the restorations (Figs 1-4-4a to c). Nowadays, biocompatible photopolymers are available to produce rigid tooth-colored restorations, approved for a short-term intraoral use as provisional (up to 6 months) (Figs 1-4-4d and e). The ease, speed, and reduced costs derived from this diagnostic workflow in conjunction with the accuracy of the mock-up make the procedure highly efficient and recommendable.
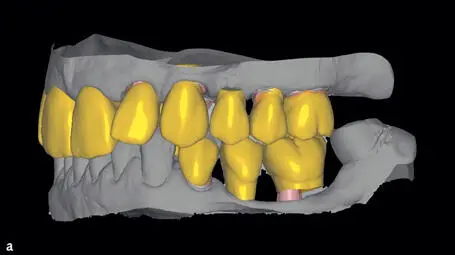
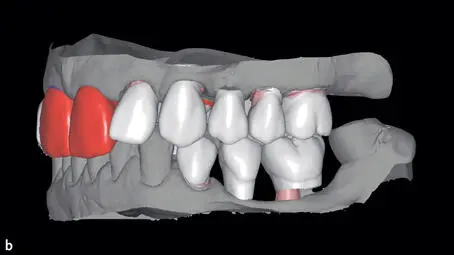
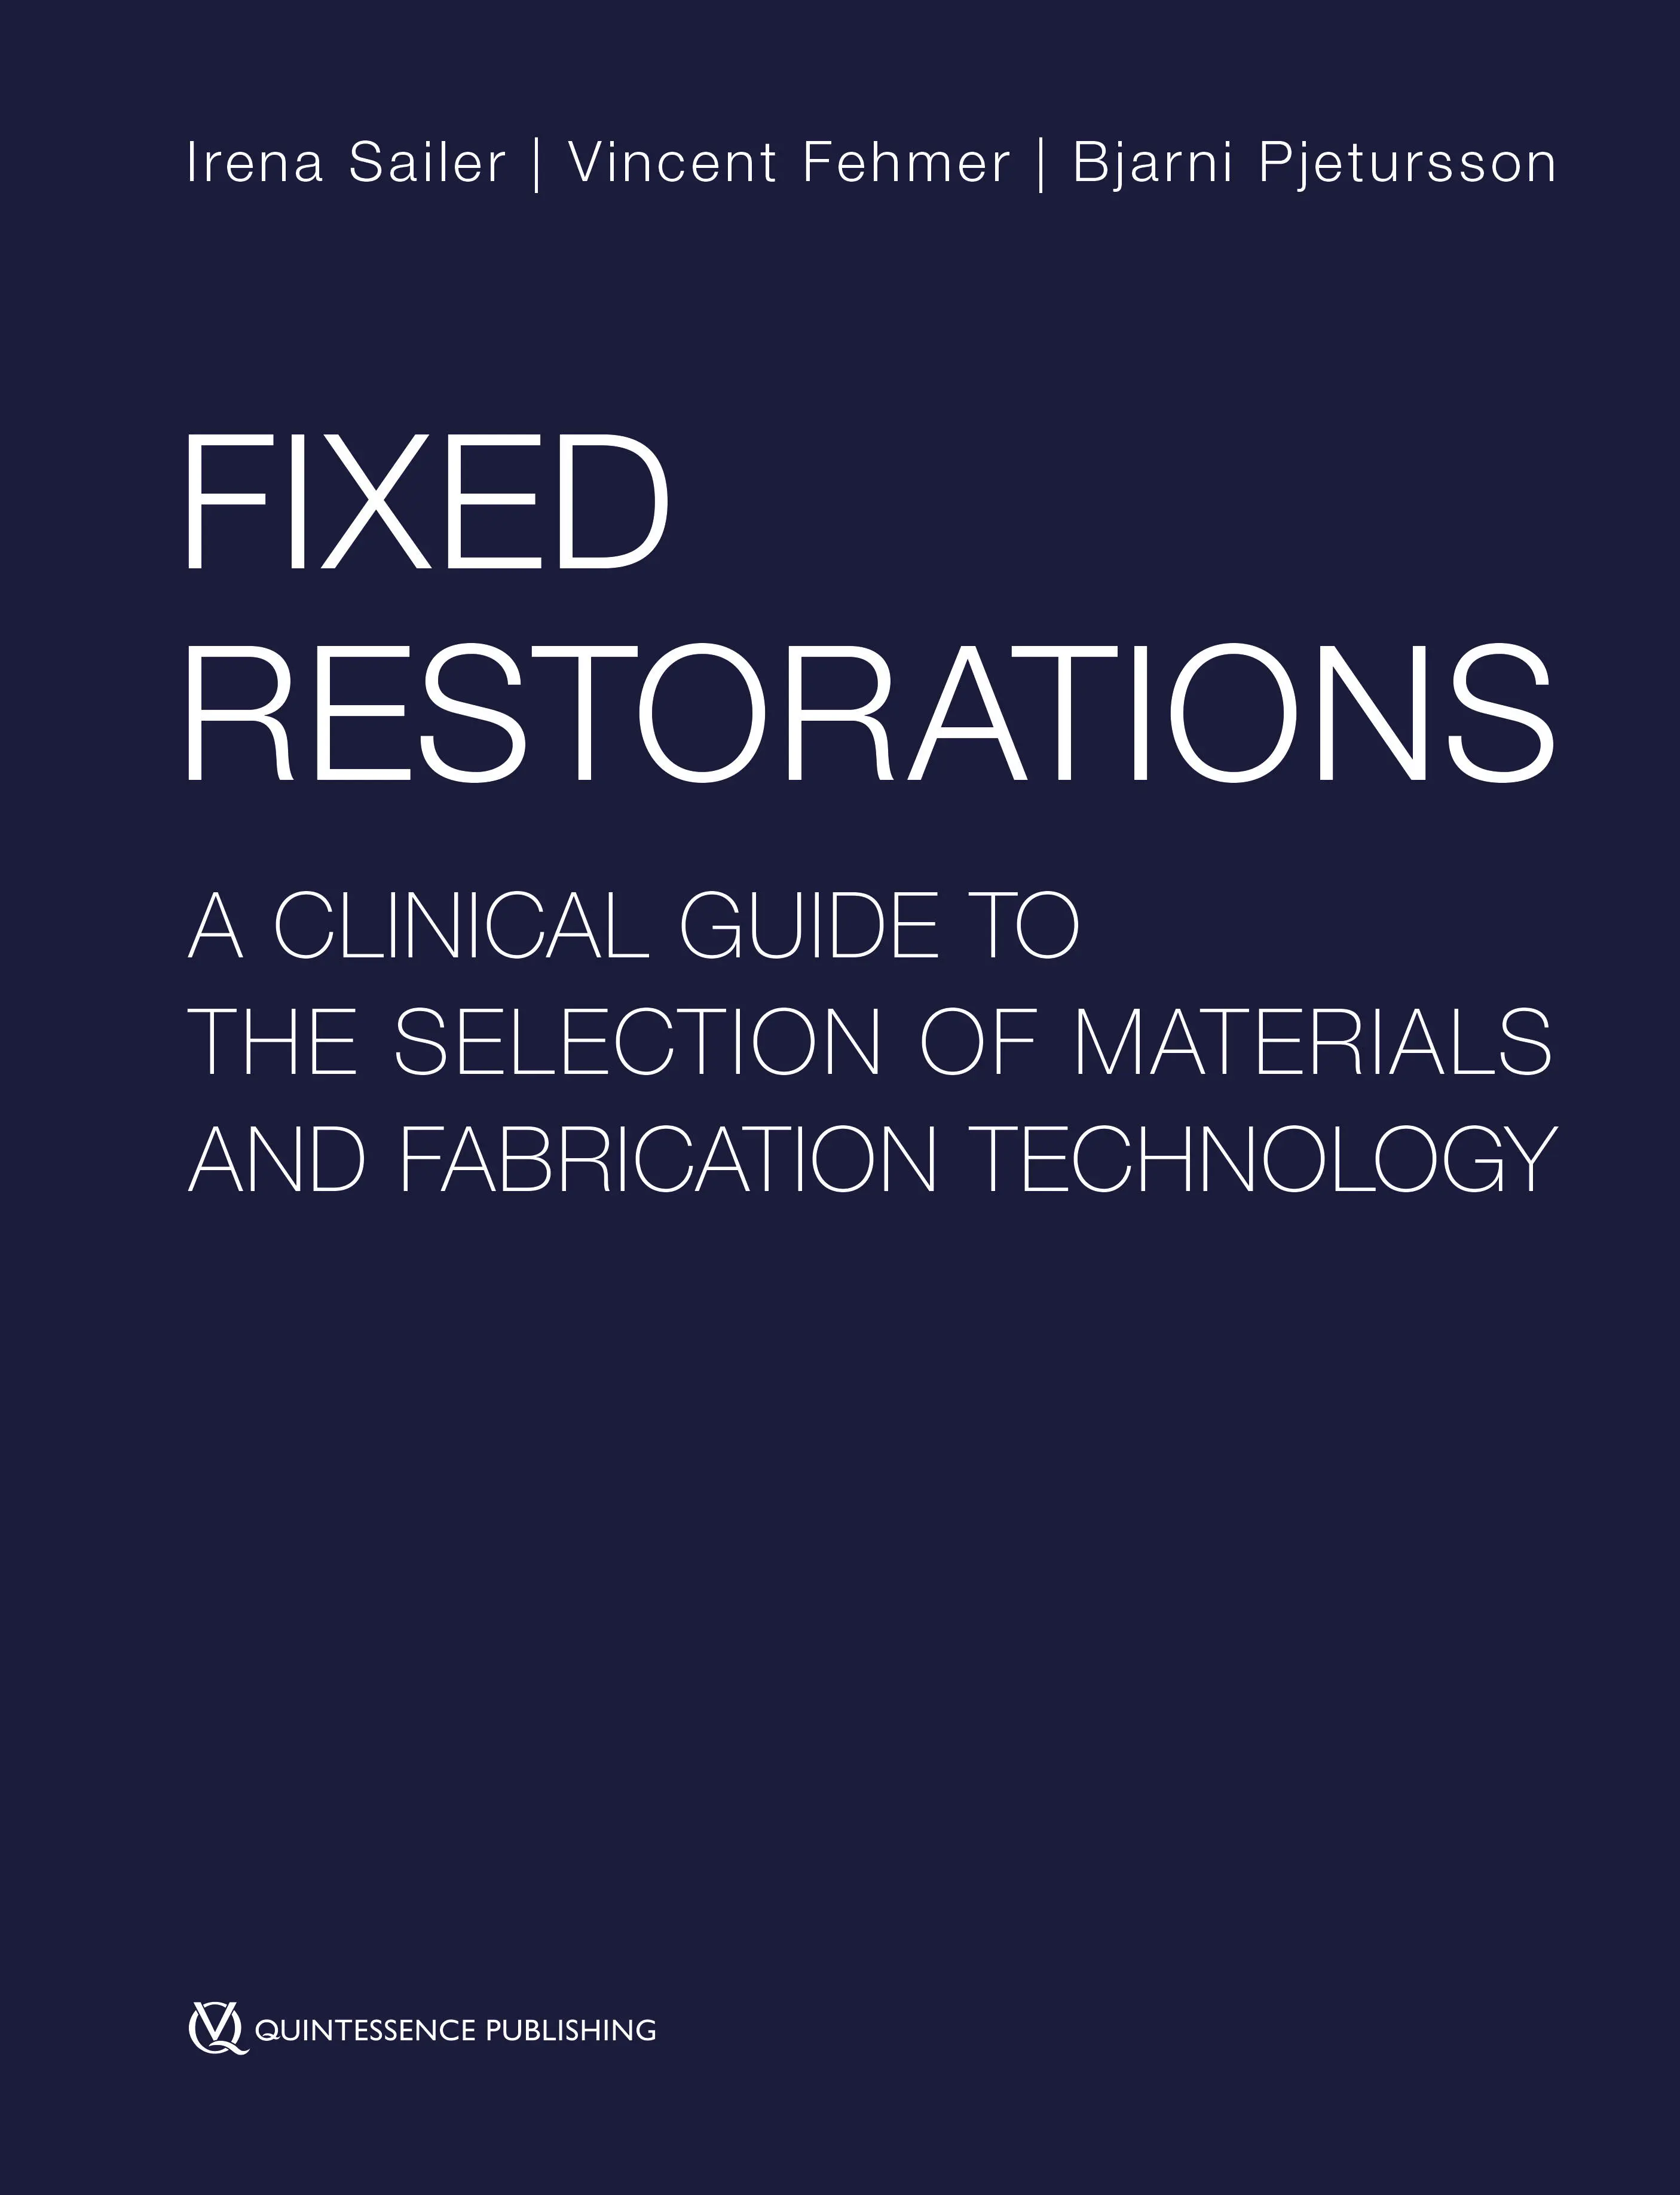
Figs 1-4-4a to 1-4-4c Three different versions of virtual wax-up and setup for the same patient (reproduced from Sancho-Puchades et al 16, with permission).
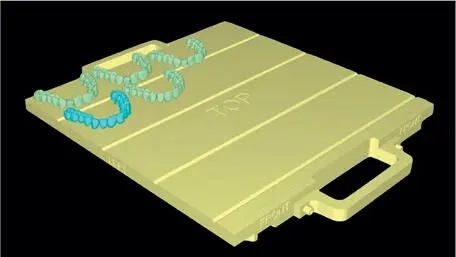
Fig 1-4-4d Different .STL files of the virtual diagnostics of one patient prepared for printing (reproduced from SanchoPuchades et al 16, with permission).
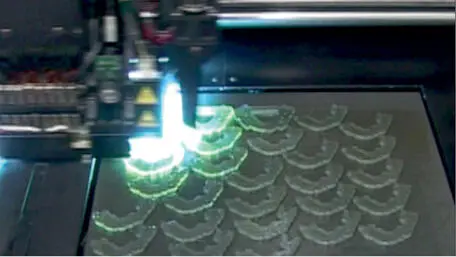
Fig 1-4-4e 3D printing of the mock-ups (reproduced from Sancho-Puchades et al 16, with permission).
The procedures are illustrated step-by-step by means of the following clinical case:
A 52-year-old male patient asked for a comprehensive rehabilitation of his deteriorated dentition (Fig 1-4-5).
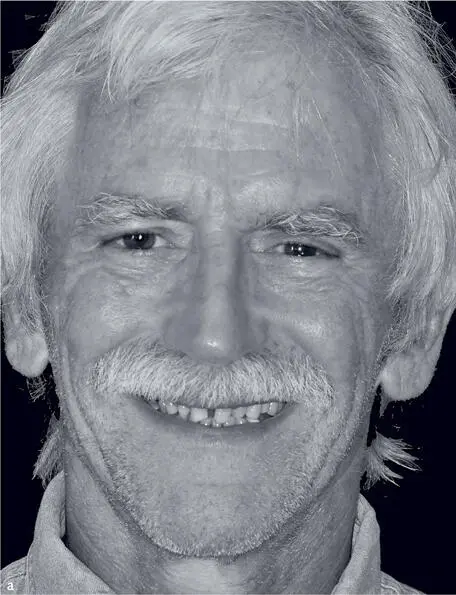
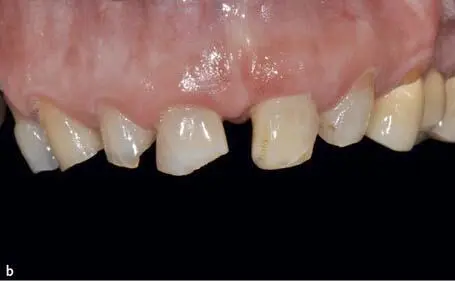
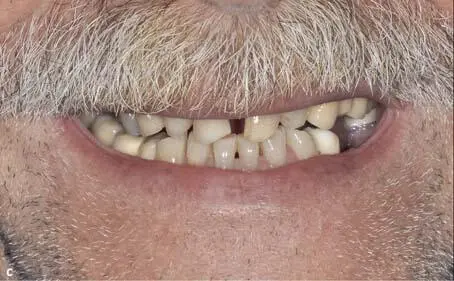
Figs 1-4-5a to 1-4-5c Initial situation of the patient; portrait, smile line, and intraoral frontal views of the dental situation prior to treatment (reproduced from Sancho-Puchades et al 16, with permission).
His main concerns were to recover masticatory function and improve the appearance of his smile. After a thorough anamnesis and examination, the dental pathologies and the esthetic problems were identified. However, the diagnosis of the ideal contour of the prospective restoration needed further investigation. A wax-up was created and was tried-in as a direct mock-up over the patient’s teeth. The first diagnostics were discussed with the patient and the desired modifications were made in the diagnostic wax-up. Based on these corrections, eggshell provisionals were fabricated. With the provisional restorations, the patient’s initial desires were partially fulfilled since he could now comfortably eat again and his speech improved, but the patient was still not fully satisfied with the appearance of his new smile. Therefore, before the framework of the final restoration was designed another diagnostic try-in appointment was scheduled. The conventional master models were optically scanned (IScan D104, Imetric; Courgenay, Switzerland), and utilizing a virtual design software (Exocad, Exocad; Germany), three versions of the possible maxillary restorations were developed. The three versions were then printed in A3-colored resin (PolyJet MED610, Stratasys; Eden Prarie, MN, USA) using a 3D printer (Objet Eden 260V, Stratasys) (Fig 1-4-6a).
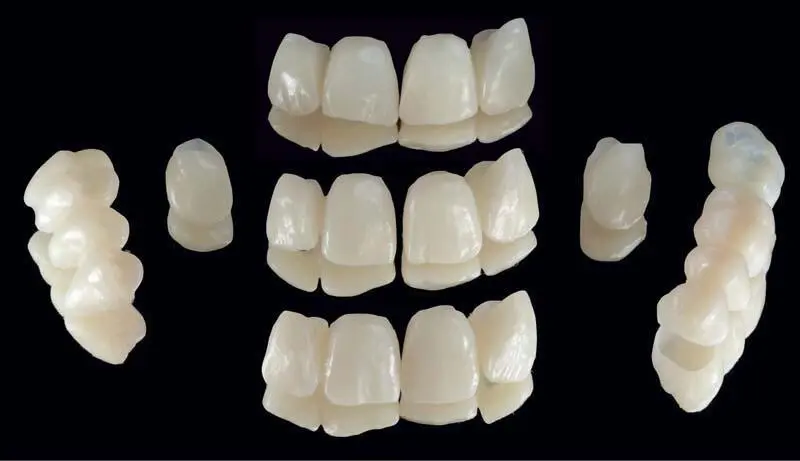
Fig 1-4-6a Different versions of the printed diagnostic mock-ups for this patient (reproduced from Sancho-Puchades et al 16, with permission).
The digitally generated mock-ups were tried-in and critically evaluated by the patient and restorative team (Figs 1-4-6b to k).
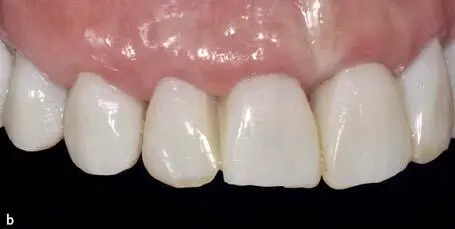
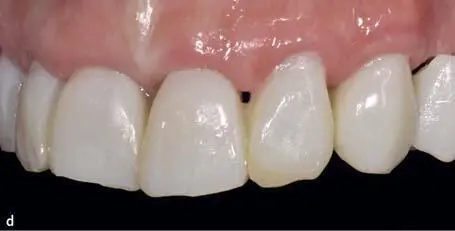
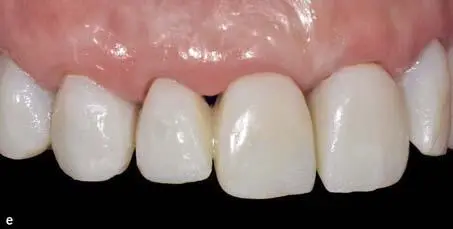
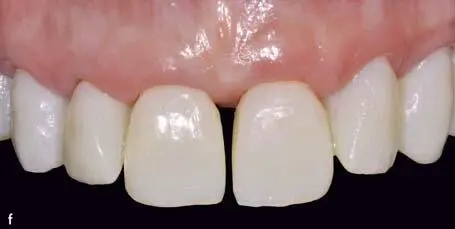
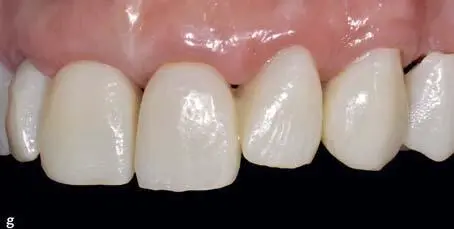
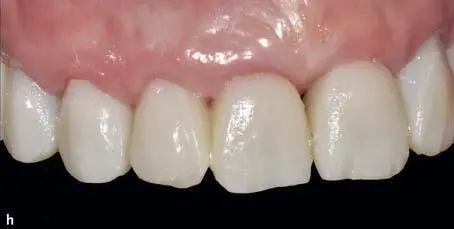
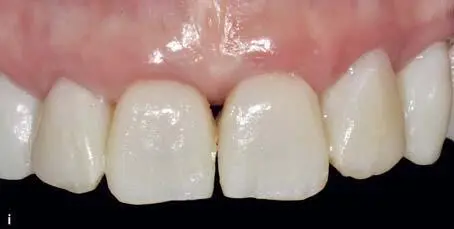
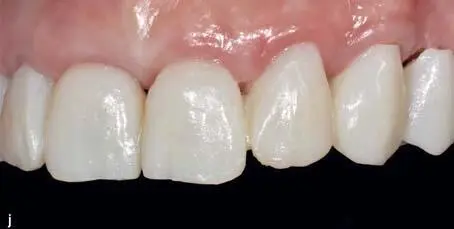
Figs 1-4-6b to 1-4-6j Try-in of the different printed mock-ups (reproduced from Sancho-Puchades et al 16, with permission).
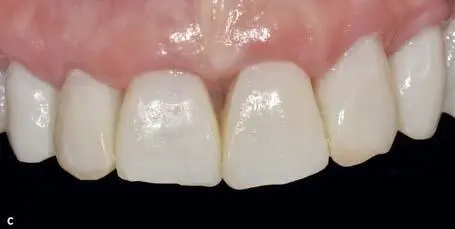
It was agreed that the version with no diastema and converging incisal borders fit the best to the patient’s smile and face (Fig 1-4-7). This version was taken as a reference for the final restoration production.
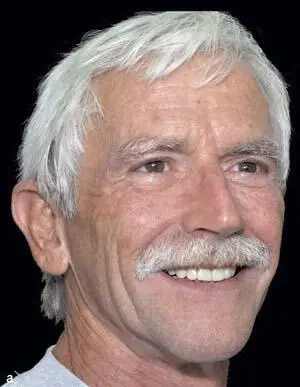
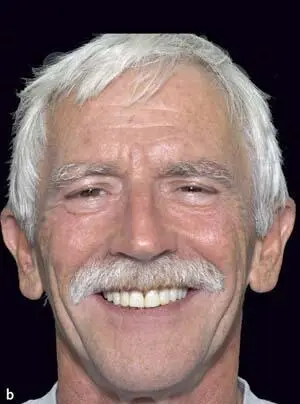

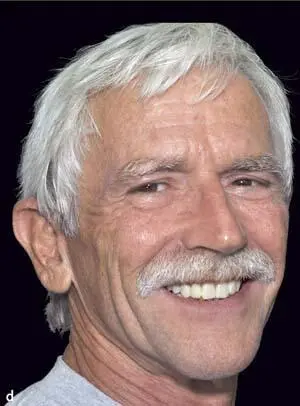
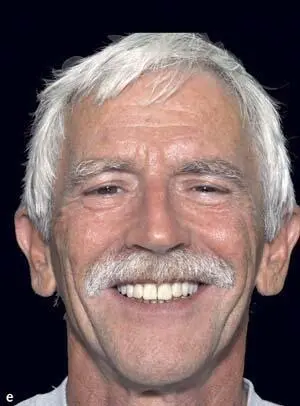
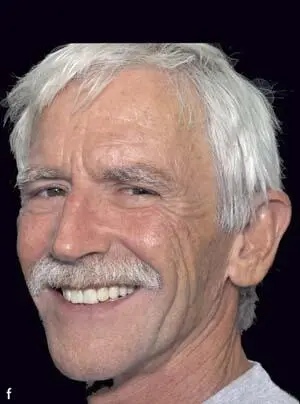
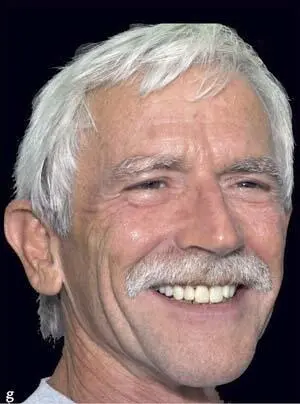
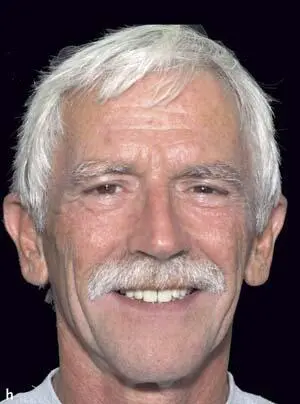
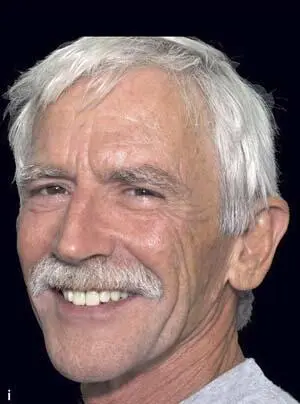
Figs 1-4-7a to 1-4-7i Portraits with the different diagnostic mock-ups (reproduced from Sancho-Puchades et al 16, with permission).
Читать дальшеИнтервал:
Закладка:
Похожие книги на «Fixed Restorations»
Представляем Вашему вниманию похожие книги на «Fixed Restorations» списком для выбора. Мы отобрали схожую по названию и смыслу литературу в надежде предоставить читателям больше вариантов отыскать новые, интересные, ещё непрочитанные произведения.


Обсуждение, отзывы о книге «Fixed Restorations» и просто собственные мнения читателей. Оставьте ваши комментарии, напишите, что Вы думаете о произведении, его смысле или главных героях. Укажите что конкретно понравилось, а что нет, и почему Вы так считаете.