Bruce Barnbaum - The Art of Photography - An Approach to Personal Expression
Здесь есть возможность читать онлайн «Bruce Barnbaum - The Art of Photography - An Approach to Personal Expression» весь текст электронной книги совершенно бесплатно (целиком полную версию без сокращений). В некоторых случаях можно слушать аудио, скачать через торрент в формате fb2 и присутствует краткое содержание. Жанр: Старинная литература, на английском языке. Описание произведения, (предисловие) а так же отзывы посетителей доступны на портале библиотеки ЛибКат.
- Название:The Art of Photography: An Approach to Personal Expression
- Автор:
- Жанр:
- Год:неизвестен
- ISBN:нет данных
- Рейтинг книги:5 / 5. Голосов: 1
-
Избранное:Добавить в избранное
- Отзывы:
-
Ваша оценка:
- 100
- 1
- 2
- 3
- 4
- 5
The Art of Photography: An Approach to Personal Expression: краткое содержание, описание и аннотация
Предлагаем к чтению аннотацию, описание, краткое содержание или предисловие (зависит от того, что написал сам автор книги «The Art of Photography: An Approach to Personal Expression»). Если вы не нашли необходимую информацию о книге — напишите в комментариях, мы постараемся отыскать её.
The Art of Photography: An Approach to Personal Expression — читать онлайн бесплатно полную книгу (весь текст) целиком
Ниже представлен текст книги, разбитый по страницам. Система сохранения места последней прочитанной страницы, позволяет с удобством читать онлайн бесплатно книгу «The Art of Photography: An Approach to Personal Expression», без необходимости каждый раз заново искать на чём Вы остановились. Поставьте закладку, и сможете в любой момент перейти на страницу, на которой закончили чтение.
Интервал:
Закладка:
Looking at Figure 9-3, if you choose any length of development time along the X-axis, then rise vertically along that time line, you will see how dense each exposed zone becomes during development. At 6½ minutes (normal development time on this graph), each exposed zone reaches its proper density. Below 6½ minutes, each exposed zone is proportionately below its normal density; above 6½ minutes, each zone is proportionately above its normal density (except Zone 1, which reaches its density quickly and stays there).
The initial jog in the curves prior to density build-up reflects the fact that the emulsion absorbs the developer before density begins to increase. This is the same phenomenon you see during printing, when the paper is placed in the developer and 10–15 seconds elapse before the image begins to appear. The process is somewhat slower for a negative, taking 15–20 seconds (maybe more) for density to manifest.
Putting Higher Zones to Work
Understanding negative development is very important, not only because it shows how contrast can be increased or decreased, but also because it indicates how to use the zones above Zone 9. As explained in Chapter 8, in a normally developed straight print made on average contrast paper, all zones above Zone 9 print as blank white (Chapter 8). For this reason, most photographers feel that the range of a negative is limited to Zones 0 through 9. Not true. Figure 9-3 tells you that an object can be exposed in a higher zone and that reduced development can bring it back within printable range. Furthermore, if two objects are metered to be very far apart tonally—say, eight zones—they can be exposed at Zones 4 and 12 respectively; then they can be given greatly reduced development time, so that the darker object is developed to Zone 3 while the lighter object is reduced below Zone 9.
In Chapter 10 we will see how areas developed above Zone 9 can still be printed. This will further increase your use of the higher zones and greatly expand your creative potential. In this manner, you can use the full range of the negative rather than limiting yourself to the lower half.
There are two points I wish to stress here. First, enlarging papers possess a much shorter range of tonalities than negative materials. So, while a negative is capable of recording scenes of excessive contrast within its extended range, its scale may need to be compressed to fit on the shorter tonal scale of the enlarging paper. Second, while the long tonal scale of the negative is fully usable during exposure, it is not wise to develop negatives to high densities (i.e., Zones 11 and up) because those densities require excessively long exposures under the enlarger to yield tonalities. Therefore, if you encounter a scene of excessive contrast and choose to expose the brightest areas well above Zone 9 (a perfectly good approach), be sure to use less-than-normal development times in order to avoid excessive densities. Good separations will still be maintained in your negative and in the print.
During exposure, the spread of zones between two objects never changes, but it can be altered during negative development. If two objects are metered to be 5 zones apart (i.e., 5 stops), they will always be 5 zones apart when exposed, unless they are altered by filtration or by reciprocity failure (explained below). Depending on the exposure you make, they can be placed at Zones 2 and 7, 3 and 8, 4 and 9, 5 and 10, etc., but they’re always five zones apart. The 5 zones of separation can be maintained by normal development; or, they can be brought closer together by developing the negative less than normal, known as “minus development”; or, they can be separated further by developing the negative longer than normal, known as “plus development”.
Of the two ways that contrast can be altered during exposure —filtration or reciprocity failure—filtration is better known. Suppose two objects meter three zones apart, and the darker object is red while the lighter one is green. A red filter will lighten the red object with respect to the green one and therefore reduce the contrast between them at exposure. A green filter will darken the red object with respect to the green one and expand the contrast between them at exposure. Filtration must be taken into account when exposing and developing the negative.
Reciprocity Failure
Reciprocity denotes the way film responds to light within the standard range of exposures, from one second down to  second. Within that range of exposure times, the negative maintains a reciprocal relationship between light level and exposure; if you cut the amount of light in half, you can double the exposure time to maintain the same overall image. (It’s a reciprocal relationship because it means that 2 × ½ = 1.) Thus, if your exposure is
  second and you close the aperture from f/8 to f/11, increasing the shutter speed to
  second will maintain the same overall exposure and image. Or, if your exposure is
  second and the light level drops in half, expanding the shutter speed to
  second will also maintain the same overall image.
For times beyond one second (encountered under dim light conditions), this reciprocal relationship breaks down, leading to reciprocity failure. If, for example, you calculate your exposure to be five seconds at f/8, but you need greater depth-of-field and close the aperture to f/11, a 10-second exposure will not give you the same overall image. It turns out that you may need to keep the shutter open 15 seconds or more to gain the same overall exposure. The reason is that beyond one second, film becomes progressively less efficient in its ability to gather light.
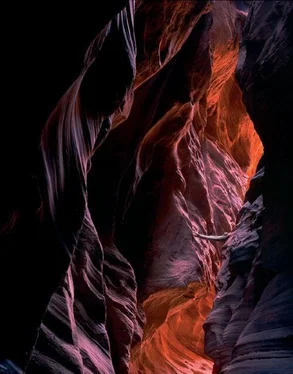
During a long exposure, light reflected off brighter objects is accepted by the film somewhat more efficiently than light from dimmer objects. Therefore, overall contrast increases progressively during a long exposure as the exposure time increases. My experiences in the English cathedrals (where exposure times generally ranged between 3 and 20 minutes), and in the Arizona/Utah canyons (where some exposures exceeded an hour in length, and one was fully 3½ hours) show that the contrast increase due to lengthy exposures can be substantial. Development must be altered by an appropriate amount in order to maintain the desired contrast.
Each of the sections in the tables below is labeled to indicate an approximate range of how much increase in contrast occurs as the result of a long exposure. Thus, when the increase is equivalent to an N+1 development, a development of N–1 is required to counteract it and yield overall normal development (see Time/Temperature Development Charts in Figure 9-6 through Table 9-6).
Increased contrast due to reciprocity failure is a double-edged sword. If you want greater contrast in a scene, you get it automatically with longer exposures. You can force the situation in bright, flat light by using strong, neutral density filters to force long exposures that increase contrast. Furthermore, when you increase contrast via long exposures, it does not increase the film’s grain—whereas if you increase contrast via long development times, grain increases.
While reciprocity failure can be beneficial, my experience is generally that increased contrast from reciprocity failure most often occurs when overall light levels are dim. In most such situations, the contrast is already quite high. In both the English cathedrals and the slit canyons, reciprocity failure saddled me with undesirable additional contrast in situations that were already excessively contrasty. (All films vary in their reciprocity failure characteristics; some, like Fuji Acros, have none up to two minutes of exposure.)
Читать дальшеИнтервал:
Закладка:
Похожие книги на «The Art of Photography: An Approach to Personal Expression»
Представляем Вашему вниманию похожие книги на «The Art of Photography: An Approach to Personal Expression» списком для выбора. Мы отобрали схожую по названию и смыслу литературу в надежде предоставить читателям больше вариантов отыскать новые, интересные, ещё непрочитанные произведения.
Обсуждение, отзывы о книге «The Art of Photography: An Approach to Personal Expression» и просто собственные мнения читателей. Оставьте ваши комментарии, напишите, что Вы думаете о произведении, его смысле или главных героях. Укажите что конкретно понравилось, а что нет, и почему Вы так считаете.


