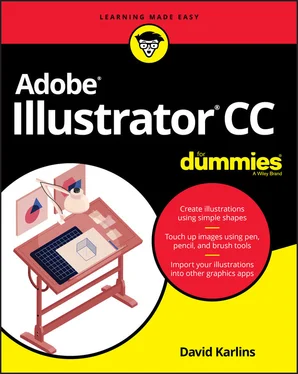
David Karlins - Adobe Illustrator CC For Dummies
Здесь есть возможность читать онлайн «David Karlins - Adobe Illustrator CC For Dummies» — ознакомительный отрывок электронной книги совершенно бесплатно, а после прочтения отрывка купить полную версию. В некоторых случаях можно слушать аудио, скачать через торрент в формате fb2 и присутствует краткое содержание. Жанр: unrecognised, на английском языке. Описание произведения, (предисловие) а так же отзывы посетителей доступны на портале библиотеки ЛибКат.
- Название:Adobe Illustrator CC For Dummies
- Автор:
- Жанр:
- Год:неизвестен
- ISBN:нет данных
- Рейтинг книги:5 / 5. Голосов: 1
-
Избранное:Добавить в избранное
- Отзывы:
-
Ваша оценка:
- 100
- 1
- 2
- 3
- 4
- 5
Adobe Illustrator CC For Dummies: краткое содержание, описание и аннотация
Предлагаем к чтению аннотацию, описание, краткое содержание или предисловие (зависит от того, что написал сам автор книги «Adobe Illustrator CC For Dummies»). Если вы не нашли необходимую информацию о книге — напишите в комментариях, мы постараемся отыскать её.
offers the guidance you need to turn your ideas into real drawings.
Written by an Illustrator trainer and expert, this book walks those new to the tool through the basics of drawing, editing, and applying the unique tools found in this popular program.
Create illustrations using simple shapes Touch up images using pen, pencil, and brush tools Import your illustrations into other graphic apps Apply special effects and add type This book is essential reading for new and beginning illustrators who are either adopting a digital tool for the first time, switching from an existing tool to Illustrator, or adding Illustrator know-how to existing Adobe knowledge.
Adobe Illustrator CC For Dummies — читать онлайн ознакомительный отрывок
Ниже представлен текст книги, разбитый по страницам. Система сохранения места последней прочитанной страницы, позволяет с удобством читать онлайн бесплатно книгу «Adobe Illustrator CC For Dummies», без необходимости каждый раз заново искать на чём Вы остановились. Поставьте закладку, и сможете в любой момент перейти на страницу, на которой закончили чтение.
Интервал:
Закладка:
3 Part 1: Creating, Navigating, and Saving Projects Part 1
Chapter 1: Navigating Illustrator’s Interface Chapter 1
Surveying the Illustrator Universe Surveying the Illustrator Universe In the bulk of this book, I focus on documenting how to get things done: for example, how to create, save and print illustrations ( Chapter 2 ); how to draw lines and shapes ( Chapter 4 ); and how to select and assign color ( Chapter 11 ). The book is non-linear, so you’re invited to jump to just what you need. If you’re like me, you want to find out how to solve a problem, not understand how something works — at least at first. Other people, with more orderly minds I suspect, like to immerse themselves in the how before they get to the what. If you have started with this chapter, you might be just entering into the Illustrator universe with a rational impulse to find out how to navigate your way around an interface that includes over 80 tools, hundreds of menu options, and at least two distinct but significantly overlapping options for accessing the most commonly used features: the Control panel and the Properties panel. These two panels provide similar sets of options, and which panel you use is really a matter of which one you find more comfortable to work with. My mission in this opening chapter is not to present encyclopedic documentation of everything in the byzantine Illustrator interface. Instead, I provide a basic guide to where to find what, along with a curated documentation of features you will almost certainly need.
Launching Illustrator Launching Illustrator Although people use Illustrator in different ways, a large section of designs travel through a few workflows. When you launch Illustrator, the opening home screen provides access to these frequently traveled express lanes to get you on your way: Learn tab: The Learn tab, shown in Figure 1-1, provides access to a set of helpful video tutorials. You can watch them in sequence as a continuous learning experience, or choose a topic to help you solve a pressing challenge. FIGURE 1-1: Illustrator tutorials accessible from the home screen. Start a New File Fast section: Because there are a number of frequently traveled pathways to creating files, the options in the Start a New File Fast section of the home screen allow easy access to basic settings for print and screen projects. These are not templates; they are packaged sets of properties such as units of measurements (points, pixels, inches, and more) and color modes (such as RGB or CMYK). Choosing one of these options can jump-start a project. I zoom in on these options in Chapter 2 . Open button: When you want to open an existing file, Illustrator kindly presents you with a set of template thumbnails — types of projects, such as a letterhead, a poster, a website, or an app prototype. If you can't find the file in the thumbnails, use the Sort and Filter options, shown in Figure 1-2, to search for the file. FIGURE 1-2: Choosing from recently opened files.
Using and Customizing Toolbars Using and Customizing Toolbars After you open or create a document, Illustrator’s toolbar is the single most essential element in creating illustrations. Illustrator provides two toolbars, Basic and Advanced. The Basic toolbar is highly customizable. The Basic toolbar, which is displayed by default when Illustrator is launched, includes a curated set of frequently used tools. The Basic toolbar is highly customizable. To add tools to the Basic toolbar, click the ellipses (edit toolbar)) icon at the bottom of the Basic toolbar. The tools drawer appears. You can display or hide tools using the four Show options at the bottom of the tools drawer. Or you can drag any tool into the Basic toolbar, as shown in Figure 1-3. FIGURE 1-3: Adding the Magic Wand to the Basic toolbar. The Advanced toolbar includes every tool available in Illustrator. You can toggle from the Basic to the Advanced toolbar by choosing Windows ⇒ Toolbars ⇒ Advanced. You can’t change the tools that appear there.
Accessing and Arranging Panels Accessing and Arranging Panels You use features in panels to tweak, tune, touch up, and transform artwork. Every chapter in this book, and every substantial Illustrator project, involves using features available through panels. But here I want to focus on a couple features of panels above and beyond how any specific panel works. You can also quickly set up a work environment for typical workflows such as print, web, or typography by choosing Window ⇒ Workspace and then selecting a type of project from the submenu. I’m choosing the Essentials workspace in Figure 1-4. FIGURE 1-4: Using a workspace to populate the screen with selected sets of panels. An Illustrator workspace is defined by which panels are displayed. You can configure your own workspace by adding and arranging panels, or you can use one of the presets. The contradiction is that the more panels you display, the more features you have quick access to but the less space you have to draw something! So, if you find your workspace cluttered with too many panels, you have a few options: Temporarily hide all panels by tapping the Tab key. A second tap restores the panels. Clear the workspace of extraneous panels and revert to a minimalist workspace with just the Basic toolbar by choosing Window ⇒ Workspace ⇒ Essentials. Dock one panel by dragging it by its tab to another panel. (You can dock it in the top or bottom of a panel or group it in the panel.) In Figure 1-5, I’m dragging the Color Guide panel to the bottom of the Color panel. The image on the right shows the docked Color Guide panel. FIGURE 1-5: Docking a panel. Group panels by dragging the tab of one panel into the title bar of another panel. In Figure 1-6, I grouped the Color and Color Guide panels. FIGURE 1-6: Grouped panels. Collapse panels (including groups of panels) into icons by clicking the << (double arrows) in the upper-right of the panel or panel group. Panels are your friend. But like any friend, they can become a bit too much at times. So when you find your workspace overwhelmed by panels, use any of the tips just listed to reduce clutter and free up space for designing!
Using the Control Panel or the Properties Panel Using the Control Panel or the Properties Panel The two most robust panels in Illustrator are the Control panel and the Properties panel. Both panels have many features that overlap. And both panels are context-sensitive, meaning the options they display depend on what you're doing and what objects you select. For example, in Figure 1-7, I selected a box of type (the word Control ). Both the Control panel (at the top of the screen) and the Properties panel (on the right) provide access to fill and stroke color, character and paragraph style options, font, font size, and opacity. FIGURE 1-7: Option for styling type in the Control and Properties panels. The differences, essentially, are that the Properties panel has more options for selected objects and the Control panel takes up less space.
Chapter 2: Creating, Saving, Exporting, and Printing Files Chapter 2
Creating Documents Creating Documents The first step in doing anything in Illustrator is to create a document. But right away you are confronted with important initial choices. Why? Essentially because Illustrator graphics can take two pathways: print and screen. The way colors are defined and objects are measured varies greatly between these two paths. Am I saying that when you conceive of a project you need to know whether or not the output is aimed at print output or screen output or both? Basically, yes. Although you can change horses in the middle of the stream, you might create unnecessary complications in sizing and coloring objects. It's best to anticipate the output and — to repeat my mantra — work backward from there.
Deploying Artboards Deploying Artboards As I briefly noted, the canvas is the area of the Illustrator workspace where you create graphics. The canvas is basically everything you see on the screen except the interface (such as the menu, Control panel, and other panels). I walk through the non-canvas sections of the workspace in Chapter 1 . Within the canvas, artboards are discrete, sized spaces that make it easy to export, share, or print sections of the canvas. That’s a lot of workflow help! Here’s how I like to think about artboards: They are both coherent and discrete. Too philosophical? Okay, here’s the point: Artboards inherit and share many properties of the document they lie within, such as color mode or raster effect resolution. (I explain these options earlier in the chapter in the “ Defining color mode, artboard size, and raster resolution ” section.) And that’s nice because it means you can work on different graphics, including differently sized graphics, with shared properties. For example, you might have a project where you design a print poster, palm card, and plastic banner for an event. Although these will be different in size, they will likely use the same set of colors and maybe other features such as symbols (which I explain in Chapter 10 ). Or you might use multiple artboards of the same size to prepare a prototype of a mobile app that shows different states of user interaction. Here, dozens of artboards might be helpful. Again, this project has common document properties that apply to all artboards, such as RGB color and pixels as the unit of measurement. To help you get your money’s worth out of artboards, I first review some basic rules for creating and using them. Then I walk you through the two scenarios I just identified — print project and app prototype — to help you understand the efficacy of artboards and to expose you to key techniques for deploying artboards.
Exporting, Saving, and Printing Exporting, Saving, and Printing You can export, save, and print several kinds of objects in Illustrator: An entire document One, some, or all artboards in a document Selected objects Assets You share Illustrator files for a wide range of print and screen output options by exporting them to one of a long list of file formats. Exported files can't be edited in Illustrator. You save Illustrator files when you need to edit them in the future. Sometimes you export files for print or web output, and then save them. Sometimes you can save Illustrator files in formats that you can hand off to print or web designers and edit them. In this section, I first describe how to save files that you can open and edit in Illustrator. Then I explain how to export or print documents, artboards, selections, and assets. Finally, I share some tips on printing and working with commercial printers.
Chapter 3: Placing and Tracing Artwork Chapter 3
Placing Artwork Placing Artwork In Illustrator, place refers to bringing files into an existing document. Placed files can be embedded in a document or linked from an external source and included in an Illustrator document. When files are linked, changes to the original file are reflected in the Illustrator document. When files are embedded in an Illustrator document, the umbilical cord, so to speak, is cut, and changes made to the original file are not reflected in the Illustrator document.
Importing Sketches from Adobe Illustrator Draw Importing Sketches from Adobe Illustrator Draw For millennia, okay, for a couple decades, digital artists have had to deal with the challenge of transferring sketches to Illustrator. They could draw in their sketchbook and scan the artwork into Illustrator. Ouch! Illustrator has powerful tracing tools, and I show you how to use them in the “Tracing Raster Images” section. But tracing scanned sketches and converting them to vectors is a hassle and usually produces unsatisfactory results. You can sketch directly in Illustrator with a drawing tablet, such as a Wacom tablet. But what if inspiration strikes while you’re out in the field? If you grab your sketchbook, you have to wrestle with scanning the sketch into Illustrator. But if you have a mobile device and a stylus, or even a fingernail, you have all the tools you need to sketch on the spot and access the results in Illustrator. The first step is to install Adobe Illustrator Draw on your iOS or Android device, using the appropriate app store. The app is free! When you install Adobe Illustrator Draw, you’ll be prompted to sign in with your Adobe ID and password. Doing that links Adobe Illustrator Draw with your Adobe account and your desktop Illustrator app. After you launch Adobe Illustrator Draw on your digital device, you’ll see simple but intuitive drawing tools. I can’t squeeze in an overview of those tools here, but you can find documentation at www.adobe.com/products/draw.html . For a quick-and-dirty sketch, just draw on the screen with your fingernail like I did when I confronted the odd creature in Figure 3-10, left. The easiest way to open the file directly in Illustrator on your laptop or desktop is to click the share icon in Draw, and choose Adobe Desktop Apps ⇒ Illustrator CC, as shown in Figure 3-10, right. Presto! That’s all it takes to open an Adobe Illustrator Draw file in Illustrator. FIGURE 3-10: Sketching in Adobe Illustrator Draw (left) and setting the sketch to open in Illustrator or Photoshop (right).
Tracing Raster Images Chapter 4: Drawing Lines and Shapes Building Graphics with Basic Shapes Applying Shape Properties from the Control Panel Reshaping Shapes Building Complex Shapes Drawing Shapes with Perspective Applying Isometric Effects to Shapes Chapter 5: Selecting and Arranging Objects Selecting in Illustrator Grouping and Isolating Objects Aligning and Spacing Objects Arranging Objects Front-to-Back Chapter 6: Organizing Documents with Layers Using a Template Layer Organizing and Arranging Objects in Layers Organizing Content within and between Layers Styling with Layers Applying Layers in Real-World Challenges
Интервал:
Закладка:
Похожие книги на «Adobe Illustrator CC For Dummies»
Представляем Вашему вниманию похожие книги на «Adobe Illustrator CC For Dummies» списком для выбора. Мы отобрали схожую по названию и смыслу литературу в надежде предоставить читателям больше вариантов отыскать новые, интересные, ещё непрочитанные произведения.
Обсуждение, отзывы о книге «Adobe Illustrator CC For Dummies» и просто собственные мнения читателей. Оставьте ваши комментарии, напишите, что Вы думаете о произведении, его смысле или главных героях. Укажите что конкретно понравилось, а что нет, и почему Вы так считаете.


