8 Choose File ⇒ Close in Adobe Photoshop and return to Adobe Bridge.
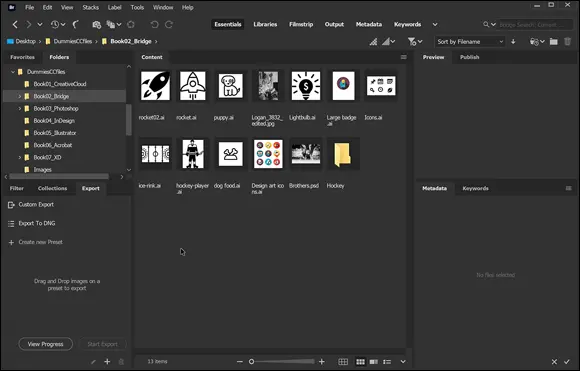
FIGURE 1-2:You can visually see the contents of a folder using Adobe Bridge.
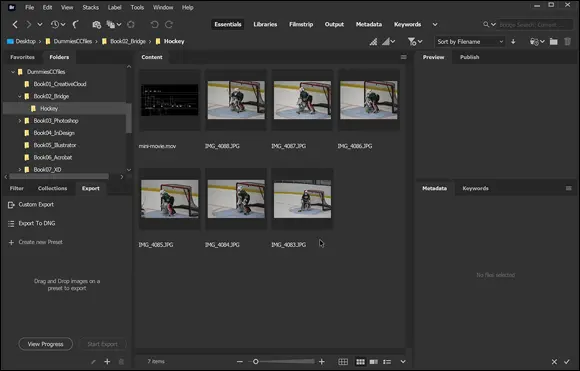
FIGURE 1-3:A visual display of images in a folder.
 From most Creative Cloud applications, you can choose File ⇒ Browse in Bridge to pop back into the Bridge application.
As a default, Bridge is opened in the default Essentials workspace. In this view, you have three columns that you can resize by clicking and dragging the borders separating the columns. This view also provides you with a Content pane, in the center, that displays thumbnails documents in your selected folder.
In addition to the Essentials workspace, there are several other preconfigured workspaces that you can access from the Application bar, as shown in Figure 1-4. Depending upon the information you want to showcase, you might want to switch from one workspace to another. Switching workspaces does not change the locations of your files and folders; it just changes the view.
Experiment with these to see which works best for you.
Here are explanations of the preconfigured workspaces:
Metadata: Displays the Content panel in List view, along with the Favorites, Metadata, and Filter panels.
Essentials: Displays the Favorites, Folders, Filter, Collections, Content, Preview, Metadata, and Keywords panels. FIGURE 1-4:Change your workspace in the Application bar. The Metadata view was selected in this example.
Filmstrip: Displays thumbnails in a scrolling horizontal row along with a preview of the selected item. This workspace also displays the Favorites, Folders, Filter, and Collections panels.
Keywords: Displays the Content panel in Details view, as well as the Favorites, Keywords, and Filter panels.
Looking for a better view
You may want to resize your thumbnails in the Content pane, especially if you have many files. You can easily do this by using the Thumbnail slider in the lower portion of the Bridge workspace.
You can also change the presentation of the content by using the View options in the lower-right corner, as shown in Figure 1-5. Your choices are
Click to lock to thumbnail grid
View content as thumbnails
View content as details
View content as list
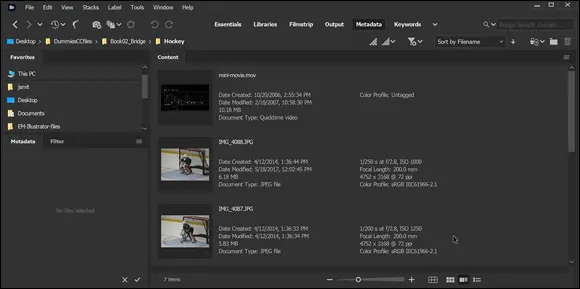
FIGURE 1-5:Change your view to bring out additional details. View content as details was selected for this example.
Perhaps you want to create a new folder. Whether you create a new folder in your system File directory or in the Finder for the Mac, it will be recognized by Bridge. In this next example, you navigate back using the Path bar, and create a new folder in the Book02_Bridge folder:
1 Make sure you are still viewing the contents of the Hockey folder. Note that the location your are in is listed in the Path bar as shown in Figure 1-6.This is the directory path to the folder that you have active and open at this time.
2 Click on Book02_Bridge in the Path bar to navigate back to that folder.
3 To create a new folder inside this folder, click the Create New Folder button in the upper right, as shown in Figure 1-7, or right-click (PC)/Control-click (Mac) and select New Folder from the contextual menu that appears.A new folder appears, ready to be renamed.
4 Name the file Rockets.

FIGURE 1-6:Use the Path bar to navigate back through your folders.

FIGURE 1-7:You can create new folders right in Adobe Bridge.
Moving a file to another folder
Next you select and move some files into your newly created folder:
1 Click on one of the Rocket images and then, holding down the Ctrl key (PC) or Command key (Mac), click on the other rocket image.Using the Ctrl or Command key allows you to select multiple files.
2 With both rocket images selected, click and drag them over to your new Rockets folder, as shown in Figure 1-8. Release your mouse when the files are on top of the folder to move them into that folder. You can also move and copy files using the contextual menu. Right-click (PC) or Control-click (Mac) on any image file to see the contextual menu that appears with options that include moving and copying the selected file.
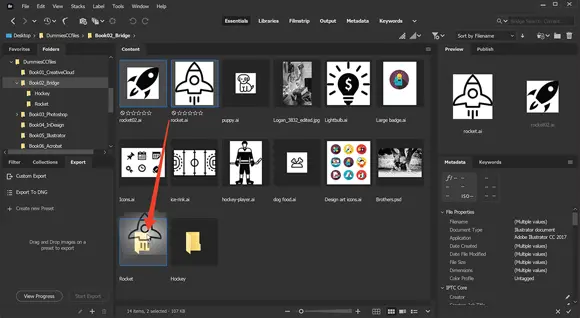
FIGURE 1-8:Move images from one folder to another in Adobe Bridge.
When working in the Creative Cloud, you may return to certain folders over and over again. In that situation, it would help to have some Favorite folders established and saved in the Favorites panel. When your most popular folders are saved as favorites, accessing them requires only one click.
Follow these steps in order to save your own favorite. In the following steps, the files from the DummiesCCFile are used. You can follow along with your own files and folders if you like.
1 Using the Folders panel, navigate your file directory system until you locate the DummiesCCFile folder. If you have followed instructions it should be easy to find on the Desktop.In the example shown in Figure 1-9, the folder is located on the desktop.
2 Make sure that the Favorites panel is forward. Check this by clicking on the tab that says Favorites.
3 Click on the DummiesCCFiles folder and drag it to the Favorites panel. Release the mouse when you see a blue line that indicates where the favorite will appear in the present list, as shown in Figure 1-9.
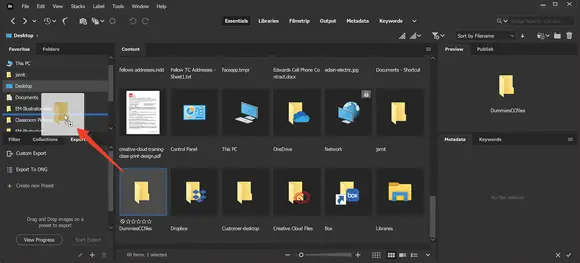
FIGURE 1-9:Click and drag a folder into the Favorites panel.
Now that you have saved the DummiesCCFiles as a favorite, you can access the folder anytime you like simply by clicking on the folder name in the Favorites panel.
Investigating the Application bar
Now that you have spent a little bit of time working in Bridge, the Application bar and its tools will make more sense to you. The Application bar runs along the top of the Bridge workspace. The tools and features are shown in Figure 1-10.
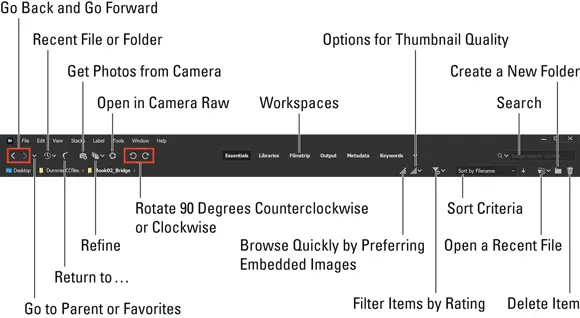
FIGURE 1-10:The Application bar.
Читать дальше


 From most Creative Cloud applications, you can choose File ⇒ Browse in Bridge to pop back into the Bridge application.


