1 ...6 7 8 10 11 12 ...16 Home-canning jars come in many sizes: 4-ounce, half-pint, 12-ounce, 1-pint, and 1-quart. They offer two widths of openings: regular-mouth (about 2½ inches in diameter) and wide-mouth (about 3⅛ inches in diameter); see Figure 2-10. Regular-mouth jars are used more frequently for jelly, jam, relish, or any other cooked food. Wide-mouth jars are mainly used for canning vegetables, pickles, and meats, because it’s easier to get the large pieces into the wide opening.
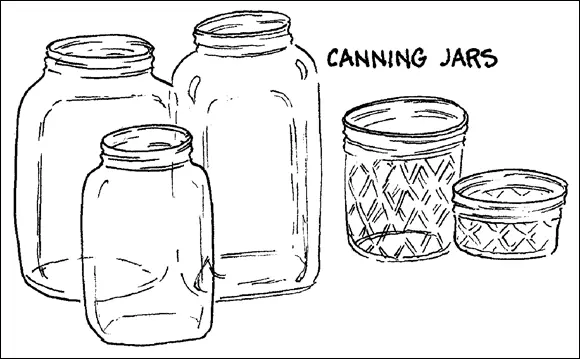
FIGURE 2-10:Varieties of canning jars: wide-mouth, regular-mouth, and jelly jars.
Some canning jar companies offer half-gallon jars, but they are not USDA or Cooperative Extension System approved for safe canning. However, these larger jars make excellent containers for dehydrated foods.
Each jar must be sealed using either a single-use or reusable lid and a metal screw band (see Figure 2-11). Single-use lids are more readily available on retail store shelves, but if you find you’re canning a large amount of food, you can save money by purchasing reusable lids online.
Single-use lids: The underside edge of these lids has a rubberlike sealing compound called Plastisol. This compound adheres to a clean jar rim and creates an airtight seal after the heat-processing period and the metal screw band is removed. These lids aren’t reusable.
Reusable lids: These lids are made of FDA- and USDA-approved, food-grade plastic. They are also BPA- and phthalate-free. They consist of a plastic lid with a rubber gasket and are held down by the same type of metal screw band as single-use lids.
Screw bands: The screw band holds the lid in place (whether single-use or reusable) during the processing period and secures it in place when you store an opened jar in the refrigerator. After verifying that your cooled jars have successfully sealed (refer to Chapter 4), you remove the screw band before you store the canned food. The screw bands may be used many times, as long as there are no signs of corrosion or rust and they aren’t bent or dented. Always remove screw bands from either single-use or reusable lids before storage.
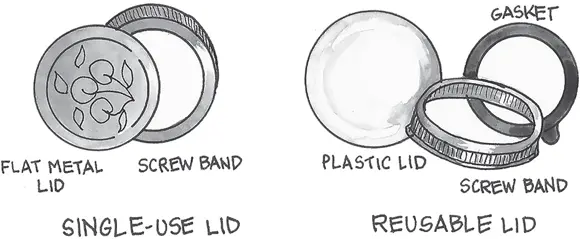
FIGURE 2-11:Two-piece caps: lids and screw bands.
 It is not necessary to sterilize metal canning lids before using them; they can be used at room temperature. Overheating metal lids in hot water can result in the layer of sealing compound becoming thin and not making a good seal on the jar.
If the most commonly used glass home-canning jars bear the names of Ball and Kerr, why do we call them Mason jars? The Mason jar is named for its creator, James Landis Mason. He designed and patented a unique glass jar that used a screw-top lid to create an airtight seal for food. This easy-to-seal jar replaced the large stoneware vessels that had previously been used for food storage.
The tapered jars we use today were introduced after World War II. They use a two-piece cap consisting of a lid and a metal screw band that fits the threaded jar top. Today, all home-canning jars are generically referred to as Mason jars. Thank you, Mr. Mason, for making the task of home-canning easy with the use of screw-top closures.
A lid wand (see Figure 2-12) has a magnet on one end of a heat-resistant stick. With it, you can take a lid from hot water and place it on the filled-jar rim without touching the lid or disturbing the sealing compound.
 Place your lids top to top and underside to underside to prevent them from sticking together in your pan of hot water. If they do stick together, dip them into a bowl of cold water to release the suction. Reheat them in the hot water for a few seconds before using them. Also offset the lids as you place them in the water. This keeps them fanned out and easier to pick up singly.
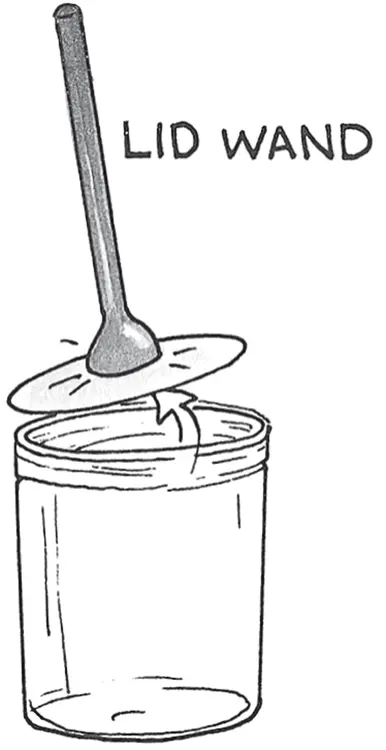
FIGURE 2-12:A lid wand.
A thin, flexible plastic spatula is the right tool for releasing air bubbles between pieces of food in your filled jars (check out Figure 2-13). Long and slightly tapered, this utensil is specifically made to fit into filled jars without damaging the food or displacing it.

FIGURE 2-13:A thin plastic spatula for releasing air bubbles.
 Buy a package of chopsticks for an inexpensive alternative.
 Don’t use a metal item or a larger object for this job because it may damage your food and crack or break your hot jar.
Wide-mouth canning funnel
A wide-mouth funnel (see Figure 2-14) fits into the inside edge of a regular-mouth or wide-mouth canning jar and lets you quickly and neatly fill your jars. This is an essential tool for canning.
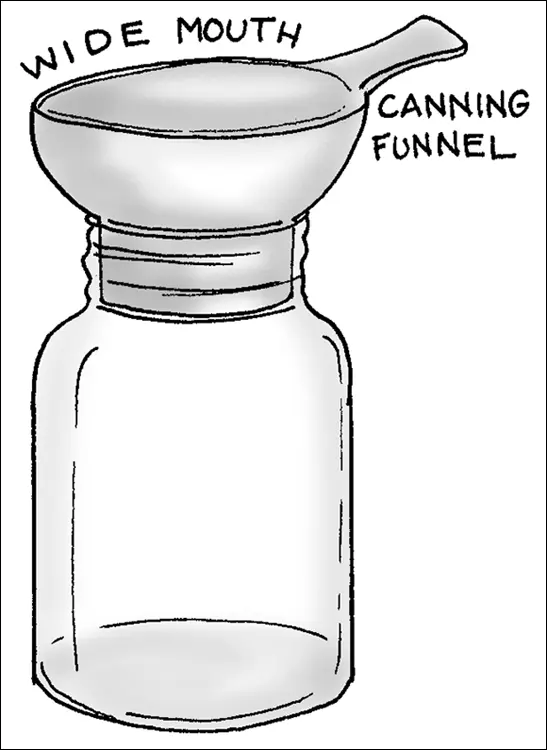
FIGURE 2-14:A wide-mouth canning funnel.
A jelly bag is made for extracting juice from cooked fruit for making jelly. These bags aren’t expensive, but if you’d rather not purchase one, make your own using a metal strainer lined with cheesecloth. Use a strainer that hangs on the edge of your pot or mixing bowl and doesn’t touch the liquid. Head to Chapter 6for instructions on making jelly.
Stoneware crocks are available in sizes from 1 gallon to 5 gallons, usually without lids. They’re nonreactive and are used for making pickles and olives. Make sure you use only crocks that are glazed on the interior and certified free of lead and cadmium, a form of zinc ore used in pigments or dyes.
 Be wary of using secondhand stoneware crocks. These crocks were often made with leaded glaze that will leach into your foodstuff. Because you do not often know the history of used items, this is an item that is best purchased new and not secondhand.
Required Tools and Equipment for Freezing Food
Some of the items required for this simple form of food preservation are already in your kitchen. For a more detailed list, check out Chapter 13.
A freezer (shocker, right?): Usually, the freezer attached to your refrigerator is large enough for freezing food. But if you’re serious about freezing lots of food, you may want to invest in a separate freezer unit.
Читать дальше


 It is not necessary to sterilize metal canning lids before using them; they can be used at room temperature. Overheating metal lids in hot water can result in the layer of sealing compound becoming thin and not making a good seal on the jar.
 Place your lids top to top and underside to underside to prevent them from sticking together in your pan of hot water. If they do stick together, dip them into a bowl of cold water to release the suction. Reheat them in the hot water for a few seconds before using them. Also offset the lids as you place them in the water. This keeps them fanned out and easier to pick up singly.


