Bruce Barnbaum - The Art of Photography - An Approach to Personal Expression
Здесь есть возможность читать онлайн «Bruce Barnbaum - The Art of Photography - An Approach to Personal Expression» весь текст электронной книги совершенно бесплатно (целиком полную версию без сокращений). В некоторых случаях можно слушать аудио, скачать через торрент в формате fb2 и присутствует краткое содержание. Жанр: Старинная литература, на английском языке. Описание произведения, (предисловие) а так же отзывы посетителей доступны на портале библиотеки ЛибКат.
- Название:The Art of Photography: An Approach to Personal Expression
- Автор:
- Жанр:
- Год:неизвестен
- ISBN:нет данных
- Рейтинг книги:5 / 5. Голосов: 1
-
Избранное:Добавить в избранное
- Отзывы:
-
Ваша оценка:
- 100
- 1
- 2
- 3
- 4
- 5
The Art of Photography: An Approach to Personal Expression: краткое содержание, описание и аннотация
Предлагаем к чтению аннотацию, описание, краткое содержание или предисловие (зависит от того, что написал сам автор книги «The Art of Photography: An Approach to Personal Expression»). Если вы не нашли необходимую информацию о книге — напишите в комментариях, мы постараемся отыскать её.
The Art of Photography: An Approach to Personal Expression — читать онлайн бесплатно полную книгу (весь текст) целиком
Ниже представлен текст книги, разбитый по страницам. Система сохранения места последней прочитанной страницы, позволяет с удобством читать онлайн бесплатно книгу «The Art of Photography: An Approach to Personal Expression», без необходимости каждый раз заново искать на чём Вы остановились. Поставьте закладку, и сможете в любой момент перейти на страницу, на которой закончили чтение.
Интервал:
Закладка:
Now that I’ve switched to variable contrast paper, I lower the contrast level by dialing in 60 units of yellow filtration on my dichroic head enlarger. Let me explain this. On a dichroic head (i.e., a three-color enlarging light source), you have white light as your source when no filtration is dialed in. The contrast level is about the same as normal contrast grade, or about Grade 2 on the graded papers. As you increase the magenta filtration, contrast progressively increases above the Grade 2 level. As you increase the yellow filtration (starting from white light), contrast progressively decreases below the Grade 2 level. So, with the yellow filter dialed to 60 units of filtration, I expose the proof and develop it solely in Dektol, giving me the same overall contrast level I formerly obtained on graded papers.
It turns out that a contact proof of a negative exhibits about the same contrast as the enlarged image at the same level of filtration. (This is true of diffusion light sources but not condenser light sources. Most enlargers made today feature diffusion light sources: cold light, dichroic light sources, or variable contrast light sources. I will assume that most readers are using a diffusion light source on your enlarger.) If I like the contact proof’s contrast level, I dial in 60 units of yellow to make an enlarged print. If the contact proof looks low in contrast, then I dial down the amount of yellow filtration (which increases contrast), go to white light (i.e., no filtration), or even go to a low amount of magenta filtration. If the contact proof looks very low in contrast and muddy, I might dial in quite a bit of magenta filtration, say 50–75 units. If it really looks muddy, I may go all the way up to 150–170 units of magenta, the highest level that my LPL enlarger achieves.
On the other hand, if the contrast level of the proof looks too high, I begin printing by dialing in more than 60 units of yellow filtration. The more contrast that the proof appears to have, the greater the amount of yellow filtration I dial in to lower it.
Low-contrast contact proofs give me a great deal of information about how to approach printing my negatives. I recommend you adopt this procedure. If I varied the contrast level from negative to negative when making proof prints, I’d never know which ones were made at high contrast and which were made at low contrast, and I’d have no stable starting point. A fixed contrast level gives me a solid foundation for analyzing my negatives.
My method of making contact proofs
Let’s now turn to my method of exposing the negatives to make usable contact proofs. I place two sheets of 8″ × 10″ enlarging paper atop a thick foam pad under my enlarger and four 4″ × 5″ negatives on each sheet of paper. I cover the entire setup with a ¼″ sheet of glass, heavy enough to press the negatives into direct contact with the enlarging paper.
The eight negatives normally vary in density. Often there are considerable density differences among them. So I expose them all to the amount of exposure needed to get a good proof of the thinnest negative. Of course, there may be other negatives in the group that have the same relatively low density. After making that exposure, I place 4″ × 5″ sheets of cardboard atop the glass over each of those negatives, preventing any further exposure. (I use the cardboard sheets that come with the 4″ × 5″ film for this purpose.) Then I give additional exposure to the next densest negative in the group and cover that negative with cardboard. I continue giving additional exposure to successively denser negatives until I expose the densest one fully. Then I develop both sheets of paper to yield eight proof prints.
Of course, I don’t always guess the perfect exposure for all eight negatives, but time and experience make my guesses reasonably good. If any of the eight are much too light or much too dark to yield useful information, I simply expose them again in the next group of eight negatives. If I still get it wrong, I do it a third time, or as many times as needed until I get a useful contact proof print. Once I get a usable proof, I’m finished with that negative, as far as proofing is concerned. After drying the sheets, I cut them into individual proofs, throwing away the bad exposures.
If I’m proofing roll film, I place a full roll (cut into strips) on each 8″ × 10″ sheet of paper and do the same procedure as outlined above: exposing for the thinnest negative(s), covering them, and then exposing successively denser negatives on the roll until all are fully exposed. Hopefully I get useful information on all of them. If too many fail to give me usable information, I’ll do the entire roll again. I do not cut roll film proofs into individual negatives because the individual proofs would be too cumbersome or get lost.
Note
Darkroom work is a continuation of the work that started in the field. Printing is not a separate act of photographic creativity; it’s the next step on a continuum .
I always study a contact proof extensively before enlarging it. Why? Because it tells me how I should approach printing the negative to obtain the image I want. Remember, I was behind the camera when the scene was exposed, so I know how I felt about it at the time. I made a series of decisions in the field to put me on the right path toward my statement. Now that I’ve developed the negative, I study the contact proof to see how I can carry that vision into my final print. If I don’t study that contact print thoroughly, I’d be starting my printing from scratch, as if I were starting with someone else’s negative. Yet I always allow myself the option of seeing the image anew and going in a vastly different direction. I try not to be dogmatic or rigid. A new vision may be more worthwhile than carrying through the thoughts I had while in the field.
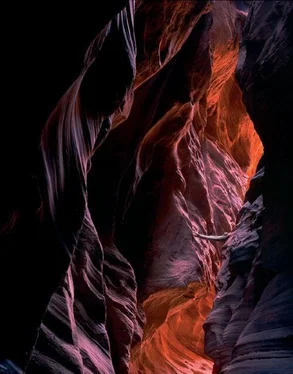
Darkroom work is a continuation of the work that started in the field. Printing a negative is not a separate act of photographic creativity; it’s the next step on a continuum. For example, I have often developed a negative to higher contrast in an already contrasty scene. I realized while I was behind the camera that I could use the darkroom to burn down the brightest areas, but that the higher contrast negative would give me better local contrasts within the scene. Thus, I was thinking about how I would print the negative even before I exposed it (Figure 7-1). Seeing the process all the way through is known as “previsualization”. It’s part of knowing what you want, learning the zone system, understanding the full capabilities of the negative, and recognizing the options in the darkroom to help get you there.
A writer has a good outline of a book before starting the story. A composer has a concept of an entire piece of music before composing. A painter has an idea of a painting before committing to the canvas. (There are exceptions, of course, but this is usually the case.) Similarly, photographers should have a clear outline and path for a final photograph while standing behind the camera. But you’ll get there only part of the time if you restrict yourself to negatives of a standard density, proofed at a standard time. Why restrict yourself; why not expand your options?
Now that we’ve made good contact proofs, let’s increase our efficiency in making a final print. This is integrally tied up with Myth #6.
Myth #6: The best landscape photographs are made within an hour and a half of sunrise or sunset
Confining yourself exclusively to early and late hour photography does not guarantee the making of a great photograph. Some people may extend the stated time frame for good outdoor photographs to two hours, and a few real liberals may even go farther. I take the radical route and say that you can photograph landscapes throughout the day, from the first light of morning to the very last photon of evening, with the possibility of great results at any time. The only concession I make to timing is that you need some light; you simply can’t make photographs in total darkness! Other than the need for some amount of light, there’s no reason to put your camera away at any time of the day.
Читать дальшеИнтервал:
Закладка:
Похожие книги на «The Art of Photography: An Approach to Personal Expression»
Представляем Вашему вниманию похожие книги на «The Art of Photography: An Approach to Personal Expression» списком для выбора. Мы отобрали схожую по названию и смыслу литературу в надежде предоставить читателям больше вариантов отыскать новые, интересные, ещё непрочитанные произведения.
Обсуждение, отзывы о книге «The Art of Photography: An Approach to Personal Expression» и просто собственные мнения читателей. Оставьте ваши комментарии, напишите, что Вы думаете о произведении, его смысле или главных героях. Укажите что конкретно понравилось, а что нет, и почему Вы так считаете.
