Current time: A bar that indicates the current time and moves down as the day progresses.
Events area: An area that shows the appointments and meetings you schedule.
Side panel: The sidebar on the right, which consists of the following elements: Keep: Opens the Keep pane so you can add a quick note to store in the Keep app Tasks: Opens the Tasks pane so you can add a quick task to store in the Tasks app
Hide side panel: An arrow you click to collapse the side panel and gain a little extra horizontal legroom. Click the arrow again to return to the side panel.
Changing the Calendar View
By default, Calendar uses Week view in the Events area, which shows a week's worth of appointments and meetings. However, Calendar is quite flexible and has several other views you can use. Here's the complete list:
Day: Displays a single day's worth of events. In the View list, click Day (or press D). You can switch to Day view and simultaneously navigate to a specific date by clicking that date's day number in Week view or Month view. You can also do this in Year view, but that requires two separate clicks (not a double-click, though!) on the day number.
Week: Displays Sunday through Saturday for the current week. In the view list, click Week (or press W). By default, Calendar uses Sunday as the first day of the week. If Monday feels to you like the true start of the week, you can configure Calendar to oblige. Click Settings, See all settings, and then click View Options. Use the Start Week On list to select Monday. (Note that you can alternatively choose Saturday as the starting day, if that floats your boat.)
Month: Displays the current month. In the View list, click Month (or press M).
Year: Displays the current year. In the View list, click Year (or press Y). In most multiday views, Calendar includes weekends. If you use Calendar exclusively for work, you might never schedule anything on a Saturday or Sunday, so you can get a bit more room in the Events area by excluding weekends for the view. On the View menu, deselect the Show Weekends command.
Schedule: Displays a list of your upcoming events. In the View list, click Schedule (or press A).
4 days: Displays four days' worth of events. In the View list, click 4 Days (or press X).
 The 4 Days view is a custom view you can modify to display whatever number of days suits your style. To change this view, click Settings, See all settings, and then click View Options. Use the Set Custom View list to select the number of days or weeks you want Calendar to display in the view.
Time Traveling: Changing the Date
Calendar usually opens with the current week displayed and today's date selected. However, if you want to work with a different day, Date Navigator makes it easy: Just click a date and Calendar immediately adjusts the Events area to display that date in whatever view you're currently using.
Date Navigator starts off displaying the current month, but if you need to navigate to a date in a different month, use either of the following techniques to pick a different month:
Click the Previous Month arrow (pointed out in Figure 3-2) to move backward one month at a time.
Click the Next Month arrow (again, check out Figure 3-2) to move forward one month at a time.
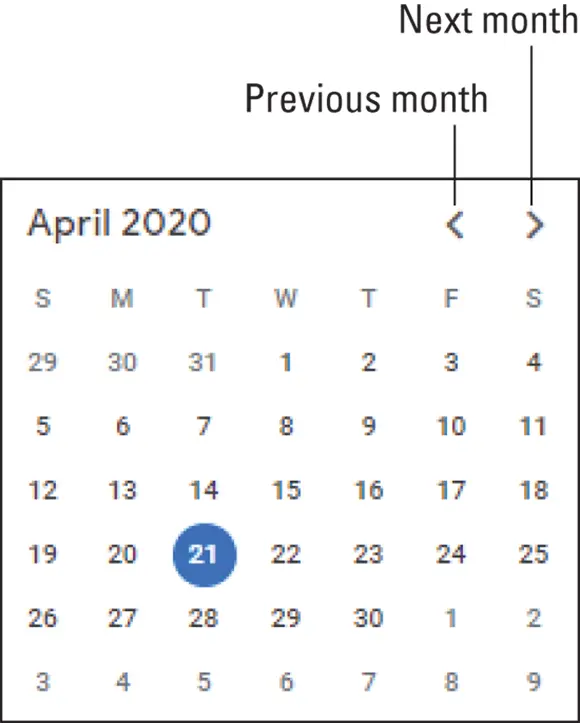
FIGURE 3-2:In Date Navigator, use the Previous Month and Next Month arrows to display the month you want.
You can also navigate the current view by using the following techniques:
To move forward to the next period of the current view: Click Next Period (see Figure 3-3), where Period is the current view setting: Day, Week, Month, Year, or 4 Days. (For this last view, the arrow title is Next Period.)
To move backward to the previous period of the current view: Click Previous Period (see Figure 3-3), where Period is the current view setting: Day, Week, Month, Year, or 4 Days. (For this last view, the arrow title is Previous Period.)
To navigate the current view so that it includes today's date: Click Today.
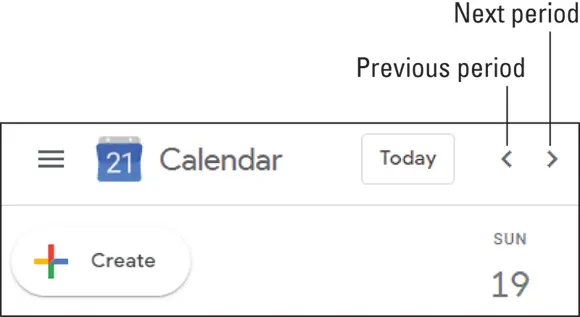
FIGURE 3-3:Use the view navigation controls to navigate the current view.
Setting Your Social Schedule: Entering Events
Got a party to plan, a meeting to make, or a lunch to linger over? The gadabouts, hobnobbers, and other social butterflies in the crowd will like how easy Calendar makes it to schedule these and other get-togethers.
Before getting down to brass Calendar tacks, you should know that Calendar lets you create two kinds of events:
Event: An event is the most general Calendar item. It refers to any activity for which you set aside a block of time. Typical events include a lunch date, a trip to the dentist or doctor, or a back waxing appointment. You can also create recurring appointments that are scheduled at regular intervals (such as weekly or monthly).
All-day event: An all-day event is any activity that consumes one or more entire days. Examples include conferences, trade shows, vacations, and mental-health days. In Calendar, all-day events don't occupy blocks of time. Instead, they appear as banners above the affected days. You can also schedule recurring all-day events.
The next few sections show you how to create events and all-day events.
Here are the steps you need to trudge through to set up an event:
1 Navigate to the date on which the event occurs.
2 Switch to either Day view or Week view.
3 Select the time you want to set aside for the event:If the event is an hour long, use the Events area to click the time when the event begins. For example, if the event starts at noon, click the 12 P.m. line; if the event starts at 3:30 P.m., click halfway between the 3 P.m. and 4 P.m. lines. When you click a time in the Events area, Calendar creates an hourlong event. If that hourlong default works for you, then nothing to see here! Otherwise, you can set up a different default duration. Click Settings, See all settings, and then click Event Settings. Use the Default Duration list to select the number of minutes you prefer Calendar to use as the default whenever you create a new event.For all other event durations, use the Events area to move the mouse pointer to the start time of the event, and then click-and-drag the mouse pointer down until you reach the end time for the event. As you drag, Calendar helpfully displays the starting and ending times, as shown in Figure 3-4. Don't worry too much if you don't get the time exactly right; you'll get a chance to fix both the start time and the end time in a sec.After all that work, Calendar displays the dialog box shown in Figure 3-5, which is already filled in with the event's start and end information. This information consists of four fields, which are, from left to right, the start date, the start time, the end time, and the end date.
4 Use the Add Title text box to type a title that describes your event.For many events, you don't need to add anything else, so if that's the case for you, go ahead and jump down to Step 8 to finish up.Otherwise, continue with Step 5 to fill in more event details.If you're looking for info on how to invite guests to your event, mosey on over to Chapter 12. FIGURE 3-4:Click-and-drag down in the Events area to specify the event's start and end times. FIGURE 3-5:The dialog box for a basic event, with the starting and ending dates and times filled in.
Читать дальше

 The 4 Days view is a custom view you can modify to display whatever number of days suits your style. To change this view, click Settings, See all settings, and then click View Options. Use the Set Custom View list to select the number of days or weeks you want Calendar to display in the view.


