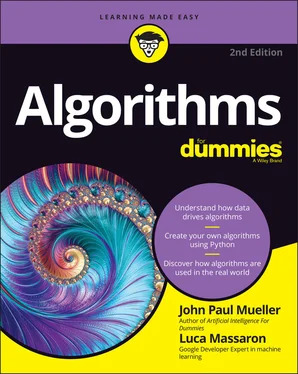
John Paul Mueller - Algorithms For Dummies
Здесь есть возможность читать онлайн «John Paul Mueller - Algorithms For Dummies» — ознакомительный отрывок электронной книги совершенно бесплатно, а после прочтения отрывка купить полную версию. В некоторых случаях можно слушать аудио, скачать через торрент в формате fb2 и присутствует краткое содержание. Жанр: unrecognised, на английском языке. Описание произведения, (предисловие) а так же отзывы посетителей доступны на портале библиотеки ЛибКат.
- Название:Algorithms For Dummies
- Автор:
- Жанр:
- Год:неизвестен
- ISBN:нет данных
- Рейтинг книги:3 / 5. Голосов: 1
-
Избранное:Добавить в избранное
- Отзывы:
-
Ваша оценка:
- 60
- 1
- 2
- 3
- 4
- 5
Algorithms For Dummies: краткое содержание, описание и аннотация
Предлагаем к чтению аннотацию, описание, краткое содержание или предисловие (зависит от того, что написал сам автор книги «Algorithms For Dummies»). Если вы не нашли необходимую информацию о книге — напишите в комментариях, мы постараемся отыскать её.
Algorithms For Dummies,
Algorithms For Dummies
Algorithms For Dummies — читать онлайн ознакомительный отрывок
Ниже представлен текст книги, разбитый по страницам. Система сохранения места последней прочитанной страницы, позволяет с удобством читать онлайн бесплатно книгу «Algorithms For Dummies», без необходимости каждый раз заново искать на чём Вы остановились. Поставьте закладку, и сможете в любой момент перейти на страницу, на которой закончили чтение.
Интервал:
Закладка:
Using GitHub gists to save notebooks
You use GitHub gists as a means of sharing single files or other resources with other people. Some people use them for full projects as well, but the idea is that you have a concept that you want to share — something that isn’t quite fully formed and doesn’t represent a usable application. You can read more about gists at https://help.github.com/articles/about-gists/ .
Performing Common Tasks
Most tasks in Colab and Notebook work the same. Each has both code cells and noncode cells, and you can create code cells in both Colab and Notebook by using the options on the Insert menu. Likewise, both environments have noncode cells that come in three forms:
Text
Section header
Form field, which comes in these types:DropdownInputSliderMarkdown
Noncode cells in Colab work somewhat differently from the Markdown cells found in Notebook, but the idea is the same. Two interesting additions in Colab that aren’t found in Notepad are the scratch code cell, which allows you to experiment with code in real time, and code snippets, which are canned code for performing specific tasks (you just insert them where needed).
You can also edit and move cells. One important difference between the two environments is that you can’t change a cell type in Colab, but you can in Notebook. A cell that you create as a section header can’t suddenly transform into a code cell. The following sections offer a brief overview of the various features.
Creating code cells
The first cell that Colab creates for you is a code cell. Colab and Notebook share the same features with regard to code, so code you write in Colab also works in Notepad (and vice versa). However, off to the side of the cell, you see a menu of extras that you can use with Colab (see Figure 3-9); these aren’t present in Notebook.

FIGURE 3-9:Colab code cells contain a few extras not found in Notebook.
You use the icons shown in Figure 3-9 to augment your Colab code experience. Here’s what these features do (in order of appearance, left to right, in the figure):
Move cell up: Moves the cell up one position in the cell hierarchy.
Move cell down: Moves the cell down one position in the cell hierarchy.
Link to cell: Displays a dialog box containing a link you can use to access a specific cell within the notebook. You can embed this link anywhere on a web page or within a notebook to allow someone to access that specific cell. The person still sees the entire notebook but doesn’t have to search for the cell you want to discuss.
(Optional) Add a comment (assuming that you have the right to make a comment): Creates a comment balloon to the right of the cell. This is not the same as a code comment, which exists inline with the code but affects the entire cell. You can edit, delete, or resolve comments. A resolved comment is one that receives attention and is no longer applicable.
Open editor settings: Opens the same dialog box shown in Figure 3-2 and discussed in the “ Getting familiar with Google Colab features” section, earlier in this chapter. You need to select some code before this option appears.
Mirror cell in tab: Mirrors the currently selected cell in a Cell pane that appears on the right side of the window. You can scroll wherever you want within the code in the left pane and keep this code accessible. The right-pointing arrow lets you execute the cell at any time after making changes in left-pane code. A pair of double-pointing arrows lets you move the focus back to the selected code in the left pane with a single click. You can also move the cell code to a scratch cell, where you can play with it without modifying your original code. You can have more than one Cell pane. You simply select the one you want and move between them as needed, which lets you move easily from place to place in your code. Close a Cell pane by clicking the X next to the word Cell.
Delete Cell: Removes the cell from the notebook.
Vertical ellipses: Contains a number of additional features in a menu (not all of which may appear because they depend on the file you have opened, the tasks you have performed, and your rights to work with the file content):Copy Cell: Copies the content of the currently selected cell to the clipboard.Cut Cell: Deletes the content of the currently selected cell and places it on the Clipboard.Clear Output: Removes the output from the cell. You must run the code again to regenerate the output.View Output Fullscreen: Displays the output (not the entire cell or any other part of the notebook) in full-screen mode on the host device. This option is useful when displaying a significant amount of content, or when a detailed view of graphics helps explain a topic. Press Esc to exit full-screen mode.Add a Form: Inserts a form into the cell to the right of the code. You use forms to provide a graphical input for parameters. Forms don’t appear in Notebook, but because of how you create them, they won’t prevent you from running the code in Notebook. You can read more about forms at https://colab.research.google.com/notebooks/forms.ipynb .
Code cells also tell you about the code and its execution. The little icon next to the output displays information about the execution when you hover your mouse over it. Clicking the icon clears the output. You must run the code again to regenerate the output.
Creating text cells
Text cells work much like Markup cells in Notebook. However, Figure 3-10 shows that you receive additional help in formatting the text using a graphical interface. The markup is the same, but you have the option of allowing the GUI to help you create the markup. For example, in this case, to create the hash sign (#) for a heading, you click the double T icon that appears first in the list. Clicking the double T icon again would increase the header level. To the right, you see how the text will appear in the notebook.
Notice the menu to the right of the text cell. This menu contains many of the same options that a code cell does. For example, you can create a list of links to help people access specific parts of your notebook through an index. In contrast to Notebook, you can’t execute text cells to resolve the markup they contain.
Creating special cells
The special cells that Colab provides are variations of the text cell. These special cells, which you access using the Insert menu option, make creating the required cells faster. However, you shouldn’t use these special cells if you need to maintain compatibility between Colab and Notebook. The following sections describe each of these special cell types.
Working with headings
When you choose Insert ⇒ Section Header Cell, you see a new cell created below the currently selected cell that has the appropriate header level 1 entry in it. You can increase the heading level by clicking the double T icon. The GUI looks the same as the one in Figure 3-10, so you have all the standard formatting features for your text.

FIGURE 3-10:Use the GUI to make formatting your text easier.
Working with a table of contents
An interesting addition to Colab is the automatic generation of a table of content for your notebook. To use this feature, click the Table of Contents icon on the left side of the window. The table of contents contains one entry for each heading you provide in your code. The entries are automatically organized according to level, so you see the hierarchy of your code. Clicking an entry automatically takes you to that location in your code.
Читать дальшеИнтервал:
Закладка:
Похожие книги на «Algorithms For Dummies»
Представляем Вашему вниманию похожие книги на «Algorithms For Dummies» списком для выбора. Мы отобрали схожую по названию и смыслу литературу в надежде предоставить читателям больше вариантов отыскать новые, интересные, ещё непрочитанные произведения.
Обсуждение, отзывы о книге «Algorithms For Dummies» и просто собственные мнения читателей. Оставьте ваши комментарии, напишите, что Вы думаете о произведении, его смысле или главных героях. Укажите что конкретно понравилось, а что нет, и почему Вы так считаете.


