Wei-Meng Lee - C# 2008 Programmer's Reference
Здесь есть возможность читать онлайн «Wei-Meng Lee - C# 2008 Programmer's Reference» весь текст электронной книги совершенно бесплатно (целиком полную версию без сокращений). В некоторых случаях можно слушать аудио, скачать через торрент в формате fb2 и присутствует краткое содержание. Город: Indianapolis, Год выпуска: 2009, ISBN: 2009, Издательство: Wiley Publishing, Inc., Жанр: Программирование, на английском языке. Описание произведения, (предисловие) а так же отзывы посетителей доступны на портале библиотеки ЛибКат.
- Название:C# 2008 Programmer's Reference
- Автор:
- Издательство:Wiley Publishing, Inc.
- Жанр:
- Год:2009
- Город:Indianapolis
- ISBN:978-0-470-28581-7
- Рейтинг книги:4 / 5. Голосов: 1
-
Избранное:Добавить в избранное
- Отзывы:
-
Ваша оценка:
C# 2008 Programmer's Reference: краткое содержание, описание и аннотация
Предлагаем к чтению аннотацию, описание, краткое содержание или предисловие (зависит от того, что написал сам автор книги «C# 2008 Programmer's Reference»). Если вы не нашли необходимую информацию о книге — напишите в комментариях, мы постараемся отыскать её.
C# 2008 Programmer's Reference — читать онлайн бесплатно полную книгу (весь текст) целиком
Ниже представлен текст книги, разбитый по страницам. Система сохранения места последней прочитанной страницы, позволяет с удобством читать онлайн бесплатно книгу «C# 2008 Programmer's Reference», без необходимости каждый раз заново искать на чём Вы остановились. Поставьте закладку, и сможете в любой момент перейти на страницу, на которой закончили чтение.
Интервал:
Закладка:
Height="100" Width="100"
Stroke="Black" StrokeThickness="10">
Here you used the element to fill the each ellipse shapes with a element. Reload the Default.htmlfile in the web browser. Figure 19-13 shows the output.

Figure 19-13
The element paints an area with a radial gradient. Edit the UI.xamlfile, and replace its content with the following:
xmlns="http://schemas.microsoft.com/client/2007"
xmlns:x="http://schemas.microsoft.com/winfx/2006/xaml">
Canvas.Left="10" Canvas.Top="10"
Height="100" Width="100"
Stroke="Black" StrokeThickness="10">
Canvas.Left="120" Canvas.Top="10"
Height="100" Width="100"
Stroke="Black" StrokeThickness="10">
Reload the Default.htmlfile in the web browser, and observe the output (see Figure 19-14).
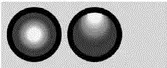
Figure 19-14
The element paints an area with an image. Assuming that you have the image shown in Figure 19-15 saved as C:\Silverlight\USFlag.jpg, edit the UI.xamlfile created, and replace its content with the following:

Figure 19-15
xmlns="http://schemas.microsoft.com/client/2007"
xmlns:x="http://schemas.microsoft.com/winfx/2006/xaml">
Canvas.Left="10" Canvas.Top="10"
Height="100" Width="100"
Stroke="Black" StrokeThickness="10">
Canvas.Left="120" Canvas.Top="10"
Height="100" Width="100"
Stroke="Black" StrokeThickness="10">
Reload Default.html in the web browser to view the output (see Figure 19-16).

Figure 19-16
Crafting XAML Using Expression Blend 2
While you can code the UI by hand, an easier way is to use a designer tool to design and create the UI graphically.
Microsoft Expression Blend 2 is the professional design tool to create engaging web-connected experiences for Windows and Silverlight. Currently in version 2, you can download a 30-day trial edition of Expression Blend 2 from www.microsoft.com/downloads.
This section explains how to use Expression Blend 2 to build a Silverlight application and programmatically interact with the content of a Silverlight application using JavaScript.
Launch Expression Blend 2 by selecting Start→Programs→Microsoft Expression→Microsoft Expression Blend 2. Create a new project by selecting the New Project item.
In the New Project dialog, select the Silverlight 1 Site project type and name the project RoundButton (see Figure 19-17). Click OK.

Figure 19-17
In the design view, double-click on the Canvascontrol to insert one onto the page (see Figure 19-18).
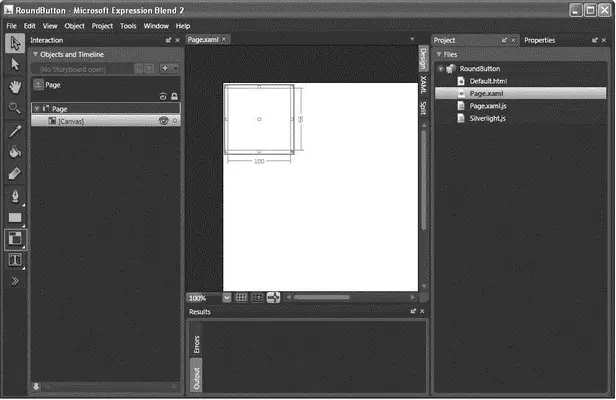
Figure 19-18
Right-click on the Rectanglecontrol in the Toolbox, and select the Ellipse(see Figure 19-19).
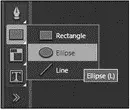
Figure 19-19
Double-click on the Ellipseelement to add it to the page. Move the Ellipseobject into the Canvascontrol by dragging it onto the Canvas object in the Objects and Timeline window (see Figure 19-20).
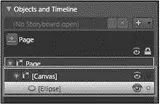
Figure 19-20
The page now looks like Figure 19-21.
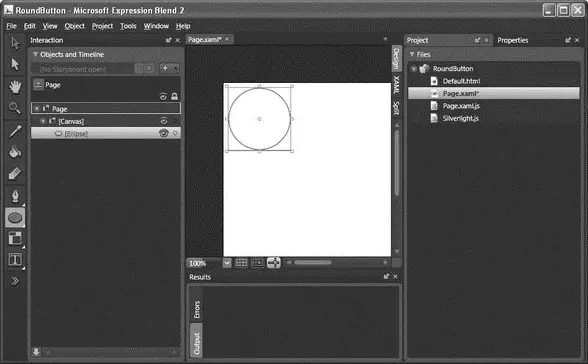
Figure 19-21
With the Ellipseobject selected, select the Properties inspector, and click (see Figure 19-22):
□ Stroke
□ Solid Color Brush
□ Specify 5 for StrokeThickness
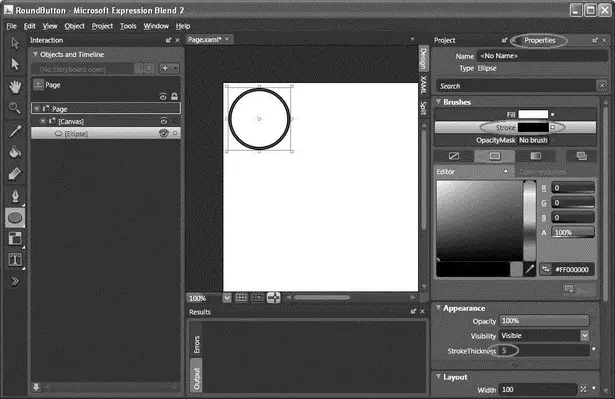
Figure 19-22
Next, click the following (see Figure 19-23):
□ Fill
□ Gradient Brush
□ Specify 180 for B, 248 for G, 8 for B, and 100% for A

Figure 19-23
Click on the Brush Transform tool, and observe the arrow on the Ellipse element (see Figure 19-24).
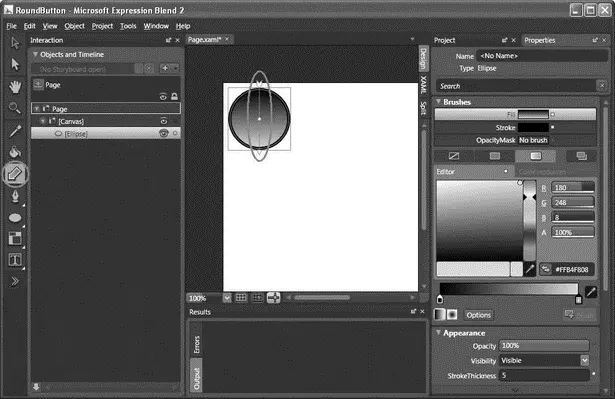
Figure 19-24
Move the arrow 135 degrees counterclockwise, as shown in Figure 19-25.

Figure 19-25
Make a copy of the Ellipse element (right-click on the Ellipse element in the Objects and Timeline window and select Copy, then paste it onto the page and move it into the Canvas control again).
For the new Ellipsecontrol, gradient-fill it in the opposite direction by reversing the direction of the arrow (see Figure 19-26).
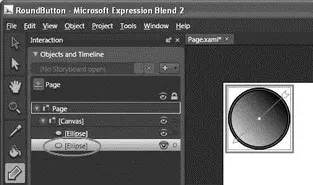
Figure 19-26
Select the Properties inspector, and set its properties as follows (see Figure 19-27):
| Property | Value |
|---|---|
Name |
EllipsePressed |
Opacity |
0% |
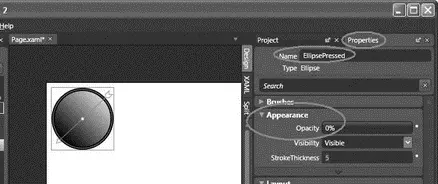
Figure 19-27
Double-click on the TextBlockelement to add it to the page. As usual, move it into the Canvascontrol and type OK into the TextBlockelement (see Figure 19-28).
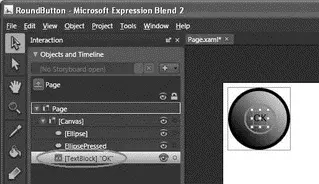
Figure 19-28
With the TextBlockobject selected, select the Properties inspector, and click (see Figure 19-29):
□ Foreground
□ Solid Color Brush
□ Specify 251 for B, 219 for G, 8 for B, and 100% for A
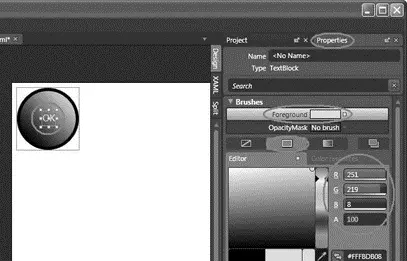
Figure 19-29
Читать дальшеИнтервал:
Закладка:
Похожие книги на «C# 2008 Programmer's Reference»
Представляем Вашему вниманию похожие книги на «C# 2008 Programmer's Reference» списком для выбора. Мы отобрали схожую по названию и смыслу литературу в надежде предоставить читателям больше вариантов отыскать новые, интересные, ещё непрочитанные произведения.


Обсуждение, отзывы о книге «C# 2008 Programmer's Reference» и просто собственные мнения читателей. Оставьте ваши комментарии, напишите, что Вы думаете о произведении, его смысле или главных героях. Укажите что конкретно понравилось, а что нет, и почему Вы так считаете.