Of course, you can perform more complex animation. This section shows you how to make the animation real-life using a KeySpline.
Using Expression Blend 2, create a new Silverlight project and name it Animations2.
Add an Image element to the page, and set it to display an image (see Figure 19-43).
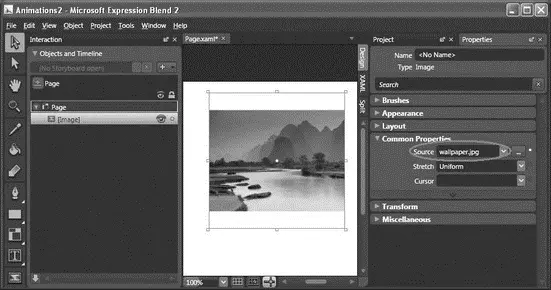
Figure 19-43
Add a Timelineobject to the project and use its default name of Storyboard1.
Add two keyframes to time 0:00.000 and 0:01.000, respectively.
At time 0:01.000, click the Translate tab in the Transform section of the Properties Inspector. Set X to 0 and set Y to 250 (see Figure 19-44).
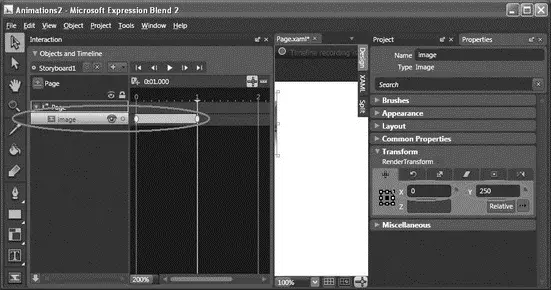
Figure 19-44
This will move the image vertically from the top to the bottom. In the Rotate tab, set the Angle to 360 (see Figure 19-45).
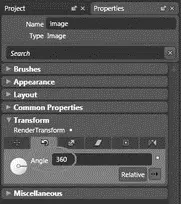
Figure 19-45
This will cause the image to rotate 360 degrees clockwise.
In the XAML view, add the Loaded attribute to the
element:
xmlns="http://schemas.microsoft.com/client/2007"
xmlns:x="http://schemas.microsoft.com/winfx/2006/xaml"
Width="640" Height="480"
Background="White" x:Name="Page">
Append the following block of code to Page.xaml.js:
function onLoad(sender, eventArgs) {
var obj = sender.findName("Storyboard1");
obj.begin();
}
Press F5 to test the application. Notice that when the page is loaded, the image drops to the bottom of the page, while rotating clockwise (see Figure 19-46).
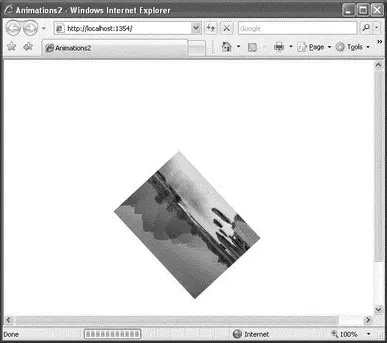
Figure 19-46
Slowing the Rate of Fall
To slow down the rate of all, you can increase the duration of the timeline object. In Storyboard1, move the second keyframe from time 0:01.000 to 0:02.500 (see Figure 19-47).
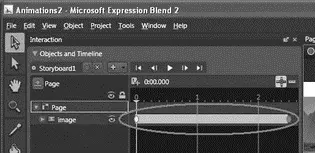
Figure 19-47
Press F5 to test again. Notice that this time the image falls is longer compared to the previous instance.
Varying the Rate of Fall
In the previous section, the image drops at a uniform speed. That isn't very realistic, because in real life an object accelerates as it falls. You need to tweak the properties a little to make it more lifelike.
Select the second keyframe (at time 0:02.500) and select the Properties Inspector.
In the Easing section, modify the KeySpline by dragging the yellow dot from the top to the bottom (see Figure 19-48).
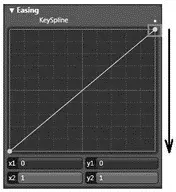
Figure 19-48
A KeySpline is used to define the progress of an animation. The x-axis of the KeySpline represents time and the y-axis represents value. The KeySpline should now look like Figure 19-49.
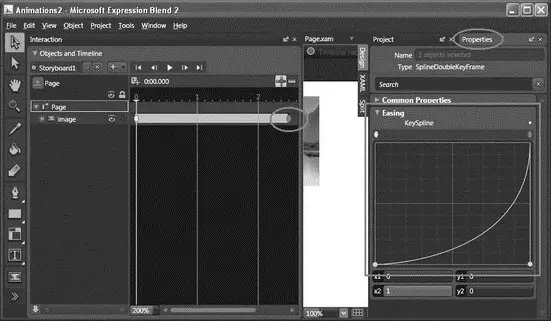
Figure 19-49
The modified KeySpline means "as time progresses, increase the rate of change." In this example, it means that as the falling image approaches the bottom, it will drop faster.
Press F5 to test again, and you'll see that the image accelerates as it nears the bottom. The animation is now more realistic, simulating free-fall.
One of Silverlight's key capabilities is a rich media experience. This section examines how to embed a Windows media file in your Silverlight application and how to control its playback. In addition, it also explains how to create simple effects on the video.
Creating the Silverlight Project
Using Expression Blend 2, create a Silverlight project and name it Media.
In the Project window, right-click on the project name ( Media) and select Add Existing Item. Select a Windows Media file ( WindowsMedia.wmv, for this example; it's included in the book's code download). After this, the WindowsMedia.wmvfile will be added to the project.
Double-click WindowsMedia.wmvin the Project window to add it to the page (see Figure 19-50).

Figure 19-50
You need Windows Media Player 10 or later for this project to work.
The WindowsMedia.wmvfile in now contained within a MediaElement control (see also Figure 19-51):
xmlns="http://schemas.microsoft.com/client/2007"
xmlns:x="http://schemas.microsoft.com/winfx/2006/xaml"
Width="640" Height="480"
Background="White"
x:Name="Page">
x:Name="WindowsMedia_wmv"
Width="320" Height="240"
Source="WindowsMedia.wmv" Stretch="Fill"
Canvas.Top="8" Canvas.Left="8"
AutoPlay="True"/>
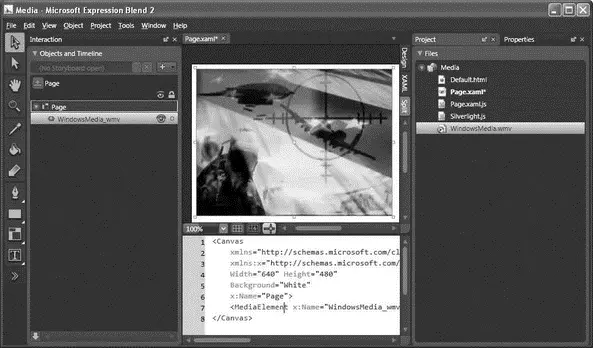
Figure 19-51
Press F5 to test the page. The video automatically starts to play when the page has finished loading (see Figure 19-52).
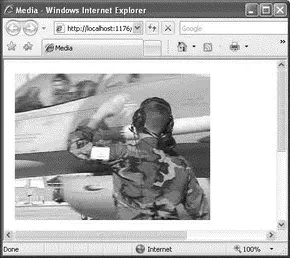
Figure 19-52
Disabling Auto-Play
While automatically playing a video is a useful feature, sometimes you might want to disable this. For example, if you have multiple videos embedded in a page, this feature is actually more nuisance than helpful. To disable the auto-play feature, just set the AutoPlay attribute in the element to False, like this:
xmlns="http://schemas.microsoft.com/client/2007"
xmlns:x="http://schemas.microsoft.com/winfx/2006/xaml"
Width="640" Height="480"
Background="White"
x:Name="Page">
x:Name="WindowsMedia_wmv"
Width="320" Height="240"
Source="WindowsMedia.wmv" Stretch="Fill"
Canvas.Top="8" Canvas.Left="8"
AutoPlay="False"
/>
So how and when do you get it to play? You can programmatically play the video when the user's mouse enters the video and pause it when the mouse leaves the video. Also, if the user clicks on the video, the video can stop and return to the beginning. To do so, set the following highlighted attributes:
xmlns="http://schemas.microsoft.com/client/2007"
xmlns:x="http://schemas.microsoft.com/winfx/2006/xaml"
Читать дальше


