The program listing of the project is given in Figure 7.12 (program SD3.C). At the beginning of the program the UART is initialized to 2400 baud. Then the SPI bus and the FAT file system are initialized as required by the library. The program then creates file MYFILE55.TXT by calling library function Mmc_Fat_Assign with the arguments as the filename and the creation flag 0x80, which tells the function to create a new file if the file does not exist. The filename should be in “filename.extension” format, though it is also possible to specify an eight-digit filename and a three-digit extension with no “.” between them, as the “.” will be inserted by the function. Other allowed values of the creation flag are given in Table 7.8. Note that the SD card must have been formatted in FAT16 before we can read or write to it. Most new cards are already formatted, but we can also use the Mmc_Fat_QuickFormat function to format a card.
/**************************************************************
SD CARD PROJECT
===============
In this project a SD card is connected to PORTC as follows:
CS RC2
CLK RC3
DO RC4
DI RC5
In addition, a MAX232 type RS232 voltage level converter chip
is connected to serial output port RC6.
The program opens a file called MYFILE55.TXT on the SD card
and writes the string "This is MYFILE.TXT." to this file. Then
the string "This is the added data..." is appended to this file.
The program then sends the contents of this file to the UART.
Author: Dogan Ibrahim
Date: August 2007
File: SD3.C
**************************************************************/
char filename[] = "MYFILE55TXT";
unsigned char txt[] = "This is the added data...";
unsigned short character;
unsigned long file_size,i;
void main() {
//
// Configure the serial port
//
Usart_Init(2400);
//
// Initialize the SPI bus
//
Spi_Init_Advanced(MASTER_OSC_DIV16, DATA_SAMPLE_MIDDLE,
CLK_IDLE_LOW, LOW_2_HIGH);
//
// Initialize the SD card bus
//
while(Mmc_Init(&PORTC,2));
//
// Initialize the FAT file system
//
while(Mmc_Fat_Init(&PORTC,2));
//
// Create the file (if it doesn’t exist)
//
Mmc_Fat_Assign(&filename, 0x80);
//
// Clear the file, start with new data
//
Mmc_Fat_Rewrite();
//
// Write data to the file
//
Mmc_Fat_Write("This is MYFILE.TXT.",19);
//
// Add more data to the end...
//
Mmc_Fat_Append();
Mmc_Fat_Write(txt,sizeof(txt));
//
// Now read the data and send to UART
//
Mmc_Fat_Reset(file_size);
for(i=0; i
Mmc_Fat_Read(&character);
Usart_Write(character);
}
for(;;); // wait here forever
}

Figure 7.12: Program listing of the project
Table 7.8: Mmc_Fat_Assign file creation flags
| Flag |
Description |
| 0x01 |
Read only |
| 0x02 |
Hidden |
| 0x04 |
System |
| 0x08 |
Volume label |
| 0x10 |
Subdirectory |
| 0x20 |
Archive |
| 0x40 |
Device (internal use only, never found on disk) |
| 0x80 |
File creation flag. If file does not exist and this flag is set, a new file with the specified name will be created. |
The file is cleared (if it is not already empty) using function call Mmc_Fat_Rewrite , and then the string “This is MYFILE.TXT” is written to the file by calling library function Mmc_Fat_Write . Note that the size of the data to be written must be specified as the second argument of this function call. Then Mmc_Fat_Append is called and the second string “This is the added data…” is appended to the file. Calling function Mmc_Fat_Reset sets the file pointer to the beginning of the file and also returns the size of the file. Finally, a for loop is set up to read each character from the file using the Mmc_Fat_Read function call, and the characters read are sent to the UART with the Usart_Write function call.
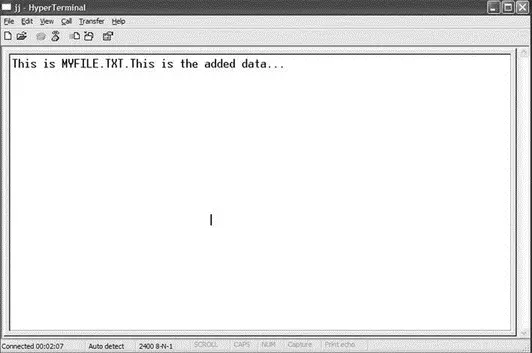
A snapshot of the screen with the HyperTerminal running is shown in Figure 7.13.

Figure 7.13: Snapshot of the screen
PROJECT 7.4 — Temperature Logger
This project shows the design of a temperature data logger system. The ambient temperature is read every ten seconds and stored in a file on an SD card. The program is menu-based, and the user is given the option of:
• Sending the saved file contents to a PC
• Saving the temperature readings to a new file on an SD card
• Appending the temperature readings to an existing file on an SD card
The hardware of this project is similar to the one for Project 7.1 (i.e., as shown in Figure 7.8), but here, in addition, the serial input port pin (RC7) is connected to the RS232 connector so data can be received from the PC keyboard. In addition, a LM35DZ-type analog temperature sensor is connected to the microcontroller’s analog input AN0 (pin 2). The new circuit diagram is shown in Figure 7.14.

Figure 7.14: Circuit diagram of the project
The LM35 DZ is a three-pin analog temperature sensor that can measure with 1°C accuracy temperatures between 0°C and +100°C. One pin of the device is connected to the supply (+5V), another pin to the ground, and the third to the analog output. The output voltage of the sensor is directly proportional to the temperature (i.e., Vo=10mV/°C). If, for example, the temperature is 10°C, the output voltage will be 100mV, and if the temperature is 35°C, the output voltage of the sensor will be 350mV.
When the program is started, the following menu is displayed on the PC screen:
TEMPERATURE DATA LOGGER
1. Send temperature data to the PC
2. Save temperature data in a new file
3. Append temperature data to an existing file
Choice?
The user then chooses one of the three options. When an option is completed, the program does not return to the menu. To display the menu again the system has to be restarted.
The program listing of the project is shown in Figure 7.15 (program SD4.C). In this project, a file called TEMPERTRTXT is created on the SD card to store the temperature readings (the library function call will insert the “.” to make the filename “TEMPERTR.TXT”), if it does not already exist.
Читать дальше


