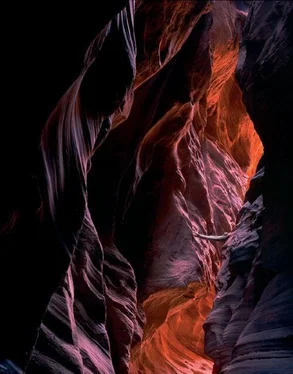
Bruce Barnbaum - The Art of Photography - An Approach to Personal Expression
Здесь есть возможность читать онлайн «Bruce Barnbaum - The Art of Photography - An Approach to Personal Expression» весь текст электронной книги совершенно бесплатно (целиком полную версию без сокращений). В некоторых случаях можно слушать аудио, скачать через торрент в формате fb2 и присутствует краткое содержание. Жанр: Старинная литература, на английском языке. Описание произведения, (предисловие) а так же отзывы посетителей доступны на портале библиотеки ЛибКат.
- Название:The Art of Photography: An Approach to Personal Expression
- Автор:
- Жанр:
- Год:неизвестен
- ISBN:нет данных
- Рейтинг книги:5 / 5. Голосов: 1
-
Избранное:Добавить в избранное
- Отзывы:
-
Ваша оценка:
- 100
- 1
- 2
- 3
- 4
- 5
The Art of Photography: An Approach to Personal Expression: краткое содержание, описание и аннотация
Предлагаем к чтению аннотацию, описание, краткое содержание или предисловие (зависит от того, что написал сам автор книги «The Art of Photography: An Approach to Personal Expression»). Если вы не нашли необходимую информацию о книге — напишите в комментариях, мы постараемся отыскать её.
The Art of Photography: An Approach to Personal Expression — читать онлайн бесплатно полную книгу (весь текст) целиком
Ниже представлен текст книги, разбитый по страницам. Система сохранения места последней прочитанной страницы, позволяет с удобством читать онлайн бесплатно книгу «The Art of Photography: An Approach to Personal Expression», без необходимости каждый раз заново искать на чём Вы остановились. Поставьте закладку, и сможете в любой момент перейти на страницу, на которой закончили чтение.
Интервал:
Закладка:
Here’s how it works. The apple in the transparency serves as a red filter to the incoming red light. As the mask is exposed through the transparency, the red light from the enlarger passes through the red apple largely unimpeded because the apple is the same color. Similarly, the green leaves serve as a green filter for the incoming red light. Therefore, the red light is blocked to some extent by the green of the leaves. The part of the mask below the apple receives more light and becomes darker (i.e., denser) when developed; the part of the mask below the leaves receives less light and is lighter (i.e., thinner) when developed. When the mask is then registered with the original transparency, more density is added to the apple than to the leaves, making the leaves brighter and snappier and the apple darker in the positive-to-positive print.
If you are working with negative material, the result is the same but by opposite means. The red light from the enlarger produces a mask that is thinner below the red apple (which appears somewhat green on the negative) and denser below the green leaves (which appears somewhat red on the negative). When re-registered with the negative, little density is added to the apple; more density is added to the green leaves. When printed, the apple is darker and the leaves are lighter.
So the rule is this: if you want to create a mask that brightens a specific color, make the mask with the filtration of the color opposite to it on the color wheel (Figure 6-5). Perhaps a less confusing way to think about this is that when you make a mask, you should filter with the color you wish to darken in the final print. Sharp cutting filters (e.g., those used as black-and-white filters) can produce overt, dramatic effects. Again, experimentation will show you what works and what must be avoided.
The Shadow Mask
A second, shadow mask may prove to be as worthwhile—or perhaps even more important overall—than the initial contrast reduction mask. This technique exposes only the shadow regions, bringing to life excessively dense areas of the original transparency. It’s the equivalent of the highlight mask for negative printing in either black-and-white or color. Needless to say, there must be some separation within the shadows of the original transparency to gain visibility on the print; but if it’s there, however dimly, this second mask (the shadow mask) can bring out more visible detail in the print than is easily seen on the transparency .
To make a shadow mask, you must use a high contrast film together with a high contrast developer. When registered with the transparency, exposed, and then developed, the film will be ultra-dense in all highlight and mid-tone areas but devoid of any density in the shadow areas. Of course, the intensity of the initial exposure determines the cutoff. In this way, shadow areas can be given additional exposure, bringing them into visibility, without allowing additional exposure in the mid-tones or highlights. When the second mask is placed in register with the transparency, the “either-or” effect translates directly to the print.
If you wish to avoid a sharp cutoff effect, you can choose a standard developer rather than a high contrast developer. This gives some tonal gradation into the mid-tone values of the transparency, though the highlight regions still develop to very high densities (which is just what you want). When a shadow mask developed in this manner is registered with the transparency, not only the deepest shadow areas get additional exposure, but also the mid-tone highlights, allowing them to become quite brilliant and rich within the general context of the shadow areas.
By using both the overall contrast mask and the shadow mask, every area of the print can achieve a glow that is unmatched by any other method. In essence, the overall contrast reduction mask allows prints to be made; the shadow mask makes them brilliant. That’s why an Ilfochrome print can be more “alive” than the original transparency.
The basic printing exposure is made with or without a mask. If the initial exposure is made with no mask, a second exposure can be made with the contrast reduction mask. Choosing the length of each exposure carefully can yield the precise overall contrast you desire, but it can never be higher than the unmasked print. After these two exposures, a third exposure can be made with the shadow mask to bring out subtle detail in the darkest areas. The shadow mask exposure can often add 200 percent or 500 percent more exposure under the enlarger—perhaps more! This is not surprising when you consider the extended range of the transparency compared to that of the paper. It also creates a strong argument for using lower contrast indoor transparency material rather than outdoor film as a further means of gaining contrast control over the material and achieving visibility into additional areas of the original scene.
Note
The prime limitation of color printing is reality. When the subject matter has a realistic character you can go only so far with manipulation before you stretch reality beyond the breaking point .
It may be worthwhile to point out that shadow mask exposures can be made through a filter, just as with any additional burning, to subtly edge color balance as you please. For instance, if the shadow area of the transparency is an actual shadow within the scene (under a tree, beside a wall, etc.) it probably has a blue shift. The shadow mask exposure can be made through red or magenta filtration to reduce or eliminate the blue cast. With clever insight, the print can be made incredibly true to the original scene or incredibly different.
The prime limitation of color printing is reality. In any situation in which the subject matter has a realistic character—portraits, landscapes, etc.—you can go only so far with manipulation before you stretch reality beyond the breaking point and elicit responses like “wrong color”, “too much magenta”, etc. Much of color creativity involves subtlety. Especially with an inherently brilliant material like Ilfochrome, don’t let unrestrained color control your seeing. Always maintain your control over the medium.
Spotting and Rebalancing Color for Color Prints
If spotting of color prints is necessary, or if you wish to alter the color balance of portions of a color print using dyes, I have found that the best time to do it is when the print is still wet. This way, the dye absorbs into the emulsion, leaving no residual signs of manipulation. If spotting is done when the print is dry, there is usually a reflective difference from the surface that is obvious and distracting. I find it best to apply color dyes just after squeegeeing the print and prior to putting it on the screen for drying. If the surface has a layer of water on it, the dye immediately runs all over the place. If this happens, give the print a long wash until the dye is washed out and start again.
Once the wet print has been squeegeed, spotting colors can be applied. It takes some experimentation to see how dilute the applied color should be. I recommend trying it on some failed prints before you start working on your best images.
Ilford has a color spotting kit of transparent retouching dyes expressly for Ilfochrome prints. It consists of seven small tubs of hard color dyes, somewhat like tempera watercolors. A wet brush dissolves the material, which can be directly applied to the prints or diluted further to your liking. Of course, colors can be mixed to achieve virtually any hue or density you desire. For Ektacolor prints, Retouch Methods Company makes a set of liquids called retouching colors. I often use them to nudge the color to my exact desires when mixing spotting colors for black-and-white prints.
Читать дальшеИнтервал:
Закладка:
Похожие книги на «The Art of Photography: An Approach to Personal Expression»
Представляем Вашему вниманию похожие книги на «The Art of Photography: An Approach to Personal Expression» списком для выбора. Мы отобрали схожую по названию и смыслу литературу в надежде предоставить читателям больше вариантов отыскать новые, интересные, ещё непрочитанные произведения.
Обсуждение, отзывы о книге «The Art of Photography: An Approach to Personal Expression» и просто собственные мнения читателей. Оставьте ваши комментарии, напишите, что Вы думаете о произведении, его смысле или главных героях. Укажите что конкретно понравилось, а что нет, и почему Вы так считаете.
