Peter Bauer - Adobe Photoshop CC For Dummies
Здесь есть возможность читать онлайн «Peter Bauer - Adobe Photoshop CC For Dummies» — ознакомительный отрывок электронной книги совершенно бесплатно, а после прочтения отрывка купить полную версию. В некоторых случаях можно слушать аудио, скачать через торрент в формате fb2 и присутствует краткое содержание. Жанр: unrecognised, на английском языке. Описание произведения, (предисловие) а так же отзывы посетителей доступны на портале библиотеки ЛибКат.
- Название:Adobe Photoshop CC For Dummies
- Автор:
- Жанр:
- Год:неизвестен
- ISBN:нет данных
- Рейтинг книги:3 / 5. Голосов: 1
-
Избранное:Добавить в избранное
- Отзывы:
-
Ваша оценка:
Adobe Photoshop CC For Dummies: краткое содержание, описание и аннотация
Предлагаем к чтению аннотацию, описание, краткое содержание или предисловие (зависит от того, что написал сам автор книги «Adobe Photoshop CC For Dummies»). Если вы не нашли необходимую информацию о книге — напишите в комментариях, мы постараемся отыскать её.
is your experienced guide to the technical terrain, slashing away the foliage for a clear picture of how to produce the perfectly framed and beautifully curated images you want.
Beginning with an overview of the basic kit bag you need for your journey toward visual mastery, Peter Bauer—Photoshop instructor and an award-winning fine art photographer in his own right—shows you how to build your skills and enrich your creative palette with enhanced colors and tone, filters and layering, and even how undertake a foray into digital painting. Add in instructions on combining text with images and the how-tos of video and animation editing, and you have all the tools you need to carve out a one-person multimedia empire.
Master everything from the basics to professional insider tips Combine, layer, tone, and paint your images Explore the colorfully creative world of Photoshop filters Fix common problems You’ll find everything on the latest version of the software that you could dream of—and an improved shot at artistic success!
Adobe Photoshop CC For Dummies — читать онлайн ознакомительный отрывок
Ниже представлен текст книги, разбитый по страницам. Система сохранения места последней прочитанной страницы, позволяет с удобством читать онлайн бесплатно книгу «Adobe Photoshop CC For Dummies», без необходимости каждый раз заново искать на чём Вы остановились. Поставьте закладку, и сможете в любой момент перейти на страницу, на которой закончили чтение.
Интервал:
Закладка:
JPG: Use JPEG for photos. Remember to resize the photo so that it fits on a web page. When selecting a Quality setting, you need to balance image appearance with file size. A smaller file downloads (and displays in a web browser) faster, but a larger file generally looks better. If you reduce the Quality setting until just before the image doesn’t look great, you’ve hit the sweet spot — the compromise between file size and image quality.
GIF: GIF is more appropriate for items like web banners and buttons (such as those shown in Figure 2-15) than it is for photos. If you save a photo that’s more than perhaps 100-x-100 pixels in size, you might see some degradation of the image quality as similar colors become one color. When you save an image as GIF, it can contain no more than 256 distinct colors. JPEG and the other common file formats can have thousands of different colors.
PNG: PNG comes in two types: PNG-8 (which is a substitute for GIF) and PNG-24 (which is a substitute for JPEG). PNG has a couple of advantages for web designers, such as support for transparency.
FIGURE 2-15:Use GIF for web interface items.
Formats for commercial printing
You’re the Photoshop master of your office. Everyone knows that you understand everything about digital images. So you’re the right person to create the company’s new brochure. Except you’re a photographer. Or you’re a web designer. Or you’re actually pretty new to Photoshop. And you don’t have a clue about preparing images for a commercial printing press.
Here’s what you need to know about file formats for those CMYK (cyan/magenta/yellow/black) color images that you’re sending to the print shop:
TIFF: TIFF is generally a solid choice. Use TIFF for photographic images that don’t contain any type layers.
EPS: Choose EPS if your image has type. Don’t flatten or merge the type layers before using Save As to create the EPS. In the EPS Options dialog box, make sure to select the Include Vector Data check box to ensure that your type prints perfectly. If you reopen an EPS file in Photoshop, your type layers get merged. Don’t! Instead, make sure to save your original file as PSD and, should you need to make changes, open the PSD and create a new EPS file when you’re done editing.
PDF: PDF offers support for spot color channels, alpha channels, and paths — options not supported by EPS. ( Spot channels are used with custom colors, and alpha channels store information about transparency in the image.) If your file uses any of these features, choose PDF over EPS, if your print shop accepts PDFs. When saving as PDF, the PDF Options dialog box offers Preserve Photoshop Editing Capabilities. If you select the option, the PDF file reopens in Photoshop with layers and editable type.
PSD: Use PSD only if you’re adding the image file to a project in Adobe InDesign CC. Don’t send PSD files to a print shop unless specifically requested to do so by the print shop.
RESAVING IMAGES IN THE JPEG FORMAT
JPEG uses a lossy compression scheme: That is, as part of the compression process, it actually permanently throws away some data when you save your image. The lower the Quality setting, the more image degradation occurs. Take a look at the figure here. The original image is on the left. In the middle is the same image saved in JPEG format with medium quality and then on the right with low quality. Compare the insets on the eyelashes (400% zoom) for the left and right images. See what I mean by degradation ? Look closely at the inset to the right and you can even see the 8-pixel-by- 8-pixel blocks used by JPEG during the compression process.
If you save by using JPEG a second time, even more data is thrown away. Every time you save, your image quality suffers. Yes, indeed, you might sometimes need to open a JPEG image, make some changes, and save as JPEG again (perhaps for the web, perhaps to share with non-Photoshop friends and family). To minimize damage to the image, either use the highest setting (12) for the Quality setting or (if you know it) the exact same setting used last in Photoshop.

Formats for PowerPoint and Word
If the final destination of your image is PowerPoint or Word, use the PNG file format. If your image has areas of transparency in it, PNG is definitely the way to go. (Read about the two types of PNG files in the section “ Formats for web graphics,” earlier in this chapter.)
What about all that neat clip art that you have on your hard drive? How do you use those images when Photoshop won’t open the vector-based WMF and EMF clip art files? Here’s how you get clip art into Photoshop, quickly and easily:
1 Open a new document in Word (or a comparable word-processing program).
2 Add the clip art.In Word, choose Insert ⇒ Picture ⇒ Clip Art (or your word processor’s comparable command). Click directly on the artwork and drag the lower-right corner to resize it to the dimensions that you need in Photoshop. (The artwork comes into Photoshop at 300 ppi.)
3 Choose Edit ⇒ Copy.The selected image is copied to the Clipboard (the computer’s memory) in Word.
4 Switch to your Photoshop image.
5 Choose Edit ⇒ Paste.You have your clip art, ready to use in Photoshop! Use the Edit ⇒ Transform commands to scale, rotate, and otherwise fit the clip art into your design. (See Figure 2-16.)
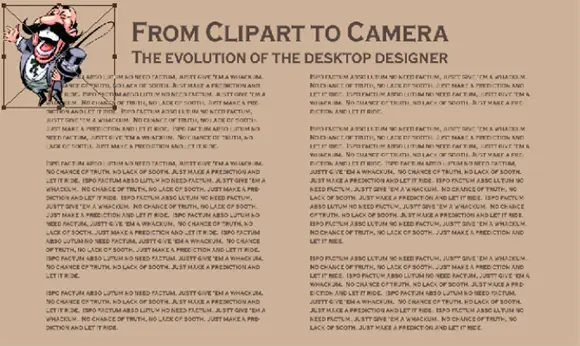
FIGURE 2-16:Copy vector artwork from Word and paste into Photoshop.
Chapter 3
Taking the Chef’s Tour of Your Photoshop Kitchen
IN THIS CHAPTER
 Understanding Photoshop’s basic interface
Working more efficiently with customization
Determining your preferences and color settings
Troubleshooting Photoshop
I know you’re hungry to dive right in and start mixing up some masterpieces, but before you fire up the stove, look around the Photoshop kitchen. Get to know your spoons from your ladles, your pots from your pans. Figure out how to turn on the blender … that sort of thing.
In this chapter, rather than go through all the Photoshop menus, panels, and tools (which would take several hundred very boring pages), I show you some basic operational concepts. (But don’t worry — you can read about how to use specific commands and tools throughout the book, in the chapters most appropriate for them.) Here you discover such things as how to spot which menu commands have dialog boxes, what the little symbol in the upper-right corner of a panel does, and which tools don’t use the Options bar. You also read about customizing your Photoshop environment for faster and more efficient work. Next I show you how to set up Photoshop’s Preferences and Color Settings. And to wrap up the chapter — perhaps the most important section in this entire book — I explain what to do when Photoshop doesn’t seem to be working properly.
Читать дальшеИнтервал:
Закладка:
Похожие книги на «Adobe Photoshop CC For Dummies»
Представляем Вашему вниманию похожие книги на «Adobe Photoshop CC For Dummies» списком для выбора. Мы отобрали схожую по названию и смыслу литературу в надежде предоставить читателям больше вариантов отыскать новые, интересные, ещё непрочитанные произведения.


Обсуждение, отзывы о книге «Adobe Photoshop CC For Dummies» и просто собственные мнения читателей. Оставьте ваши комментарии, напишите, что Вы думаете о произведении, его смысле или главных героях. Укажите что конкретно понравилось, а что нет, и почему Вы так считаете.