Doug Abbott - Embedded Linux development using Eclipse
Здесь есть возможность читать онлайн «Doug Abbott - Embedded Linux development using Eclipse» весь текст электронной книги совершенно бесплатно (целиком полную версию без сокращений). В некоторых случаях можно слушать аудио, скачать через торрент в формате fb2 и присутствует краткое содержание. Год выпуска: 2009, ISBN: 2009, Издательство: Elsevier, Жанр: Программирование, ОС и Сети, Программы, на английском языке. Описание произведения, (предисловие) а так же отзывы посетителей доступны на портале библиотеки ЛибКат.
- Название:Embedded Linux development using Eclipse
- Автор:
- Издательство:Elsevier
- Жанр:
- Год:2009
- ISBN:978-0-7506-8654-9
- Рейтинг книги:4 / 5. Голосов: 1
-
Избранное:Добавить в избранное
- Отзывы:
-
Ваша оценка:
Embedded Linux development using Eclipse: краткое содержание, описание и аннотация
Предлагаем к чтению аннотацию, описание, краткое содержание или предисловие (зависит от того, что написал сам автор книги «Embedded Linux development using Eclipse»). Если вы не нашли необходимую информацию о книге — напишите в комментариях, мы постараемся отыскать её.
• Overview of the latest C/C++ Development toolkit
• Includes case studies of eclipse use including Monta Vista, LynuxWorks, and WindRiver
Embedded Linux development using Eclipse — читать онлайн бесплатно полную книгу (весь текст) целиком
Ниже представлен текст книги, разбитый по страницам. Система сохранения места последней прочитанной страницы, позволяет с удобством читать онлайн бесплатно книгу «Embedded Linux development using Eclipse», без необходимости каждый раз заново искать на чём Вы остановились. Поставьте закладку, и сможете в любой момент перейти на страницу, на которой закончили чтение.
Интервал:
Закладка:
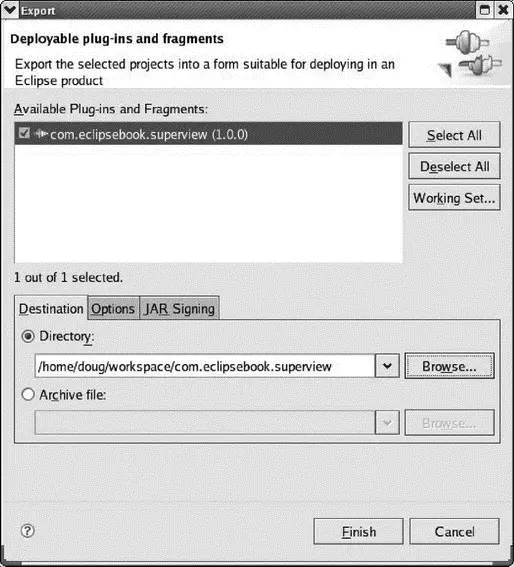
Figure 7.11: Plug-in export wizard.
Select a destination. I chose to store it back in the Superview project folder in the workspace. The wizard stores the .jarfile in a subdirectory named plugins/under the directory you specify. If you’re curious, take a look at the Optionsand JAR Signing tabs. Click Finishand the plug-in will be built.
The plug-in export wizard can also be accessed from File→Export. Select Plug-in Development→Deployable plug-ins and fragments.
That’s it! You’ve created and deployed an Eclipse plug-in.
7.5 Exploring Further
The PDE provides a number of templates that allow you to explore many features of plug-in extensions. When creating a new plug-in project, at the Plug-in Contentdialog, click Next instead of Finish as we did when we created our first plug-in. This brings up the dialog shown in Figure 7.12. Select one and you’ll get a description of what the template creates and what extensions it uses. These are complete, working examples, with reasonably well commented code.
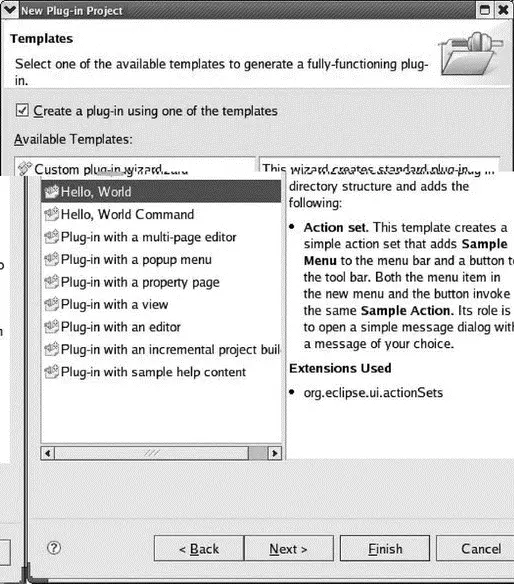
Figure 7.12: PDE plug-in templates.
Try them out!
7.6 Rich Client Platform (RCP)
Up to this point we’ve been using PDE to create plug-ins that operate from within the workbench. We can also use PDE to create so-called rich client applications that build on the Eclipse plug-in architecture, but run as independent programs. The Rich Client Platform, first introduced in version 3.0, is basically a refactoring of the fundamental parts of the Eclipse UI that allows it to be used for non-IDE applications.
Select File→New→Project…→Plug-in Project. Call it “HelloRCP.” In the Plug-in Content dialog, answer “Yes” to “Would you like to create a rich client application?” Click Nextto bring up the Templates dialog of Figure 7.13 and select Hello RCP. Click Next. This dialog is just some basic information about our trivial Hello World RCP application. Click Finish.
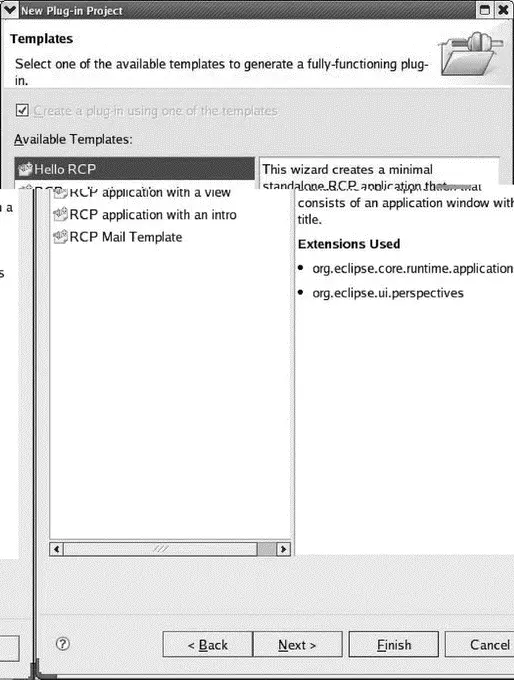
Figure 7.13: RCP Templates dialog.
The new project opens in the Manifest editor and looks pretty much like the SuperView project we created earlier. Click the Extensions tab and expand both entries. What makes this an RCP application rather than an Eclipse plug-in is that we’re creating an extension to org.eclipse.core.runtime.applications. This is the class that will be executed when the platform is started. In effect, our plug-in becomes the main application program. We’re also creating a new perspective.
Expand the HelloRCP project down to the individual .java files under hellorcpand open Application.java. This file defines a class that implements IApplication, which in turn implements both a start and a stop method.
Run the project by selecting Launch an Eclipseapplication from the Testing section of the Manifest editor Overview tab. The result (Figure 7.14) isn’t very exciting, but it does illustrate that we’ve fired off an independent application window. The code that implements the window is in ApplicationWorkbenchWindowAdvisor.java.
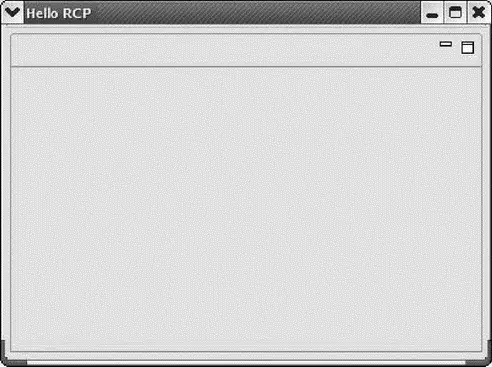
Figure 7.14: HelloRCP application window.
7.6.1 Making It a Product
Ultimately of course, we want to create a stand-alone product that doesn’t require Eclipse to run. Right-click the HelloRCP project entry and select New→Product Configuration. All you have to do is give it a File name. Call it “Hello.”
A new file shows up under the project called Hello.productand that file is opened in the Product Configuration editor. Give the product a name, say “Hello RCP.” Click the New…button to create a new product ID. The default values are fine, so just click Finish.
In the Configuration tab click Add…and select HelloRCP from the Plug-in Selection list. Then click Add Required Plug-ins. The Configuration tab should now look like Figure 7.15.
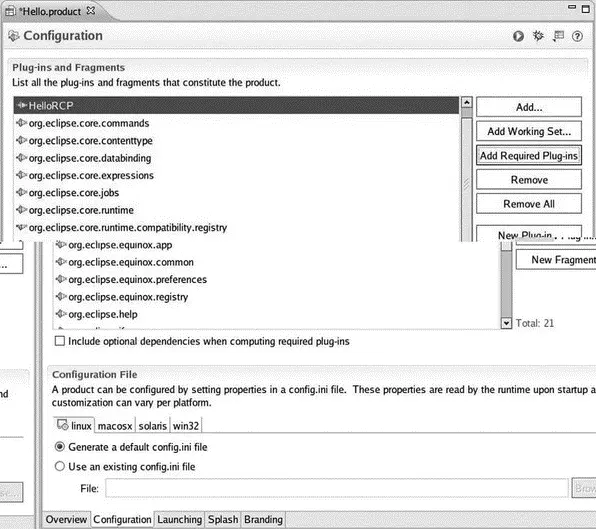
Figure 7.15: Product Configuration editor, Configuration tab.
Go back to the Overview tab, save the file, and click Synchronizeto get this configuration in sync with the plug-in. At this point it’s a good idea to test the application one more time by clicking Launch an Eclipse application. If the Hello RCP window came up correctly, then we’re ready to export the finished product.
Click on Eclipse Product export wizard. Select a relevant name for Root directory. I called it “HelloApp.” We’ll store the final application in a Destination Directory. Click Browse…, which starts in your workspace. I chose to just put it in HelloRCP. Click Finishand the final application will be built.
Go to the root directory you just created and you’ll see that the executable is called eclipse. You’ve just created a stand-alone rich client application.
A much more extensive and interesting example of a rich client application is available from the Eclipse CVS repository. Go to the CVS Repository Exploring perspective and add a new repository. The details are:
Host: dev.eclipse.org
Repository Path: /cvsroot/eclipse
User: anonymous
Password: (leave blank)
Connection Type: pserver
After connecting, expand the HEAD branch to find a very large number of projects. Scroll down to find org.eclipse.ui.examples.rcp.browser. Check out that project. Note, incidentally, that there are quite a few ui.examplesprojects. Later on, you might want to investigate some of the others.
Back in the Plug-in Development perspective, right-click the new project entry in Package Explorer and select PDE Tools→Open Manifest. In the Testing section of the manifest Overview page, click Launch an Eclipse applicationto bring up the browser window of Figure 7.16.
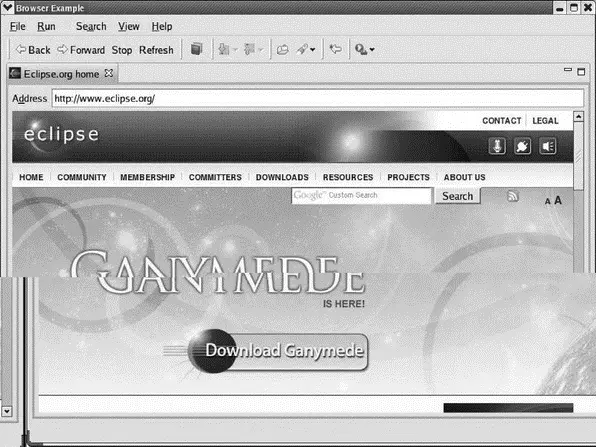
Figure 7.16: Rich Client Platform browser application.
This project already has a Browser.productfile that you can turn into a stand-alone application, as we did above with HelloRCP.
7.6.2 Embedded Rich Client Platform (eRCP)
The RCP is aimed at developing platform-independent desktop applications. So what does that have to do with embedded development, you may ask? The answer is another Eclipse project called the embedded Rich Client Platform (eRCP). This project aims to bring the power of rich client applications to embedded and mobile devices.
To explain how eRCP differs from RCP, it’s necessary to delve a little deeper into the architecture of Eclipse. Referring back to Figure 1.1, the Eclipse workbench is built on top of two hierarchical graphical toolkits. The lower level toolkit is called the Standard Widget Toolkit (SWT), a Java-defined layer sitting on top of platform-dependent GUI components. Every platform on which Eclipse runs has its own native SWT layer, but the Java side of that layer is constant.
Читать дальшеИнтервал:
Закладка:
Похожие книги на «Embedded Linux development using Eclipse»
Представляем Вашему вниманию похожие книги на «Embedded Linux development using Eclipse» списком для выбора. Мы отобрали схожую по названию и смыслу литературу в надежде предоставить читателям больше вариантов отыскать новые, интересные, ещё непрочитанные произведения.


Обсуждение, отзывы о книге «Embedded Linux development using Eclipse» и просто собственные мнения читателей. Оставьте ваши комментарии, напишите, что Вы думаете о произведении, его смысле или главных героях. Укажите что конкретно понравилось, а что нет, и почему Вы так считаете.