Doug Abbott - Embedded Linux development using Eclipse
Здесь есть возможность читать онлайн «Doug Abbott - Embedded Linux development using Eclipse» весь текст электронной книги совершенно бесплатно (целиком полную версию без сокращений). В некоторых случаях можно слушать аудио, скачать через торрент в формате fb2 и присутствует краткое содержание. Год выпуска: 2009, ISBN: 2009, Издательство: Elsevier, Жанр: Программирование, ОС и Сети, Программы, на английском языке. Описание произведения, (предисловие) а так же отзывы посетителей доступны на портале библиотеки ЛибКат.
- Название:Embedded Linux development using Eclipse
- Автор:
- Издательство:Elsevier
- Жанр:
- Год:2009
- ISBN:978-0-7506-8654-9
- Рейтинг книги:4 / 5. Голосов: 1
-
Избранное:Добавить в избранное
- Отзывы:
-
Ваша оценка:
Embedded Linux development using Eclipse: краткое содержание, описание и аннотация
Предлагаем к чтению аннотацию, описание, краткое содержание или предисловие (зависит от того, что написал сам автор книги «Embedded Linux development using Eclipse»). Если вы не нашли необходимую информацию о книге — напишите в комментариях, мы постараемся отыскать её.
• Overview of the latest C/C++ Development toolkit
• Includes case studies of eclipse use including Monta Vista, LynuxWorks, and WindRiver
Embedded Linux development using Eclipse — читать онлайн бесплатно полную книгу (весь текст) целиком
Ниже представлен текст книги, разбитый по страницам. Система сохранения места последней прочитанной страницы, позволяет с удобством читать онлайн бесплатно книгу «Embedded Linux development using Eclipse», без необходимости каждый раз заново искать на чём Вы остановились. Поставьте закладку, и сможете в любой момент перейти на страницу, на которой закончили чтение.
Интервал:
Закладка:
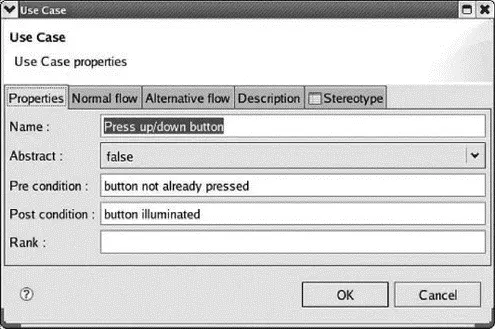
Figure 8.5: New use case dialog.
The Normal flowtab is where you describe how the system responds when the use case succeeds. In this case, two activities happen:
• Button illuminates.
• Elevator moves to passenger’s floor.
Alternative flowis what happens if something fails. Off hand, I can’t think of any actions for that circumstance. Descriptionis just additional explanatory text that doesn’t fit the other tabs.
The actor and the use case now need to be associated . Click the Add an associationicon, then click both the passenger actor and the Press up/down button use case.
You can optionally give the association a Label. Our use case diagram now looks like Figure 8.6.
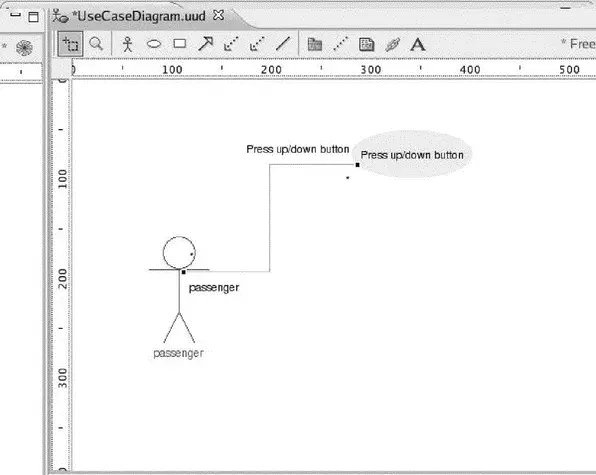
Figure 8.6: passenger and Press up/down use case.
We need one more use case for our passenger: “Press floor button.” I suggest that the Pre conditionis that “doors are open” since the passenger can’t push the button until he gets in the elevator. The Post conditionis “floor button illuminated.” The normal flow is:
1. Illuminate floor button.
2. Close doors.
3. Move to destination floor.
Create an association between the passenger and the Press floor button case. Finally, we should encapsulate our use cases inside a system . Click the Create a systembutton and drag the cursor to create a box around the two use cases. Name it “Elevator.” Oddly, the two use case ovals end up outside the system box, so drag them back into it. Figure 8.7 shows the completed diagram. Save it.
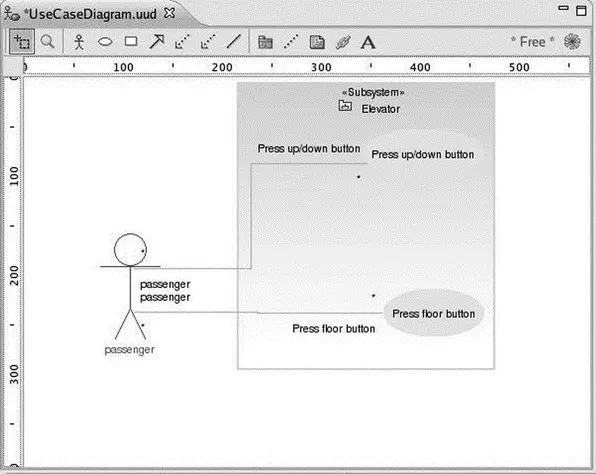
Figure 8.7: Completed use case diagram.
The information you entered into the use case diagram, as well as other diagrams, can be turned into design documentation. Unfortunately, that feature is not supported in the free version of EclipseUML.
8.1.4 Class Diagram
A system, or domain, is composed of classes and the relationships among them. The class diagram depicts these relationships and provides an overview of the domain. EclipseUML lets you define a domain model without getting bogged down in the details of creating classes, interfaces, and relationships. Wizards help you build the diagram incrementally until you have enough information to adequately describe the problem domain.
For illustration purposes, let’s say our elevator has the following classes:
• Elevator . The thing that actually moves up and down carrying passengers. The elevator has a current position that might be expressed either as a floor or as an elevation in feet. It can be directed to move up or down from its current position.
• Door . The elevator has a door that can be commanded to open or close.
• Up/Down button . Each floor has a pair of these buttons, except for the top and bottom floors. The button state can be pressed or not pressed, and it can either be illuminated or not illuminated.
• Floor button . The elevator has a set of buttons, one for each floor. Like the Up/Down buttons, these can be pressed or not pressed, illuminated or not illuminated.
• Controller . This class ties all the others together by controlling the elevator and door in response to button presses by passengers.
Right-click the elevator package in the Package Explorer view and select New UML Diagram→UML Class Diagram. Change the parent folder to elevator/models/and if you choose, delete “elevator” from the file name. The Class Diagram editor toolbar is shown in Figure 8.8. The first two icons are Selection mode and Zoom mode, as in the Use Case editor. The remaining icons are:
• Create a package
• Create a class: drop down menu
• Create an interface
• Create an enumeration
• Association: drop down menu
• Dependency: drop down menu
• Generalization
• Realization: drop down menu
• Create an Element Import: drop down menu
• Create an interface provider
• Create a require interface
• Create an interface connection
• Create a note: drop down menu
• Create an indication
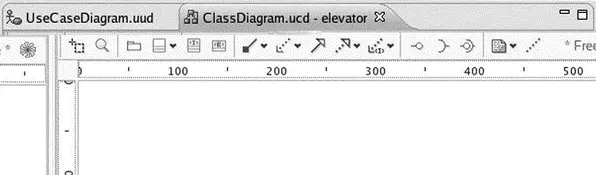
Figure 8.8: Class Diagram editor tool bar.
Click Create a classand then click somewhere in the top center of the editor. This brings up the New Java Class dialog. Name the class “Controller” and leave everything else as defaults. Click Finish. A class symbol shows up on the diagram. In the Package Explorer view a Java file, Controller.java, shows up under the elevator package.
Repeat this process for the following classes:
• Elevator
• Door
• UpDownButton
• FloorButton
The result should look something like Figure 8.9.
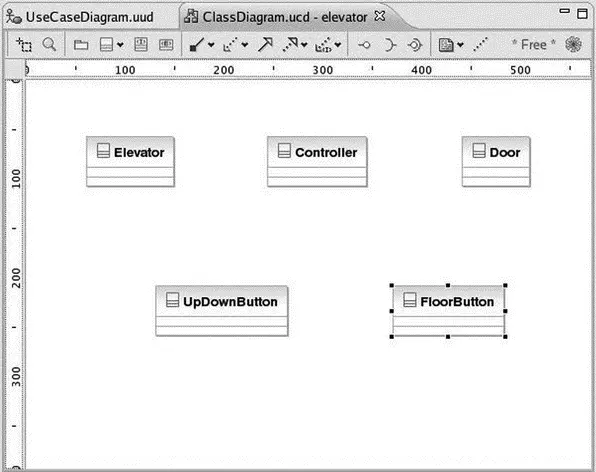
Figure 8.9: Class diagram.
Take a quick look at Controller.java. Not much there, just a stub for the Controller class. But as we add items to the class diagram, the template code will be expanded to remain in sync with the diagram.
Now that we have the classes, we need to figure out how they interact. Let’s start by creating a pair of directed associations between the Controller and the two button classes. From the Associationdrop-down menu, select Directed Association. Then click on the Controller class. The cursor changes to a plug, implying that we’re “plugging” the Controller class into something else. Now click on the UpDownButton class.
A pair of methods show up in the Controller box — getUpDownButton()and setUpDownButton(). This seems reasonable. We want to get the state of the buttons and in turn set the illumination state. Do the same thing with the FloorButton class. Our class diagram now resembles Figure 8.10.
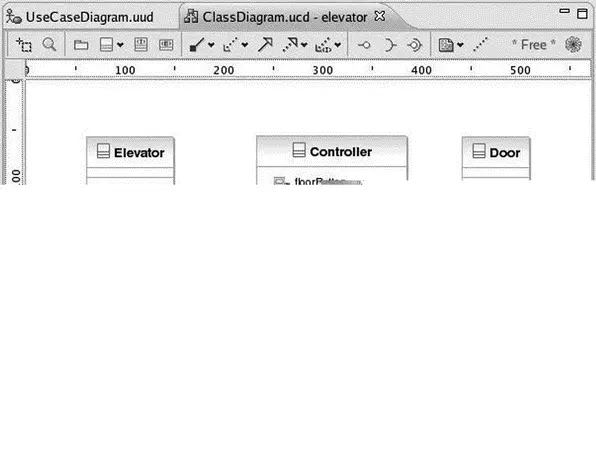
Figure 8.10: Class diagram with associations.
It might be equally useful to create directed associations with the Elevator and Door. Instead, I encourage you to investigate the other associations and connection mechanisms, to see how EclipseUML treats them. And of course, unless you’re a Java programmer with some knowledge of UML, they may not make much sense just yet.
8.1.5 Sequence Diagram
To round out our brief tour of EclipseUML, we’ll create a sequence diagram to describe the system’s response to the passenger pushing an UpDownButton. The sequence is as follows:
1. The passenger presses an UpDownButton.
2. The UpDownButton sends an update to the Controller.
3. The Controller illuminates the button and moves the Elevator to the specified floor.
4. The Elevator signals that it has reached the floor.
5. The Controller stops the Elevator and turns off the UpDownButton illumination.
Читать дальшеИнтервал:
Закладка:
Похожие книги на «Embedded Linux development using Eclipse»
Представляем Вашему вниманию похожие книги на «Embedded Linux development using Eclipse» списком для выбора. Мы отобрали схожую по названию и смыслу литературу в надежде предоставить читателям больше вариантов отыскать новые, интересные, ещё непрочитанные произведения.


Обсуждение, отзывы о книге «Embedded Linux development using Eclipse» и просто собственные мнения читателей. Оставьте ваши комментарии, напишите, что Вы думаете о произведении, его смысле или главных героях. Укажите что конкретно понравилось, а что нет, и почему Вы так считаете.