Wei-Meng Lee - C# 2008 Programmer's Reference
Здесь есть возможность читать онлайн «Wei-Meng Lee - C# 2008 Programmer's Reference» весь текст электронной книги совершенно бесплатно (целиком полную версию без сокращений). В некоторых случаях можно слушать аудио, скачать через торрент в формате fb2 и присутствует краткое содержание. Город: Indianapolis, Год выпуска: 2009, ISBN: 2009, Издательство: Wiley Publishing, Inc., Жанр: Программирование, на английском языке. Описание произведения, (предисловие) а так же отзывы посетителей доступны на портале библиотеки ЛибКат.
- Название:C# 2008 Programmer's Reference
- Автор:
- Издательство:Wiley Publishing, Inc.
- Жанр:
- Год:2009
- Город:Indianapolis
- ISBN:978-0-470-28581-7
- Рейтинг книги:4 / 5. Голосов: 1
-
Избранное:Добавить в избранное
- Отзывы:
-
Ваша оценка:
C# 2008 Programmer's Reference: краткое содержание, описание и аннотация
Предлагаем к чтению аннотацию, описание, краткое содержание или предисловие (зависит от того, что написал сам автор книги «C# 2008 Programmer's Reference»). Если вы не нашли необходимую информацию о книге — напишите в комментариях, мы постараемся отыскать её.
C# 2008 Programmer's Reference — читать онлайн бесплатно полную книгу (весь текст) целиком
Ниже представлен текст книги, разбитый по страницам. Система сохранения места последней прочитанной страницы, позволяет с удобством читать онлайн бесплатно книгу «C# 2008 Programmer's Reference», без необходимости каждый раз заново искать на чём Вы остановились. Поставьте закладку, и сможете в любой момент перейти на страницу, на которой закончили чтение.
Интервал:
Закладка:
To print the image to a printer, use the PrintDialogclass to let the user choose the desired printer (see Figure 16-16) instead of sending the output directly to the default printer:
private void btnPrint_Click(object sender, EventArgs e) {
//---let user select a printer to print---
PrintDialog pd = new PrintDialog() {
Document = printDoc, AllowSomePages = true
};
DialogResult result = pd.ShowDialog();
if (result == DialogResult.OK) printDoc.Print();
}
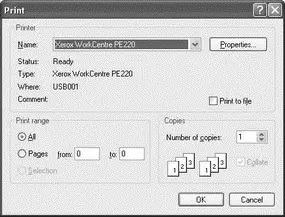
Figure 16-16
Figure 16-17 shows the output if the user indicated that he wanted to print from page 1 to 3 (in Form1). Note the page number displayed below the image.
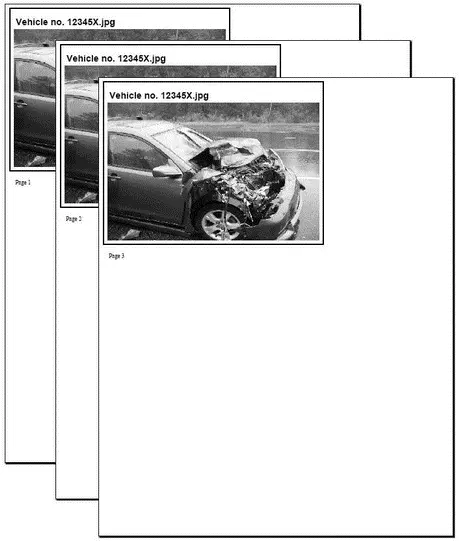
Figure 16-17
Deploying the Application
Now the application is ready to be deployed to your customers. One of the most challenging tasks faced by Windows application developers today is the deployment of their applications on the client machines. Once an application is deployed, any change to or maintenance of the application requires redeployment. Worse, with so many different client configurations, updating a Windows application is always fraught with unknowns.
Beginning with Visual Studio 2005, Microsoft rolled out a new deployment technology known as ClickOnce, which makes such deployments and even updates extremely easy and painless. ClickOnce was designed specifically to ease the deployment of Windows applications, in particular smart clients. A smart client is basically a Windows application that leverages local resources and intelligently connects to distributed data sources (such as Web Services) as and when needed. While a lot of companies are deploying web applications (due to the web's ubiquitous access) today, network latencies and server delays are some of the problems that prevent developers from reaping the full benefits of the web. Common frustrations over web applications include slow response time from web sites and limited functionality (due to the stateless nature of the HTTP protocol). A smart client aims to reap the benefit of the rich functionality of the client (Windows), while at the same time utilizing the power of Web Services in the backend.
Using ClickOnce, a Windows application can be deployed through the convenience of a web server, file servers, or even CDs. Once an application is installed using ClickOnce, it can automatically check for new updates to the application from the publisher, saving a lot of effort in maintenance and application upgrades. On the security front, ClickOnce applications run within a secure sandbox and are configured using the Code Access Security model.
Publishing the Application Using ClickOnce
Deploying your application using ClickOnce is very straightforward. In Visual Studio 2008, select Build→Publish PhotoViewer (see Figure 16-18).
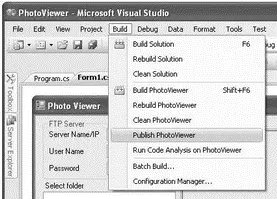
Figure 16-18
The Publish Wizard (see Figure 16-19) opens. By default, your application will be published to the local web server (IIS) using the path shown in the textbox. However, you can also publish your application using a disk path, file share, FTP, or an external web server. For this example, use the default and click Next.
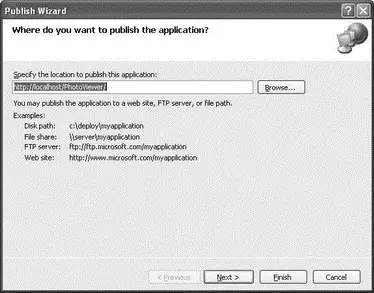
Figure 16-19
In the next page, indicate if the application is available both online and offline or available online only. Accept the default selection, and click Next to proceed to the next step.
In the next page, click Finish to complete the wizard and start the publishing process. When publishing is completed, a web page ( publish.htm) appears; it contains a link to install the application (see Figure 16-20).
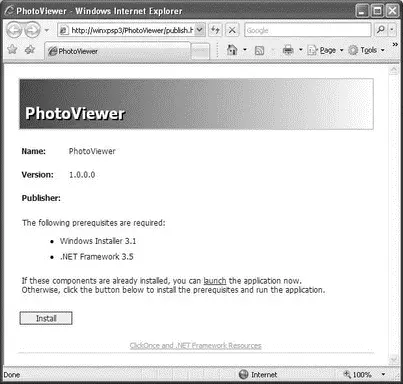
Figure 16-20
The Publish.htmpage lists the following:
□ Name, Version, and Publisher information
□ Prerequisites required for your application (automatically generated based on the application you are deploying)
The URL http:///PhotoViewer/publish.htmis the deployment location of your application. Users who want to install this application through ClickOnce simply need to go to this URL, using their web browser. You provide the URL to your users through email, brochures, and so on.
To install the application, click the Install button. You are presented with:
□ File Download dialog— Security Warning prompt. Click Run to download the application.
□ Internet Explorer dialog— Security Warning. Click Run to proceed with the installation.
□ Application Install dialog— Security Warning. Click Install to install the application (see Figure 16-21).
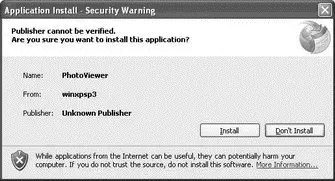
Figure 16-21
Once installed, the application is launched automatically. You can also launch the application from Start→Programs→PhotoViewer→PhotoViewer.
Updating the Application
Let's now update the application so that you can republish the application and see how the changes can be updated on the client side. For simplicity, move the Preview button to the left of the Print from label control as shown in Figure 16-22. This will enable you to verify that the application has been updated after it is republished.
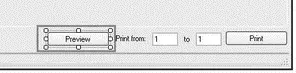
Figure 16-22
To republish the application, simply select Build→Publish PhotoViewer again. When the Publish Wizard appears, click Finish so that it can publish the application using the default settings.
Each time you publish the application, the version number of the application is incremented automatically. That's controlled by the Publish settings page in the project's properties page (see Figure 16-23).
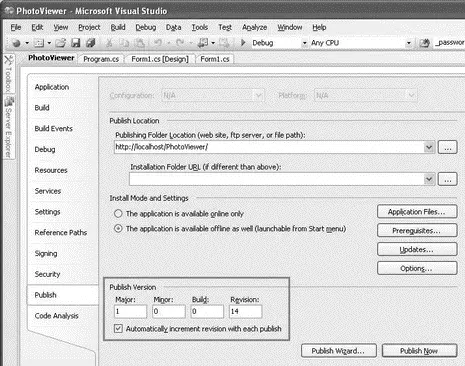
Figure 16-23
In addition, the Publish settings page also contains the Updates button, which enables you to specify how and when the application should check for updates (see Figure 16-24).
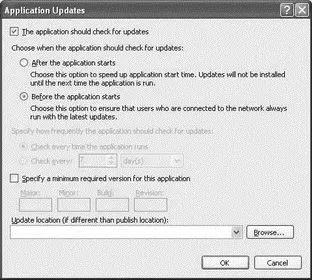
Figure 16-24
Читать дальшеИнтервал:
Закладка:
Похожие книги на «C# 2008 Programmer's Reference»
Представляем Вашему вниманию похожие книги на «C# 2008 Programmer's Reference» списком для выбора. Мы отобрали схожую по названию и смыслу литературу в надежде предоставить читателям больше вариантов отыскать новые, интересные, ещё непрочитанные произведения.


Обсуждение, отзывы о книге «C# 2008 Programmer's Reference» и просто собственные мнения читателей. Оставьте ваши комментарии, напишите, что Вы думаете о произведении, его смысле или главных героях. Укажите что конкретно понравилось, а что нет, и почему Вы так считаете.