Brad Williams - Professional WordPress Plugin Development
Здесь есть возможность читать онлайн «Brad Williams - Professional WordPress Plugin Development» — ознакомительный отрывок электронной книги совершенно бесплатно, а после прочтения отрывка купить полную версию. В некоторых случаях можно слушать аудио, скачать через торрент в формате fb2 и присутствует краткое содержание. Жанр: unrecognised, на английском языке. Описание произведения, (предисловие) а так же отзывы посетителей доступны на портале библиотеки ЛибКат.
- Название:Professional WordPress Plugin Development
- Автор:
- Жанр:
- Год:неизвестен
- ISBN:нет данных
- Рейтинг книги:4 / 5. Голосов: 1
-
Избранное:Добавить в избранное
- Отзывы:
-
Ваша оценка:
Professional WordPress Plugin Development: краткое содержание, описание и аннотация
Предлагаем к чтению аннотацию, описание, краткое содержание или предисловие (зависит от того, что написал сам автор книги «Professional WordPress Plugin Development»). Если вы не нашли необходимую информацию о книге — напишите в комментариях, мы постараемся отыскать её.
addresses modern plugin development for WordPress, the highly popular content management system (CMS). If you’re using WordPress to create and manage websites, WordPress plugins are the software that can extend or enhance CMS functionality. This book offers guidance on writing plugins for WordPress sites to share or sell to other users.
The second edition of
covers the building of advanced plugin development scenarios. It discusses the plugin framework and coding standards as well as dashboards, settings, menus, and related application programming interfaces (APIs). Additional topics include security, performance, data validation, and SQL statements.
• Learn about the power of hooks in WordPress
• Discover how JavaScript and Ajax will work in your site
• Understand key technologies: Block Editor/Gutenberg, JS/React, PHP, and the REST API
• Create and use custom post types and taxonomies.
• Creating custom dashboard menus and plugin settings
• Work with users and user data
• Schedule tasks and utilizing Cron
• Performance and security considerations
Written by experienced plugin developers,
also helps you internationalize and localize your WordPress website. Find out about debugging systems and optimizing your site for speed. As WordPress use continues to increase, you can elevate your professional knowledge of how to extend WordPress through plugins.
Professional WordPress Plugin Development — читать онлайн ознакомительный отрывок
Ниже представлен текст книги, разбитый по страницам. Система сохранения места последней прочитанной страницы, позволяет с удобством читать онлайн бесплатно книгу «Professional WordPress Plugin Development», без необходимости каждый раз заново искать на чём Вы остановились. Поставьте закладку, и сможете в любой момент перейти на страницу, на которой закончили чтение.
Интервал:
Закладка:
Now let's look at the custom function for displaying the radio button field, pdev_plugin_setting_beast_mode().
// Display and set the Beast Mode radio button field function pdev_plugin_setting_beast_mode() { // Get option 'beast_mode' value from the database // Set to 'disabled' as a default if the option does not exist $options = get_option( 'pdev_plugin_options', [ 'beast_mode' => 'disabled' ] ); $beast_mode = $options['beast_mode']; // Define the radio button options $items = array( 'enabled', 'disabled' ); foreach( $items as $item ) { // Loop the two radio button options and select if set in the option value echo "" . esc_html( $item ) . "
"; } }
This example registers a new radio button field allowing the user to select if they want to enable beast mode or not. Again, you'll use get_option()to load the current setting value, and if it doesn't exist, the default value disabledis set. Next, you'll define the two values in the $itemsarray. Now you need to loop through the two options displaying the radio button. The checked()function is used to compare the saved value against the display value and, if they are the same, to input checked="checked"on the radio button form field.
Now that you have registered two new settings fields and created the custom functions to display both fields, you need to update your validate function to accept those values and sanitize them as needed.
// Validate user input for all three options function pdev_plugin_validate_options( $input ) { // Only allow letters and spaces for the name $valid['name'] = preg_replace( '/[^a-zA-Z\s]/', '', $input['name'] ); if( $valid['name'] !== $input['name'] ) { add_settings_error( 'pdev_plugin_text_string', 'pdev_plugin_texterror', 'Incorrect value entered! Please only input letters and spaces.', 'error' ); } // Sanitize the data we are receiving $valid['fav_holiday'] = sanitize_text_field( $input['fav_holiday'] ); $valid['beast_mode'] = sanitize_text_field( $input['beast_mode'] ); return $valid; }
The only update here is to run the two new option values through the sanitize_text_field()WordPress function to sanitize the user‐inputted data. Even though the values are hard‐coded in the form, that doesn't stop a user from modifying the frontend form code and posting unknown data to these setting fields. You'll cover this more in Chapter 4.
That's it! You now have a more robust settings page for your plugin. Let's review the entire plugin source code with your new settings fields.
My plugin
Adding Fields to an Existing Page
You have seen how to create a new custom settings page for a plugin and its associated entry in the administration menus. Doing so makes sense if your plugin features a lot of settings and its administration page shows a lot of content.
Sometimes, though, it is not worth adding a new menu entry for just one or a few plugin options. Here again the Settings API will prove to be useful, allowing plugin setting fields to easily be added to the existing WordPress setting pages.
How It Works
Two internal functions, do_settings_sections()and do_settings_fields(), are triggered to draw sections and fields that have been previously registered, like you did in the example plugin.
Each core setting page calls these two functions, so you can hook into them if you know their slug name.
Adding a Section to an Existing Page
Your previous plugin was adding a whole new section and its input field on a stand‐alone page. You now modify it to insert this content into WordPress’ Privacy Settings page.
Notice that the first parameter passed in the register_setting()function call is set to reading. This function now adds your custom section into the readingsection, which is located within the Reading Settings page, as shown in Figure 3‐6. Replace all readinginstances with media, and your section will be appended at the end of the Media Settings page.
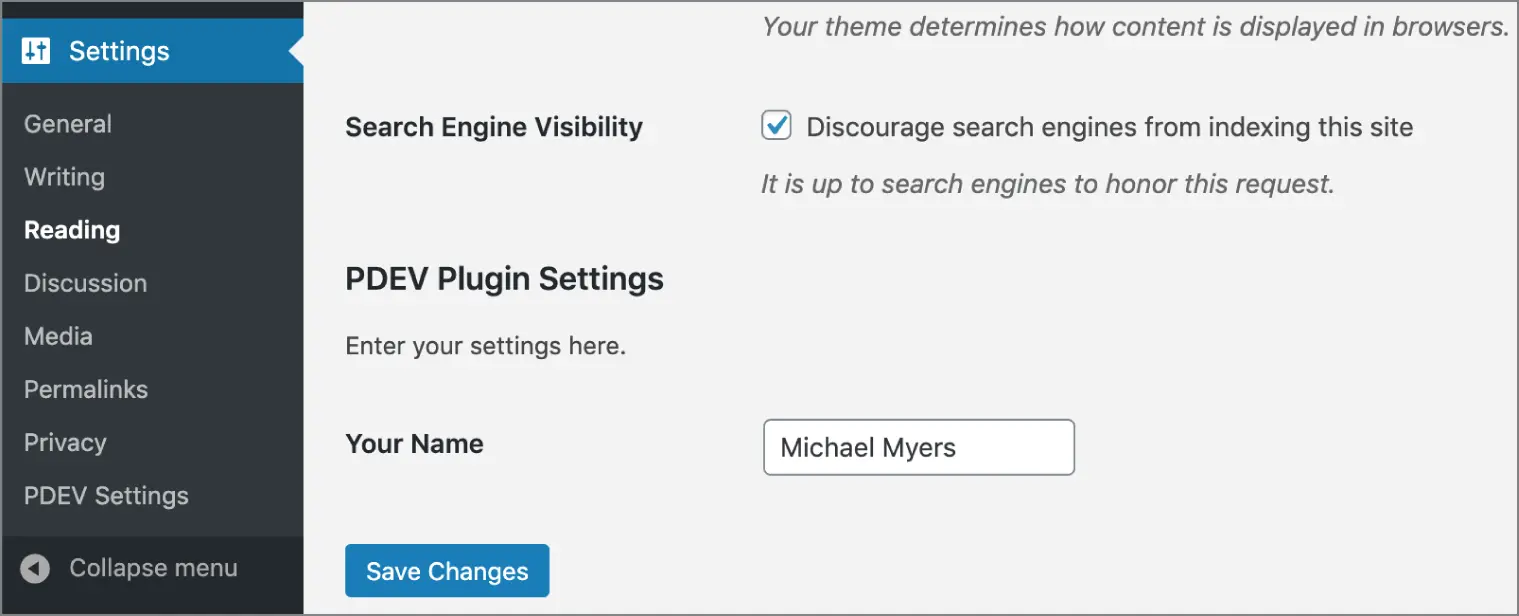
FIGURE 3‐6 : Section appended
You still need to whitelist this setting, with register_setting(). Omitting this step would make WordPress ignore the setting when submitting the form.
Adding Only Fields
Of course, it can even make sense to add just one field and no section header to an existing page. Now modify the function in the previous example as shown here:
Your singular field will be added to the defaultfield set of the readingsection, as shown in Figure 3‐7.
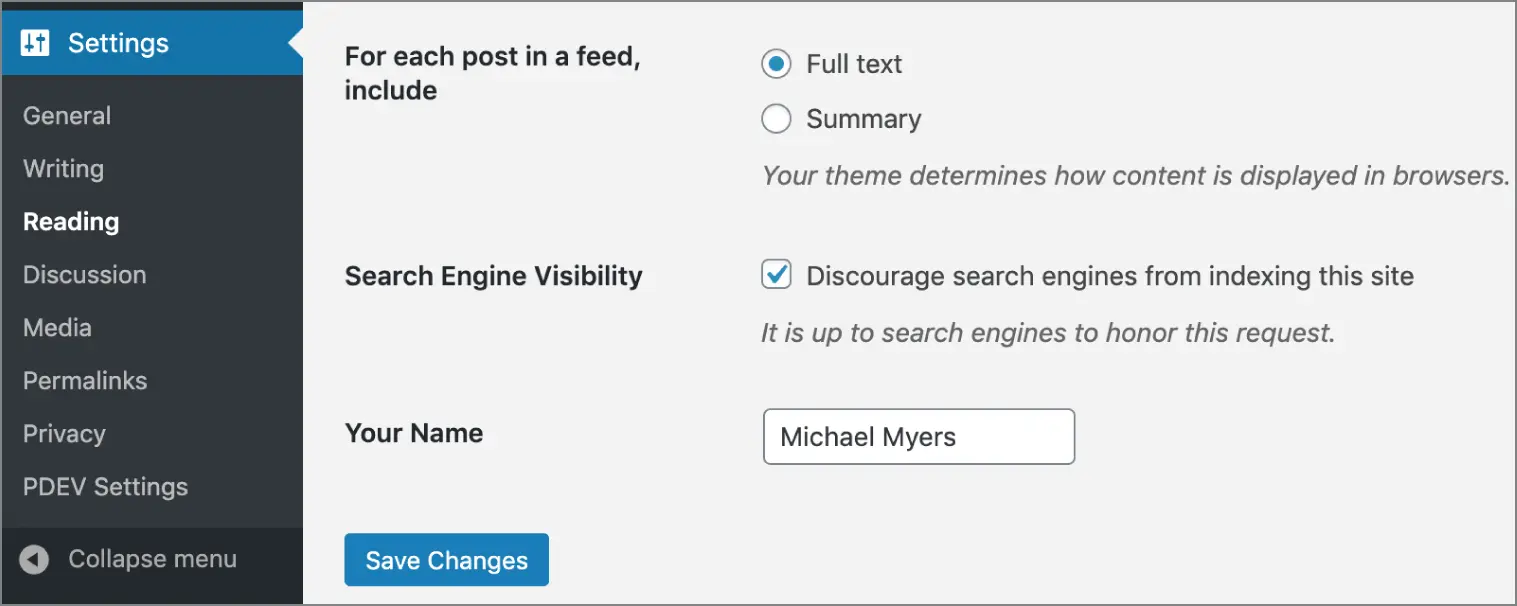
FIGURE 3‐7 : Singular field
WordPress’ Sections and Setting Fields
To add a section to an existing page or a field to an existing section, all you need to know is the slug name of the page. Table 3‐1includes every section and field set names found in the WordPress Settings pages.
TABLE 3-1 : List of Core Sections and Fields
| WORDPRESS’ SETTINGS PAGES | SECTION NAMES | FIELD SET NAMES |
General Settings ( options‐general.php) |
general |
default |
Writing Settings ( options‐writing.php) |
writing |
default remote_publishing post_via_email |
Reading Settings ( options‐reading.php) |
reading |
default |
Discussion Settings ( options‐discussion.php) |
discussion |
default avatars |
Media Settings ( options‐media.php) |
media |
default embeds uploads |
Permalink Settings ( options‐permalink.php) |
permalink |
optional |
User Interface Concerns
Electing to add your plugin settings to a separate page or to a core WordPress page is often a matter of choosing the right user interface for the right end user.
When working on a site for a client, you may focus on delivering a key‐in‐hand CMS solution and not on explaining what is WordPress and what is a plugin extending its features. Adding your plugin settings to a core Settings page can enhance its integration into WordPress’ backend because it won't appear different from other core settings. From the client's point of view, your plugin is a core element just as any other built‐in feature.
On the contrary, if you intend to make your plugin available for download, you can target people who probably understand the concept of adding new features to a core set. These people will naturally search for a custom menu where they can manage your plugin. If you opt for adding fields to an existing page, be sure to explicitly tell users about it, for instance in the plugin documentation.
Removing Settings
As a professional plugin developer, it's important to create a high‐quality experience for your users, which includes tasks that are rarely noticed. In this case you're going to learn how to remove settings that your plugin has created when it is uninstalled in WordPress.
Читать дальшеИнтервал:
Закладка:
Похожие книги на «Professional WordPress Plugin Development»
Представляем Вашему вниманию похожие книги на «Professional WordPress Plugin Development» списком для выбора. Мы отобрали схожую по названию и смыслу литературу в надежде предоставить читателям больше вариантов отыскать новые, интересные, ещё непрочитанные произведения.


Обсуждение, отзывы о книге «Professional WordPress Plugin Development» и просто собственные мнения читателей. Оставьте ваши комментарии, напишите, что Вы думаете о произведении, его смысле или главных героях. Укажите что конкретно понравилось, а что нет, и почему Вы так считаете.