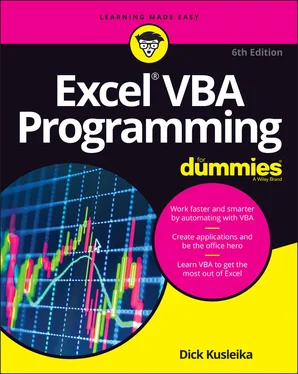
Dick Kusleika - Excel VBA Programming For Dummies
Здесь есть возможность читать онлайн «Dick Kusleika - Excel VBA Programming For Dummies» — ознакомительный отрывок электронной книги совершенно бесплатно, а после прочтения отрывка купить полную версию. В некоторых случаях можно слушать аудио, скачать через торрент в формате fb2 и присутствует краткое содержание. Жанр: unrecognised, на английском языке. Описание произведения, (предисловие) а так же отзывы посетителей доступны на портале библиотеки ЛибКат.
- Название:Excel VBA Programming For Dummies
- Автор:
- Жанр:
- Год:неизвестен
- ISBN:нет данных
- Рейтинг книги:3 / 5. Голосов: 1
-
Избранное:Добавить в избранное
- Отзывы:
-
Ваша оценка:
- 60
- 1
- 2
- 3
- 4
- 5
Excel VBA Programming For Dummies: краткое содержание, описание и аннотация
Предлагаем к чтению аннотацию, описание, краткое содержание или предисловие (зависит от того, что написал сам автор книги «Excel VBA Programming For Dummies»). Если вы не нашли необходимую информацию о книге — напишите в комментариях, мы постараемся отыскать её.
Excel VBA Programming For Dummies
Excel VBA, Excel VBA Programming For Dummies
Excel VBA Programming For Dummies — читать онлайн ознакомительный отрывок
Ниже представлен текст книги, разбитый по страницам. Система сохранения места последней прочитанной страницы, позволяет с удобством читать онлайн бесплатно книгу «Excel VBA Programming For Dummies», без необходимости каждый раз заново искать на чём Вы остановились. Поставьте закладку, и сможете в любой момент перейти на страницу, на которой закончили чтение.
Интервал:
Закладка:
Excel 2010 and later also have some new objects, methods, and properties. If you use these in your code, users with an older version of Excel will receive an error when they run your macro — and you’ll get the blame.
Chapter 2
Building Simple Macros
IN THIS CHAPTER
 Developing a useful VBA macro: A hands-on, step-by-step example
 Recording your actions by using Excel’s macro recorder
 Examining and running recorded code
 Changing a recorded macro
 Dealing with macro security issues
The best way to get into a cold body of water is to jump right in — no sense prolonging the agony. By wading through this chapter, you can get your feet wet immediately but avoid getting in over your head.
By the time you reach the end of this chapter, you’ll start feeling better about this Excel programming business, and you’ll be glad you took the plunge. This chapter provides a step-by-step demonstration of how to develop a simple but useful VBA macro.
Displaying the Developer Tab
Before you can call yourself an Excel programmer, you need to learn the secret handshake. That means you need to make a small change so that Excel will display a new tab at the top of the screen: Developer. Getting Excel to display the Developer tab is easy (and you only have to do it once). Just follow these steps:
1 Right-click any part of the Ribbon and choose Customize the Ribbon from the shortcut menu.
2 In the Customize Ribbon tab of the Excel Options dialog box, locate Developer in the box on the right.
3 Put a check mark next to Developer.
4 Click OK.You’re back to Excel with a brand-new tab: Developer.
When you click the Developer tab, the Ribbon displays information that is of interest to programmers (that’s you!). Figure 2-1 shows how the Ribbon looks when the Developer tab is selected.

FIGURE 2-1:The Developer tab is normally hidden, but it’s easy to unhide.
Creating a Macro
In this chapter, you create your first macro. The macro that you create does the following:
Types your name in a cell
Enters the current date and time in the cell below
Formats both cells to display bold
Changes the font size of both cells to 16 point
This macro won’t be winning any prizes for Most Complicated Macro of the Year, but everyone must start somewhere. (And here’s a secret: The macros you use the most are the simplest ones.) This macro accomplishes all these steps in a single action. As I describe in the following sections, you start by recording your actions as you go through these steps. Then you test the macro to see whether it works. Finally, you edit the macro to add some finishing touches.
Preparing the Environment
This section describes the steps you take prior to recording the macro. In other words, you need to make a few preparations before the fun begins:
1 Start Excel, if it’s not already running.
2 If necessary, create a new, empty workbook.Pressing Ctrl+N is a quick way to do that.
3 Click the Developer tab, and then take a look at the Use Relative References button in the Code group.If the color of that button is different from the other buttons, you’re in good shape. If the Use Relative References button is the same color as the other buttons, you need to click it to enable this option.
You explore the Relative References button in Chapter 6. For now, just make sure that the option is turned on. When it’s turned on, the Use Relative References button is a different color from the other buttons in the group.
Recording a Macro
Here comes the hands-on part. Follow these instructions carefully:
1 Select a cell.Any cell will do.
2 Choose Developer ⇒ Code ⇒ Record Macro, or click the Macro Recording button on the status bar.The Record Macro dialog box appears, as shown in Figure 2-2. FIGURE 2-2:The Record Macro dialog box appears when you’re about to record a macro.
3 Enter a name for the macro.Excel provides a default name (something like Macro1 ), but it’s better to use a more descriptive name. NameAndTime (with no spaces) is a good name for this macro.
4 Click the Shortcut Key box, and enter Shift+N (for an uppercase N) as the shortcut key. Specifying a shortcut key is optional. If you do specify one, you can execute the macro by pressing a key combination — in this case, Ctrl+Shift+N. Be aware that if you assign a common shortcut key (for instance, Ctrl+C), you lose the normal functionality for that shortcut key; Excel will trigger your macro instead.
5 Verify that the Store Macro In setting is This Workbook.
6 (Optional) Enter some text in the Description box.Some people like to describe what the macro does (or is supposed to do).Figure 2-3 shows the Record Macro dialog box filled in with a name, optional shortcut, and optional description. FIGURE 2-3:The completed Record Macro dialog box.
7 Click OK.The Record Macro dialog box closes, Excel’s macro recorder is turned on, and the Record Macro button’s caption is changed to Stop Recording. From this point, Excel monitors everything you do and converts it to VBA code.
8 Type your name in the active cell.
9 Select the cell below and enter this formula: =NOW()The formula displays the current date and time.
10 Select the formula cell, and press Ctrl+C to copy that cell to the Clipboard.
11 Choose Home ⇒ Clipboard ⇒ Paste ⇒ Values (V).This command converts the formula to its value.
12 Select both the cell with your name and the one with the date and time.
13 Use the controls in the Home ⇒ Font group to change the formatting to Bold and make the font size 16 point.
14 Choose Developer ⇒ Code ⇒ Stop Recording.The macro recorder is turned off.
Congratulations! You just recorded your first Excel VBA macro. You might want to phone your mother and tell her the good news.
Running the Macro
Once you’ve finished writing your macro, it’s time to see if it actually works. The following are some of the ways to run a macro:
Press the shortcut key. If you created a shortcut key sequence for your macro, you can run it by press those keys. For example, in the previous section you assigned Ctrl+Shift+N in the Macro Options dialog. If you hold down Ctrl and Shift, and press N, your macro will insert your name and the date and format them.
Choose Developer ⇒ Code ⇒ Macros. This shows the Macro dialog where you can select your macro and click Run.
Run it from the VBE. Open the VBE, place the cursor anywhere within your macro, and choose Run ⇒ Run Sub/UserForm from the menu (or press F5).
Assign the macro to the Quick Access toolbar. Right-click on the Quick Access toolbar and choose Customize Quick Access Toolbar to show the Excel Options dialog. Choose Macros from the Choose commands from the drop-down dialog box and add your macro. Click OK to close the dialog. Now you can click the tool on the Quick Access toolbar to run the macro.
Читать дальшеИнтервал:
Закладка:
Похожие книги на «Excel VBA Programming For Dummies»
Представляем Вашему вниманию похожие книги на «Excel VBA Programming For Dummies» списком для выбора. Мы отобрали схожую по названию и смыслу литературу в надежде предоставить читателям больше вариантов отыскать новые, интересные, ещё непрочитанные произведения.
Обсуждение, отзывы о книге «Excel VBA Programming For Dummies» и просто собственные мнения читателей. Оставьте ваши комментарии, напишите, что Вы думаете о произведении, его смысле или главных героях. Укажите что конкретно понравилось, а что нет, и почему Вы так считаете.
