Mark Murphy - Beginning Android
Здесь есть возможность читать онлайн «Mark Murphy - Beginning Android» весь текст электронной книги совершенно бесплатно (целиком полную версию без сокращений). В некоторых случаях можно слушать аудио, скачать через торрент в формате fb2 и присутствует краткое содержание. Город: New York, Год выпуска: 2009, ISBN: 2009, Издательство: Apress, Жанр: Программирование, на английском языке. Описание произведения, (предисловие) а так же отзывы посетителей доступны на портале библиотеки ЛибКат.

- Название:Beginning Android
- Автор:
- Издательство:Apress
- Жанр:
- Год:2009
- Город:New York
- ISBN:978-1-4302-2420-4
- Рейтинг книги:3 / 5. Голосов: 1
-
Избранное:Добавить в избранное
- Отзывы:
-
Ваша оценка:
Beginning Android: краткое содержание, описание и аннотация
Предлагаем к чтению аннотацию, описание, краткое содержание или предисловие (зависит от того, что написал сам автор книги «Beginning Android»). Если вы не нашли необходимую информацию о книге — напишите в комментариях, мы постараемся отыскать её.
Dear Reader,
First, welcome to the world of Android! We’re entering a new era of mobile application development, one marked by open platforms and open source, to take ‘walled gardens’ and make them green houses for any and all to participate in. Android is relatively easy for developers, and I believe that this innovation will help generate a large ecosystem of developers and consumers within a very short time. This means that budding developers such as yourself will have many opportunities to design and build your own applications and you’ll have a huge and hungry customer base.
Second, welcome to the book! Its purpose is to start you on your way with building Android applications, and to help you master the learning curve. Android is already a rich framework, comparable in many ways to the richness Android of desktop Java environments. This means that there is a lot of cool stuff for you to pick up along your journey in order to create the slickest, most useful apps Android you can imagine.
The source code for the code samples in this book is all available from the Apress site, so you can stay as hands-on and practical as you like while I introduce you to the core of Android, and invite you to experiment with the various classes and APIs we’ll be looking at. By the time you’ve finished this book, you’ll be creating your own Android applications and asking yourself what your next great application will be…!
Enjoy! Mark Murphy
Beginning Android — читать онлайн бесплатно полную книгу (весь текст) целиком
Ниже представлен текст книги, разбитый по страницам. Система сохранения места последней прочитанной страницы, позволяет с удобством читать онлайн бесплатно книгу «Beginning Android», без необходимости каждый раз заново искать на чём Вы остановились. Поставьте закладку, и сможете в любой момент перейти на страницу, на которой закончили чтение.
Интервал:
Закладка:
To manually flip the views, we need to hook into the Buttonand flip them ourselves when the button is clicked:
public classFlipperDemo extendsActivity {
ViewFlipper flipper;
@Override
publicvoid onCreate(Bundle icicle) {
super. onCreate(icicle);
setContentView(R.layout.main);
flipper = (ViewFlipper) findViewById(R.id.details);
Button btn = (Button) findViewById(R.id.flip_me);
btn. setOnClickListener( newView. OnClickListener() {
publicvoid onClick(View view) {
flipper. showNext();
}
});
}
}
This is just a matter of calling showNext()on the ViewFlipper, like you can on any ViewAnimatorclass.
The result is a trivial activity: click the button, and the next TextViewin sequence is displayed, wrapping around to the first after viewing the last (see Figures 10-9 and 10-10).
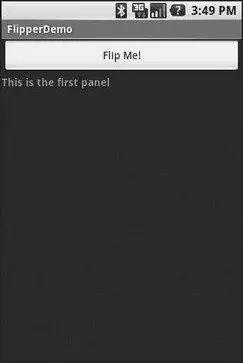
Figure 10-9. The Flipper1 application, showing the first panel
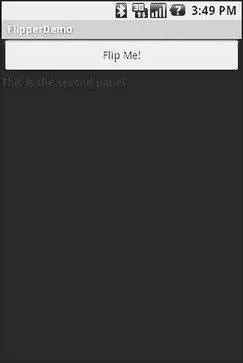
Figure 10-10. The same application, after switching to the second panel
This, of course, could be handled more simply by having a single TextViewand changing the text and color on each click. However, you can imagine that the ViewFlippercontents could be much more complicated, like the contents you might put into a TabView.
As with the TabWidget, sometimes, your ViewFlippercontents may not be known at compile time. As with TabWidget, though, you can add new contents on the fly with ease.
For example, let’s look at another sample activity ( Fancy/Flipper2), using this layout:
android:orientation="vertical"
android:layout_width="fill_parent"
android:layout_height="fill_parent"
>
android:layout_width="fill_parent"
android:layout_height="fill_parent"
>
Notice that the ViewFlipperhas no contents at compile time. Also note that there is no Buttonfor flipping between the contents — more on this in a moment.
For the ViewFlippercontents, we will create large Buttonwidgets, each containing one of a set of random words. And, we will set up the ViewFlipperto automatically rotate between the Buttonwidgets, using an animation for transition:
public classFlipperDemo2 extendsActivity {
staticString[] items={"lorem", "ipsum", "dolor", "sit", "amet",
"consectetuer", "adipiscing", "elit",
"morbi", "vel", "ligula", "vitae",
"arcu", "aliquet", "mollis", "etiam",
"vel", "erat", "placerat", "ante",
"porttitor", "sodales", "pellentesque",
"augue", "purus"};
ViewFlipper flipper;
@Override
publicvoid onCreate(Bundle icicle) {
super. onCreate(icicle);
setContentView(R.layout.main);
flipper = (ViewFlipper) findViewById(R.id.details);
flipper. setInAnimation(AnimationUtils. loadAnimation( this,
R.anim.push_left_in));
flipper. setOutAnimation(AnimationUtils. loadAnimation( this,
R.anim.push_left_out));
for(String item : items) {
Button btn = new Button( this);
btn. setText(item);
flipper. addView(btn,
newViewGroup. LayoutParams(
ViewGroup.LayoutParams.FILL_PARENT,
ViewGroup.LayoutParams.FILL_PARENT));
}
flipper. setFlipInterval(2000);
flipper. startFlipping();
}
}
After getting our ViewFlipperwidget from the layout, we first set up the “in” and “out” animations. In Android terms, an animation is a description of how a widget leaves (”out”) or enters (”in”) the viewable area. Animations are a complex beast, eventually worthy of their own chapter but not covered in this text. For now, realize that animations are resources, stored in res/anim/in your project. For this example, we are using a pair of animations supplied by the SDK samples, available under the Apache 2.0 License. As their names suggest, widgets are “pushed” to the left, either to enter or leave the viewable area.
After iterating over the funky words, turning each into a Button, and adding the Buttonas a child of the ViewFlipper, we set up the flipper to automatically flip between children ( flipper.setFlipInterval(2000);) and to start flipping ( flipper.startFlipping();).
The result is an endless series of buttons, each appearing, then sliding out to the left after 2 seconds, being replaced by the next button in sequence, wrapping around to the first after the last has been shown (see Figure 10-11).
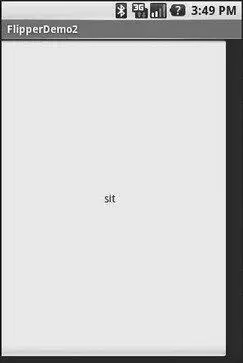
Figure 10-11. The Flipper2 application, showing an animated transition
The auto-flipping ViewFlipperis useful for status panels or other situations where you have a lot of information to display, but not much room. The key is that, since it automatically flips between views, expecting users to interact with individual views is dicey — the view might switch away part-way through their interaction.
Other Containers of Note
Android offers AbsoluteLayout, where the contents are laid out based on specific coordinate positions. You tell AbsoluteLayoutwhere to place a child in precise X,Y coordinates, and Android puts it there, no questions asked. On the plus side, this gives you precise positioning. On the minus side, it means your views will only look “right” on screens of a certain dimension, or it requires you to write a bunch of code to adjust the coordinates based on screen size. Since Android screens might run the gamut of sizes, plus have new sizes crop up periodically, using AbsoluteLayoutcould get quite annoying.
Android also has a new flavor of list, the ExpandableListView. This provides a simplified tree representation, supporting two levels of depth: groups and children. Groups contain children; children are “leaves” of the tree. This requires a new set of adapters, since the ListAdapterfamily does not provide any sort of group information for the items in the list.
Интервал:
Закладка:
Похожие книги на «Beginning Android»
Представляем Вашему вниманию похожие книги на «Beginning Android» списком для выбора. Мы отобрали схожую по названию и смыслу литературу в надежде предоставить читателям больше вариантов отыскать новые, интересные, ещё непрочитанные произведения.


Обсуждение, отзывы о книге «Beginning Android» и просто собственные мнения читателей. Оставьте ваши комментарии, напишите, что Вы думаете о произведении, его смысле или главных героях. Укажите что конкретно понравилось, а что нет, и почему Вы так считаете.