William Stanek - Windows Server 2012 R2 Storage, Security, & Networking Pocket Consultant
Здесь есть возможность читать онлайн «William Stanek - Windows Server 2012 R2 Storage, Security, & Networking Pocket Consultant» весь текст электронной книги совершенно бесплатно (целиком полную версию без сокращений). В некоторых случаях можно слушать аудио, скачать через торрент в формате fb2 и присутствует краткое содержание. Жанр: ОС и Сети, на английском языке. Описание произведения, (предисловие) а так же отзывы посетителей доступны на портале библиотеки ЛибКат.
- Название:Windows Server 2012 R2 Storage, Security, & Networking Pocket Consultant
- Автор:
- Жанр:
- Год:неизвестен
- ISBN:нет данных
- Рейтинг книги:3 / 5. Голосов: 1
-
Избранное:Добавить в избранное
- Отзывы:
-
Ваша оценка:
Windows Server 2012 R2 Storage, Security, & Networking Pocket Consultant: краткое содержание, описание и аннотация
Предлагаем к чтению аннотацию, описание, краткое содержание или предисловие (зависит от того, что написал сам автор книги «Windows Server 2012 R2 Storage, Security, & Networking Pocket Consultant»). Если вы не нашли необходимую информацию о книге — напишите в комментариях, мы постараемся отыскать её.
Windows Server 2012 R2 Storage, Security, & Networking Pocket Consultant — читать онлайн бесплатно полную книгу (весь текст) целиком
Ниже представлен текст книги, разбитый по страницам. Система сохранения места последней прочитанной страницы, позволяет с удобством читать онлайн бесплатно книгу «Windows Server 2012 R2 Storage, Security, & Networking Pocket Consultant», без необходимости каждый раз заново искать на чём Вы остановились. Поставьте закладку, и сможете в любой момент перейти на страницу, на которой закончили чтение.
Интервал:
Закладка:
6.Select Reverse Lookup Zone, and then tap or click Next.
7.Choose whether you want to create a reverse lookup zone for IPv4 or IPv6 addresses, and then tap or click Next. Do one of the following:
■If you are configuring a reverse lookup zone for IPv4, enter the network ID for the reverse lookup zone. The values you enter set the default name for the reverse lookup zone. Tap or click Next.
■If you have multiple subnets on the same network, such as 192.168.10 and 192.168.11, you can enter only the network portion for the zone name. For example, you could enter 192.168. In this case, you’d have 168.192.in-addr.arpa as the zone name and allow the DNS Manager console to create the necessary subnet zones when needed.
■If you are configuring a reverse lookup zone for IPv6, enter the network prefix for the reverse lookup zone. The values you enter are used to automatically generate the related zone names. Depending on the prefix you enter, you can create up to eight zones. Tap or click Next.
8.If you’re configuring a primary or secondary server that isn’t integrated with Active Directory, you need to set the zone file name. A default name for the zone’s DNS database file should be filled in for you. You can use this name or enter a new file name. Tap or click Next.
9.Specify whether dynamic updates are allowed. You have three options:
■ Allow Only Secure Dynamic UpdatesWhen the zone is integrated with Active Directory, you can use ACLs to restrict which clients can perform dynamic updates. With this option selected, only clients with authorized computer accounts and approved ACLs can dynamically update their resource records in DNS when changes occur.
■ Allow Both Nonsecure And Secure Dynamic UpdatesChoose this option to allow any client to update its resource records in DNS when changes occur. Clients can be secure or nonsecure.
■ Do Not Allow Dynamic UpdatesChoosing this option disables dynamic updates in DNS. You should use this option only when the zone isn’t integrated with Active Directory.
10.Tap or click Next, and then tap or click Finish. The new zone is added to the server, and basic DNS records are created automatically.
After you set up the reverse lookup zones, you need to ensure that delegation for the zones is handled properly. Contact your networking team or your ISP to ensure that the zones are registered with the parent domain.
Configuring global names
The GlobalNames zone is a specially named forward lookup zone that should be integrated with AD DS. When all the DNS servers for your zones are running Windows Server 2008 or later releases, deploying a GlobalNames zone creates static, global records with single-label names, without relying on WINS. This enables users to access hosts by using single-label names rather than fully qualified domain names. You should use the GlobalNames zone when name resolution depends on DNS, such as when your organization is no longer using WINS and you are planning to deploy only IPv6. Because dynamic updates cannot be used to register updates in the GlobalNames zone, you should configure single-label name resolution only for your primary servers.
You can deploy a GlobalNames zone by completing the following steps:
1.In the DNS Manager console, select a DNS server that is also a domain controller. If the server you want to configure isn’t listed, connect to it as described previously in “Installing and configuring the DNS Server service.”
2.Press and hold or right-click the Forward Lookup Zones node, and then tap or click New Zone. In the New Zone Wizard, tap or click Next to accept the defaults to create a primary zone integrated with AD DS. On the Active Directory Zone Replication Scope page, choose to replicate the zone throughout the forest, and then tap or click Next. On the Zone Name page, enter GlobalNamesas the zone name. Tap or click Next twice, and then tap or click Finish.
3.On every authoritative DNS server in the forest now and in the future, you need to enter the following at an elevated shell prompt:
Set-DnsServerGlobalNameZone -ComputerName ServerName -Enable $True
ServerName is the name of the DNS server that hosts the GlobalNames zone. To specify the local computer, just omit the -ComputerName parameter, such as
Set-DnsServerGlobalNameZone -Enable $True
4.For each server that you want users to be able to access by using a singlelabel name, add an alias (CNAME) record to the GlobalNames zone. In the DNS Manager console, press and hold or right-click the GlobalNames node, select New Alias (CNAME), and then use the dialog box provided to create the new resource record.
NOTE An authoritative DNS server tries to resolve queries in the following order: by using local zone data, by using the GlobalNames zone, by using DNS suffixes, by using WINS. For dynamic updates, an authoritative DNS server checks the GlobalNames zone before checking the local zone data.
TIP If you want DNS clients in another forest to use the GlobalNames zone for resolving names, you need to add an SRV resource record with the service name _globalnames._msdcs to that forest’s forestwide DNS partition. The record must specify the FQDN of the DNS server that hosts the GlobalNames zone.
Managing DNS servers

The DNS Manager console is the tool you use to manage local and remote DNS servers. As shown in Figure 9–4, the DNS Manager console’s main window is divided into two panes. The left pane makes it possible for you to access DNS servers and their zones. The right pane shows the details for the currently selected item. You can work with the DNS Manager console in three ways:
■Double-tap or double-click an entry in the left pane to expand the list of files for the entry.
■Select an entry in the left pane to display details such as zone status and domain records in the right pane.
■Press and hold or right-click an entry to display a context menu.
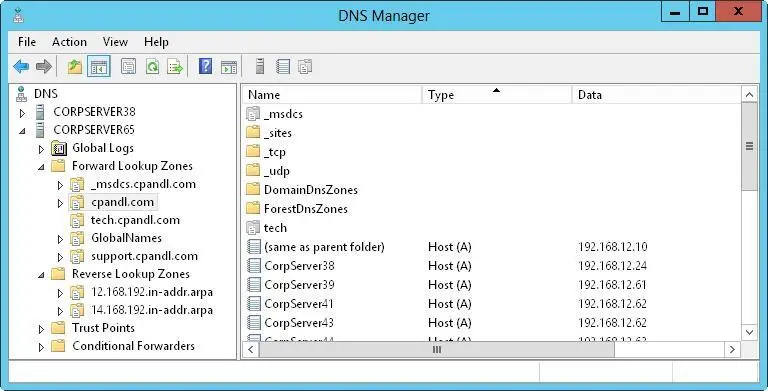
FIGURE 9–4Manage local and remote DNS servers by using the DNS Manager console.
The Forward Lookup Zones and Reverse Lookup Zones folders provide access to the domains and subnets configured for use on this server. When you select domain or subnet folders in the left pane, you can manage DNS records for the domain or subnet.
Adding and removing servers to manage
You can use the DNS Manager console to manage servers running DNS by following these steps:
1.Press and hold or right-click DNS in the console tree, and then tap or click Connect To DNS Server.
2.If you’re trying to connect to the local computer, select This Computer. Otherwise, select The Following Computer, and then enter the IP address or fully qualified host name of the remote computer with which you want to connect.
3.Tap or click OK. Windows Server 2012 R2 attempts to contact the server. If it makes contact, it adds the server to the console.
NOTE If a server is offline or otherwise inaccessible because of security restrictions or problems with the Remote Procedure Call (RPC) service, the connection fails. You can still add the server to the console by tapping or clicking Yes when prompted.
Читать дальшеИнтервал:
Закладка:
Похожие книги на «Windows Server 2012 R2 Storage, Security, & Networking Pocket Consultant»
Представляем Вашему вниманию похожие книги на «Windows Server 2012 R2 Storage, Security, & Networking Pocket Consultant» списком для выбора. Мы отобрали схожую по названию и смыслу литературу в надежде предоставить читателям больше вариантов отыскать новые, интересные, ещё непрочитанные произведения.


Обсуждение, отзывы о книге «Windows Server 2012 R2 Storage, Security, & Networking Pocket Consultant» и просто собственные мнения читателей. Оставьте ваши комментарии, напишите, что Вы думаете о произведении, его смысле или главных героях. Укажите что конкретно понравилось, а что нет, и почему Вы так считаете.