Andy Pike - DirectX 8 Programming Tutorial
Здесь есть возможность читать онлайн «Andy Pike - DirectX 8 Programming Tutorial» весь текст электронной книги совершенно бесплатно (целиком полную версию без сокращений). В некоторых случаях можно слушать аудио, скачать через торрент в формате fb2 и присутствует краткое содержание. Жанр: Программирование, на английском языке. Описание произведения, (предисловие) а так же отзывы посетителей доступны на портале библиотеки ЛибКат.
- Название:DirectX 8 Programming Tutorial
- Автор:
- Жанр:
- Год:неизвестен
- ISBN:нет данных
- Рейтинг книги:5 / 5. Голосов: 1
-
Избранное:Добавить в избранное
- Отзывы:
-
Ваша оценка:
DirectX 8 Programming Tutorial: краткое содержание, описание и аннотация
Предлагаем к чтению аннотацию, описание, краткое содержание или предисловие (зависит от того, что написал сам автор книги «DirectX 8 Programming Tutorial»). Если вы не нашли необходимую информацию о книге — напишите в комментариях, мы постараемся отыскать её.
DirectX 8 Programming Tutorial — читать онлайн бесплатно полную книгу (весь текст) целиком
Ниже представлен текст книги, разбитый по страницам. Система сохранения места последней прочитанной страницы, позволяет с удобством читать онлайн бесплатно книгу «DirectX 8 Programming Tutorial», без необходимости каждый раз заново искать на чём Вы остановились. Поставьте закладку, и сможете в любой момент перейти на страницу, на которой закончили чтение.
Интервал:
Закладка:
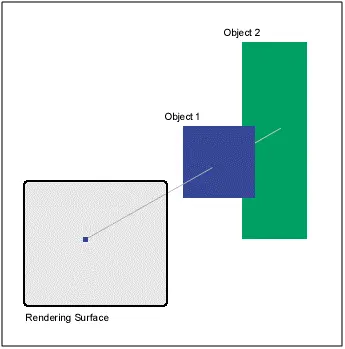
Fig 4.1
To use a depth buffer in your program is pretty easy. All you need to do is select the correct format in your InitialiseD3D function, enable depth buffering and ensure that you clear the depth buffer in your Render function. In the source for this tutorial (download above), I have added some code to select a depth buffer format in the InitialiseD3Dmethod of CGame. There are two properties of the D3DPRESENT_PARAMETERS structure that need to be set:
d3dpp.AutoDepthStencilFormat = D3DFMT_D16;
d3dpp.EnableAutoDepthStencil = TRUE;
To enable depth buffering, you need to add the following line to your InitialiseD3D method.
m_pD3DDevice->SetRenderState(D3DRS_ZENABLE, D3DZB_TRUE);
Then in the Rendermethod of CGame, make sure that you clear the depth buffer as well as the back buffer by adding the D3DCLEAR_ZBUFFER flag to the device clear method, shown below.
m_pD3DDevice->Clear(0, NULL, D3DCLEAR_TARGET|D3DCLEAR_ZBUFFER, D3DCOLOR_XRGB(0, 0, 0), 1.0f, 0);
To make our program full screen we need to make a few adjustments to our InitialiseD3D method. We need to change the "Windowed" property of our D3DPRESENT_PARAMETERS structure to FALSE, this specifies that the program will run full screen. Then, we need to set two full screen properties of the D3DPRESENT_PARAMETERS structure. FullScreen_RefreshRateInHz controls the refresh rate of the screen, and FullScreen_PresentationInterval controls the maximum rate that you swap chain (back buffer chain) are flipped. We have selected D3DPRESENT_INTERVAL_ONE which specifies that flipping will only occur when the monitor refreshes.
d3dpp.Windowed = FALSE;
d3dpp.FullScreen_RefreshRateInHz = D3DPRESENT_RATE_DEFAULT;
d3dpp.FullScreen_PresentationInterval = D3DPRESENT_INTERVAL_ONE;
Also, we need to select the correct back buffer format for our device. I have written a method, CheckDisplayMode, which will test for a valid format. This method is called in InitialiseD3D.
D3DFORMAT CGame::CheckDisplayMode(UINT nWidth, UINT nHeight, UINT nDepth) {
UINT x;
D3DDISPLAYMODE d3ddm;
for (x = 0; x < m_pD3D->GetAdapterModeCount(0); x++) {
m_pD3D->EnumAdapterModes(0, x, &d3ddm);
if (d3ddm.Width == nWidth) {
if (d3ddm.Height == nHeight) {
if ((d3ddm.Format == D3DFMT_R5G6B5) || (d3ddm.Format == D3DFMT_X1R5G5B5) || (d3ddm.Format == D3DFMT_X4R4G4B4)) {
if (nDepth == 16) {
return d3ddm.Format;
}
} else if((d3ddm.Format == D3DFMT_R8G8B8) || (d3ddm.Format == D3DFMT_X8R8G8B8)) {
if (nDepth == 32) {
return d3ddm.Format;
}
}
}
}
}
return D3DFMT_UNKNOWN;
}
The only other thing we need to do is modify our WinMain function that created our window. We need to set the x and y positions of the window to be 0 (top left) and we need to change the width and height to the screen size using the GetSystemMetricsfunction.
I have also added the ability to create a log file, this can prove useful when debugging. I have added to methods to CGame: EnableLoggingand WriteToLog. I call EnableLogging in WinMain just after the CGame object has been created, this method clears the current log and enables logging. WriteToLog simply writes text to the log file if logging is enabled. When the program closes down, statistics are also added to the log file. You should notice that the frames per second stat is no higher than your monitor refresh rate, this is due to setting d3dpp.FullScreen_PresentationInterval = D3DPRESENT_INTERVAL_ONE. The log file is called "log.txt" and should be in your project folder once the code has been run for the first time.
You should finish up with six rotating cuboids of different sizes and positions (shown below).
We haven't really added a lot of code in this tutorial, but we have re-organised it into classes. Take some time to familiarise yourself with the new structure, you'll see that most of the functions are unchanged. Full screen rendering and depth buffers are pretty straightforward, now that we've created them we don't really need to worry about them any further. In the next tutorial we will look into matrix transformations. We touched on them in the last tutorial, but this time we will go a little further and demonstrate the power of matrix transformations.
DirectX Tutorial 5: Matrix Transformations
In this tutorial we will look more into matrix transformations. With matrix transformations you can rotate, scale and move vertices (and therefore objects). We will see how to rotate five cubes, all in a different way. One around the x axis, one around the y axis, one around the z axis, one around a user defined axis and we'll scale and rotate another cube around all three axis (x, y and z). You can download the full source code by clicking the "Download Source" link above.
Well, matrices are quite an advanced maths topic so I'll try my best to explain the basics. A matrix is a grid of numbers that we can use in 3D graphics to modify the position of vertices (points in 3D space). Some of the main uses for matrices in 3D graphics are to rotate, scale and translate (move) vertices. So, what does a matrix look like? In DirectX, a matrix is a 4x4 grid of numbers; Fig 5.1 below shows an example matrix that will scale a vertex by five units:
Fig 5.1
OK, so how can a matrix change the position values of a vertex? To modify the x, y and z values of a vertex you need to multiply them by the matrix. Fig 5.2 below shows an example of multiplying a vertex by a matrix:
Fig 5.2
This is a pretty simple calculation, all you need to do is multiply each of the x, y and z values by the columns one by one. Each column will give you one of the new values for the vertex. You may notice that in the "current vertex" in our example, we have added a 1 after the z value. This is simply to balance the vertex against the matrix. You need to have the same number of values, as there are columns for the transformation to work correctly.
So, all you need to rotate, scale or translate (move) a vertex is the correct matrix. Luckily for you, DirectX has a number of functions for generating these common matrices. What if you want to scale AND rotate some vertices? Well, first you need to have two matrices, one for the rotation and one for the scale. Then you need to multiply the two matrices (for scale and rotate) together to form one new matrix that scales and rotates. This new matrix is then applied to the vertices. You must be careful to have the matrices in the right order. MatrixA X MatrixB will give you a different answer than MatrixB X MatrixA. Fig 5.3 shows how to multiply two matrices together:
Fig 5.3
To multiply two matrices together you need to multiply each row in the first matrix with each column in the second. In the example above, we have multiplied the first row (in the first matrix) by each column (in the second matrix). These four calculations will give us the top row of our answer matrix. To calculate the other three rows, simply multiply the second, third and forth rows in the first matrix by each column in the second. As I said above, DirectX has a built in function for multiplying two matrices, so don't worry too much about this!
Читать дальшеИнтервал:
Закладка:
Похожие книги на «DirectX 8 Programming Tutorial»
Представляем Вашему вниманию похожие книги на «DirectX 8 Programming Tutorial» списком для выбора. Мы отобрали схожую по названию и смыслу литературу в надежде предоставить читателям больше вариантов отыскать новые, интересные, ещё непрочитанные произведения.


Обсуждение, отзывы о книге «DirectX 8 Programming Tutorial» и просто собственные мнения читателей. Оставьте ваши комментарии, напишите, что Вы думаете о произведении, его смысле или главных героях. Укажите что конкретно понравилось, а что нет, и почему Вы так считаете.