Mark Murphy - Beginning Android
Здесь есть возможность читать онлайн «Mark Murphy - Beginning Android» весь текст электронной книги совершенно бесплатно (целиком полную версию без сокращений). В некоторых случаях можно слушать аудио, скачать через торрент в формате fb2 и присутствует краткое содержание. Город: New York, Год выпуска: 2009, ISBN: 2009, Издательство: Apress, Жанр: Программирование, на английском языке. Описание произведения, (предисловие) а так же отзывы посетителей доступны на портале библиотеки ЛибКат.

- Название:Beginning Android
- Автор:
- Издательство:Apress
- Жанр:
- Год:2009
- Город:New York
- ISBN:978-1-4302-2420-4
- Рейтинг книги:3 / 5. Голосов: 1
-
Избранное:Добавить в избранное
- Отзывы:
-
Ваша оценка:
Beginning Android: краткое содержание, описание и аннотация
Предлагаем к чтению аннотацию, описание, краткое содержание или предисловие (зависит от того, что написал сам автор книги «Beginning Android»). Если вы не нашли необходимую информацию о книге — напишите в комментариях, мы постараемся отыскать её.
Dear Reader,
First, welcome to the world of Android! We’re entering a new era of mobile application development, one marked by open platforms and open source, to take ‘walled gardens’ and make them green houses for any and all to participate in. Android is relatively easy for developers, and I believe that this innovation will help generate a large ecosystem of developers and consumers within a very short time. This means that budding developers such as yourself will have many opportunities to design and build your own applications and you’ll have a huge and hungry customer base.
Second, welcome to the book! Its purpose is to start you on your way with building Android applications, and to help you master the learning curve. Android is already a rich framework, comparable in many ways to the richness Android of desktop Java environments. This means that there is a lot of cool stuff for you to pick up along your journey in order to create the slickest, most useful apps Android you can imagine.
The source code for the code samples in this book is all available from the Apress site, so you can stay as hands-on and practical as you like while I introduce you to the core of Android, and invite you to experiment with the various classes and APIs we’ll be looking at. By the time you’ve finished this book, you’ll be creating your own Android applications and asking yourself what your next great application will be…!
Enjoy! Mark Murphy
Beginning Android — читать онлайн бесплатно полную книгу (весь текст) целиком
Ниже представлен текст книги, разбитый по страницам. Система сохранения места последней прочитанной страницы, позволяет с удобством читать онлайн бесплатно книгу «Beginning Android», без необходимости каждый раз заново искать на чём Вы остановились. Поставьте закладку, и сможете в любой момент перейти на страницу, на которой закончили чтение.
Интервал:
Закладка:
• Determine if the phone is in use via getCallState(), with return values of CALL_STATE_IDLE(phone not in use), CALL_STATE_RINGING(call requested but still being connected), and CALL_STATE_OFFHOOK(call in progress)
• Find out the SIM ID (IMSI) via getSubscriberId()
• Find out the phone type (e.g., GSM) via getPhoneType()or find out the data connection type (e.g., GPRS, EDGE) via getNetworkType()
You Make the Call!
You can also initiate a call from your application, such as from a phone number you obtained through your own Web service. To do this, simply craft an ACTION_DIAL Intentwith a Uriof the form tel:NNNNN(where NNNNNis the phone number to dial) and use that Intentwith startActivity(). This will not actually dial the phone; rather, it activates the dialer activity, from which the user can then press a button to place the call.
For example, let’s look at the Phone/Dialersample application. Here’s the crude-but-effective layout:
android:orientation="vertical"
android:layout_width="fill_parent"
android:layout_height="fill_parent"
>
android:orientation="horizontal"
android:layout_width="fill_parent"
android:layout_height="wrap_content"
>
android:layout_width="wrap_content"
android:layout_height="wrap_content"
android:text="Number to dial:"
/>
android:layout_width="fill_parent"
android:layout_height="wrap_content"
android:cursorVisible="true"
android:editable="true"
android:singleLine="true"
/>
android:layout_width="fill_parent"
android:layout_height="wrap_content"
android:layout_weight="1"
android:text="Dial It!"
/>
We have a labeled field for typing in a phone number, plus a button for dialing said number.
The Java code simply launches the dialer using the phone number from the field:
packagecom.commonsware.android.dialer;
importandroid.app.Activity;
importandroid.content.Intent;
importandroid.net.Uri;
importandroid.os.Bundle;
importandroid.view.View;
importandroid.widget.Button;
importandroid.widget.EditText;
public classDialerDemo extendsActivity {
@Override
publicvoid onCreate(Bundle icicle) {
super. onCreate(icicle);
setContentView(R.layout.main);
finalEditText number = (EditText) findViewById(R.id.number);
Button dial = (Button) findViewById(R.id.dial);
dial. setOnClickListener( newButton. OnClickListener() {
publicvoid onClick(View v) {
String toDial = "tel:" + number. getText(). toString();
startActivity( new Intent(Intent.ACTION_DIAL,
Uri. parse(toDial)));
}
});
}
}
The activity’s own UI is not that impressive as shown in Figure 35-1.
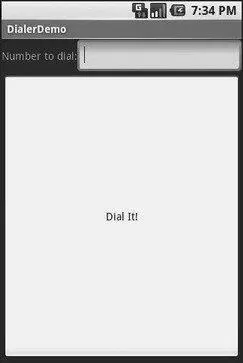
Figure 35-1. The DialerDemo sample application, as initially launched
However, the dialer you get from clicking the dial button is better, showing you the number you are about to dial in Figure 35-2.

Figure 35-2. The Android Dialer activity, as launched from DialerDemo
CHAPTER 36
Searching with SearchManager
One of the firms behind the Open Handset Alliance — Google — has a teeny-weeny Web search service, one you might have heard of in passing. Given that, it’s not surprising that Android has some built-in search capabilities. Specifically, Android has baked in the notion of searching not only on the device for data, but over the air to Internet sources of data. Your applications can participate in the search process by triggering searches or perhaps by allowing your application’s data to be searched.
Note that this is fairly new to the Android platform, and so some shifting in the APIs is likely.
Hunting Season
There are two types of search in Android: local and global. Local search searches within the current application; global search searches the Web via Google’s search engine. You can initiate either type of search in a variety of ways, including the following:
• You can call onSearchRequested()from a button or menu choice, which will initiate a local search (unless you override this method in your activity).
• You can directly call startSearch()to initiate a local or global search, including optionally supplying a search string to use as a starting point.
• You can elect to have keyboard entry kick off a search via setDefaultKeyMode(), for either local search ( setDefaultKeyMode(DEFAULT_KEYS_SEARCH_LOCAL)) or global search ( setDefaultKeyMode(DEFAULT_KEYS_SEARCH_GLOBAL)).
In either case, the search appears as a set of UI components across the top of the screen, with your activity blurred underneath it (see Figures 36-1 and 36-2).
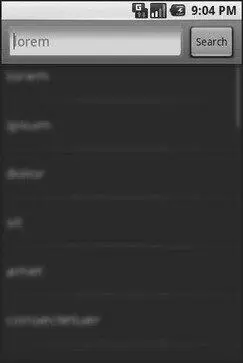
Figure 36-1. The Android local search pop-up
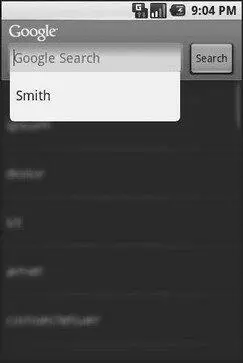
Figure 36-2. The Android global search pop-up, showing a drop-down with previous searches
Search Yourself
Over the long haul, there will be two flavors of search available via the Android search system:
• Query-style search, where the user’s search string is passed to an activity that is responsible for conducting the search and displaying the results
• Filter-style search, where the user’s search string is passed to an activity on every key press, and the activity is responsible for updating a displayed list of matches
Since the latter approach is under heavy development right now by the Android team, let’s focus on the first one.
Craft the Search Activity
The first thing you’ll want to do if you want to support query-style search in your application is to create a search activity. While it might be possible to have a single activity be both opened from the launcher and opened from a search, that might prove somewhat confusing to users. Certainly, for the purposes of learning the techniques, having a separate activity is cleaner.
Читать дальшеИнтервал:
Закладка:
Похожие книги на «Beginning Android»
Представляем Вашему вниманию похожие книги на «Beginning Android» списком для выбора. Мы отобрали схожую по названию и смыслу литературу в надежде предоставить читателям больше вариантов отыскать новые, интересные, ещё непрочитанные произведения.


Обсуждение, отзывы о книге «Beginning Android» и просто собственные мнения читателей. Оставьте ваши комментарии, напишите, что Вы думаете о произведении, его смысле или главных героях. Укажите что конкретно понравилось, а что нет, и почему Вы так считаете.