Mark Murphy - Beginning Android
Здесь есть возможность читать онлайн «Mark Murphy - Beginning Android» весь текст электронной книги совершенно бесплатно (целиком полную версию без сокращений). В некоторых случаях можно слушать аудио, скачать через торрент в формате fb2 и присутствует краткое содержание. Город: New York, Год выпуска: 2009, ISBN: 2009, Издательство: Apress, Жанр: Программирование, на английском языке. Описание произведения, (предисловие) а так же отзывы посетителей доступны на портале библиотеки ЛибКат.

- Название:Beginning Android
- Автор:
- Издательство:Apress
- Жанр:
- Год:2009
- Город:New York
- ISBN:978-1-4302-2420-4
- Рейтинг книги:3 / 5. Голосов: 1
-
Избранное:Добавить в избранное
- Отзывы:
-
Ваша оценка:
Beginning Android: краткое содержание, описание и аннотация
Предлагаем к чтению аннотацию, описание, краткое содержание или предисловие (зависит от того, что написал сам автор книги «Beginning Android»). Если вы не нашли необходимую информацию о книге — напишите в комментариях, мы постараемся отыскать её.
Dear Reader,
First, welcome to the world of Android! We’re entering a new era of mobile application development, one marked by open platforms and open source, to take ‘walled gardens’ and make them green houses for any and all to participate in. Android is relatively easy for developers, and I believe that this innovation will help generate a large ecosystem of developers and consumers within a very short time. This means that budding developers such as yourself will have many opportunities to design and build your own applications and you’ll have a huge and hungry customer base.
Second, welcome to the book! Its purpose is to start you on your way with building Android applications, and to help you master the learning curve. Android is already a rich framework, comparable in many ways to the richness Android of desktop Java environments. This means that there is a lot of cool stuff for you to pick up along your journey in order to create the slickest, most useful apps Android you can imagine.
The source code for the code samples in this book is all available from the Apress site, so you can stay as hands-on and practical as you like while I introduce you to the core of Android, and invite you to experiment with the various classes and APIs we’ll be looking at. By the time you’ve finished this book, you’ll be creating your own Android applications and asking yourself what your next great application will be…!
Enjoy! Mark Murphy
Beginning Android — читать онлайн бесплатно полную книгу (весь текст) целиком
Ниже представлен текст книги, разбитый по страницам. Система сохранения места последней прочитанной страницы, позволяет с удобством читать онлайн бесплатно книгу «Beginning Android», без необходимости каждый раз заново искать на чём Вы остановились. Поставьте закладку, и сможете в любой момент перейти на страницу, на которой закончили чтение.
Интервал:
Закладка:
• Find out how many rows are in the result set via getCount()
• Iterate over the rows via moveToFirst(), moveToNext(), and isAfterLast()
• Find out the names of the columns via getColumnNames(), convert those into column numbers via getColumnIndex(), and get values for the current row for a given column via methods like getString(), getInt(), etc.
• Re-execute the query that created the cursor, via requery()
• Release the cursor’s resources via close()
For example, here we iterate over the widgetstable entries from the previous snippets:
Cursor result =
db. rawQuery("SELECT ID, name, inventory FROM widgets");
result. moveToFirst();
while(!result. isAfterLast()) {
int id = result. getInt(0);
String name = result. getString(1);
int inventory = result. getInt(2);
// do something useful with these
result. moveToNext();
}
result. close();
Making Your Own Cursors
There may be circumstances in which you want to use your own Cursorsubclass rather than the stock implementation provided by Android. In those cases, you can use queryWithFactory()and rawQueryWithFactory(), which take a SQLiteDatabase.CursorFactoryinstance as a parameter. The factory, as one might expect, is responsible for creating new cursors via its newCursor()implementation.
Finding and implementing a valid use for this facility is left as an exercise for the reader. Suffice it to say that you should not need to create your own cursor classes much, if at all, in ordinary Android development.
Data, Data, Everywhere
If you are used to developing for other databases, you are also probably used to having tools to inspect and manipulate the contents of the database, beyond merely the database’s API. With Android’s emulator, you have two main options for this.
First, the emulator is supposed to bundle in the sqlite3console program and makes it available from the adb shellcommand. Once you are in the emulator’s shell, just execute sqlite3, providing it the path to your database file. Your database file can be found at the following location:
/data/data/your.app.package/databases/your-db-name
Here your.app.packageis the Java package for your application (e.g., com.commonsware.android) and your-db-nameis the name of your database, as supplied to createDatabase().
Note, however, that the Android 0.9 SDK appears to be missing the sqlite3command, though it has returned in Android 1.0.
The sqlite3program works, and if you are used to poking around your tables using a console interface, you are welcome to use it. If you prefer something a little bit friendlier, you can always copy the SQLite database off the device onto your development machine, then use a SQLite-aware client program to putter around. Note, though, that you are working off a copy of the database; if you want your changes to go back to the device, you will need to transfer the database back over to the device.
To get the database off the device, you can use the adb pullcommand (or the equivalent in your IDE), which takes the path to the on-device database and the local destination as parameters. To store a modified database on the device, use adb push, which takes the local path to the database and the on-device destination as parameters.
One of the most accessible SQLite clients is the SQLite Manager [23] https://addons.mozilla.org/en-US/firefox/addon/5817
extension for Firefox (Figure 20-1), as it works across all platforms.
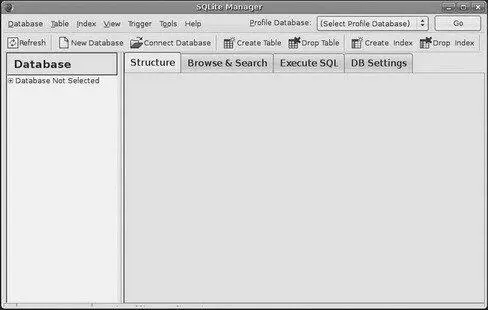
Figure 20-1. The SQLite Manager Firefox extension
You can find other client tools [24] http://www.sqlite.org/cvstrac/wiki?p=SqliteTools
on the SQLite Web site. [25] http://www.sqlite.org
CHAPTER 21
Leveraging Java Libraries
Java has as many, if not more, third-party libraries than any other modern programming language. Here, “third-party libraries” refers to the innumerable JARs that you can include in a server or desktop Java application — the things that the Java SDKs themselves do not provide.
In the case of Android, the Dalvik Virtual Machine (Dalvik VM) at its heart is not precisely Java, and what it provides in its SDK is not precisely the same as any traditional Java SDK. That being said, many Java third-party libraries still provide capabilities that Android lacks natively and therefore the ones you can get working with Android’s flavor of Java may be of use to you in your project.
This chapter explains what it will take for you to leverage such libraries, and the limitations on Android’s support for arbitrary third-party code.
The Outer Limits
Not all available Java code, of course, will work well with Android. There are a number of factors to consider, including the following:
• Expected Platform APIs : Does the code assume a newer JVM than the one Android is based on? Or does the code assume the existence of Java APIs that ship with J2SE but not with Android, such as Swing?
• Size : Existing Java code designed for use on desktops or servers need not worry too much about on-disk size, or even in-RAM size. Android, of course, is short on both. Using third-party Java code, particularly when pre-packaged as JARs, may balloon the size of your application.
• Performance : Does the Java code effectively assume a much more powerful CPU than what you may find on many Android devices? Just because a desktop computer can run it without issue doesn’t mean your average mobile phone will handle it well.
• Interface : Does the Java code assume a console interface? Or is it a pure API that you can wrap your own interface around?
One trick for addressing some of these concerns is to use open-source Java code, and actually work with the code to make it more Android-friendly. For example, if you’re only using 10% of the third-party library, maybe it’s worthwhile to recompile the subset of the project to be only what you need, or at least to remove the unnecessary classes from the JAR. The former approach is safer in that you get compiler help to make sure you’re not discarding some essential piece of code, though it may be more tedious to do.
Ants and JARs
You have two choices for integrating third-party code into your project: use source code or use pre-packaged JARs.
If you choose to use the third-party source code, all you need to do is copy it into your own source tree (under src/in your project) so it can sit alongside your existing code, then let the compiler perform its magic.
If you choose to use an existing JAR, perhaps one for which you do not have the source code, you will need to teach your build chain how to use the JAR. If you are using an IDE, that’s a matter of telling it to reference the JAR. If, on the other hand, you are not using an IDE and are relying upon the build.xmlAnt script, put the JAR in the libs/directory created for you by activityCreator, and the Ant build process will pick it up.
Интервал:
Закладка:
Похожие книги на «Beginning Android»
Представляем Вашему вниманию похожие книги на «Beginning Android» списком для выбора. Мы отобрали схожую по названию и смыслу литературу в надежде предоставить читателям больше вариантов отыскать новые, интересные, ещё непрочитанные произведения.


Обсуждение, отзывы о книге «Beginning Android» и просто собственные мнения читателей. Оставьте ваши комментарии, напишите, что Вы думаете о произведении, его смысле или главных героях. Укажите что конкретно понравилось, а что нет, и почему Вы так считаете.