Andrew Hudson - Fedora™ Unleashed, 2008 edition
Здесь есть возможность читать онлайн «Andrew Hudson - Fedora™ Unleashed, 2008 edition» весь текст электронной книги совершенно бесплатно (целиком полную версию без сокращений). В некоторых случаях можно слушать аудио, скачать через торрент в формате fb2 и присутствует краткое содержание. Город: Indianapolis, Год выпуска: 2008, ISBN: 2008, Издательство: Sams Publishing, Жанр: ОС и Сети, на английском языке. Описание произведения, (предисловие) а так же отзывы посетителей доступны на портале библиотеки ЛибКат.

- Название:Fedora™ Unleashed, 2008 edition
- Автор:
- Издательство:Sams Publishing
- Жанр:
- Год:2008
- Город:Indianapolis
- ISBN:978-0-672-32977-7
- Рейтинг книги:5 / 5. Голосов: 1
-
Избранное:Добавить в избранное
- Отзывы:
-
Ваша оценка:
Fedora™ Unleashed, 2008 edition: краткое содержание, описание и аннотация
Предлагаем к чтению аннотацию, описание, краткое содержание или предисловие (зависит от того, что написал сам автор книги «Fedora™ Unleashed, 2008 edition»). Если вы не нашли необходимую информацию о книге — напишите в комментариях, мы постараемся отыскать её.
Finding information you need is not always easy. This short index provides a list of common tasks discussed inside this book. Browse the table of contents or index for detailed listings and consult the specified chapter for in-depth discussions about each subject.
left How Do I…?
See…
How Do I…?
See…
left Back up my system?
Chapter 13
Partition a hard drive?
Appendix B, Chapters 1, 35
left Build a new Linux kernel?
Chapter 36
Play MP3s and other music?
Chapter 7
left Burn a CD?
Chapter 7
Print a file?
Chapter 8
left Change a password?
Chapter 4
Read a text file?
Chapter 4
left Change the date and time?
Chapter 32
Read or send email?
Chapter 21
left Compress a file?
Chapter 13
Read or post to newsgroups?
Chapter 5
left Configure a modem?
Chapter 2
Reboot Fedora?
Chapter 1
left Configure a printer?
Chapter 8
Rescue my system?
Chapter 13
left Configure a scanner?
Chapter 7
Set up a DNS server?
Chapter 23
left Configure a sound card?
Chapter 7
Set up a firewall?
Chapter 14
left Configure my desktop settings?
Chapter 3
Set up a web server?
Chapter 15
left Connect to the Internet?
Chapter 5
Set up an FTP server?
Chapter 20
left Control a network interface?
Chapter 14
Set up Samba with SWAT?
Chapter 19
left Copy files or directories?
Chapters 13, 32
Set up wireless networking?
Chapter 14
left Create a boot disk to boot Fedora?
Chapter 1
Shut down Fedora?
Chapter 1
left Create a database?
Chapter 16
Use a spreadsheet?
Chapter 6
left Create a user?
Chapter 4
Use Instant Messaging?
Chapter 5
left Delete a file or directory?
Chapter 32
Watch television on my computer?
Chapter 7
left Get images from a digital camera?
Chapter 7
Edit a text file?
Chapter 4
left Install Fedora?
Chapter 1
Make Fedora more secure?
Chapter 14
left Log in to Fedora?
Chapter 1
Mount a CD-ROM or hard drive?
Chapter 35
Fedora™ Unleashed, 2008 edition — читать онлайн бесплатно полную книгу (весь текст) целиком
Ниже представлен текст книги, разбитый по страницам. Система сохранения места последней прочитанной страницы, позволяет с удобством читать онлайн бесплатно книгу «Fedora™ Unleashed, 2008 edition», без необходимости каждый раз заново искать на чём Вы остановились. Поставьте закладку, и сможете в любой момент перейти на страницу, на которой закончили чтение.
Интервал:
Закладка:
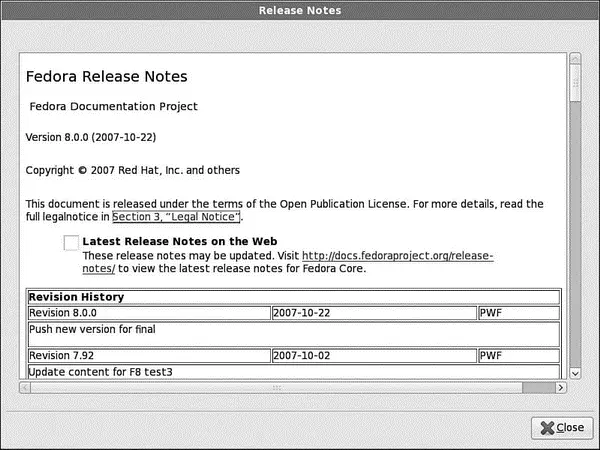
FIGURE 1.8 Read Help or Release Notes before installing Fedora.
Fedora's installer supports the capability to monitor background and install processes running during an installation. You can watch the progress of an install and hardware information reported by the Linux install kernel by navigating to a different console display or virtual console. To do so, simultaneously press the Ctrl, Alt, and the appropriate function key (such as F1-F5).
Use this approach to watch for kernel messages, monitor hardware detection, gain access to a single-user shell, and view the progress of the installer script.
When using a graphical installer, press Ctrl+Alt+F4 (then Alt+F2 or Alt+F3) to navigate to the various screens. Press Alt+F7 to jump back to the installer. When performing a text-based installation, use Alt+F2 (then Alt+F3 or Alt+F4). Use Alt+F1 to jump back to a text-based install.
If your pointing device (mouse) is not recognized, you can press Alt+R to "press" the Release Notes button. Similarly, you can press Alt+H to hide text shown on the left side of the screen, but you should take a minute to read the frame's contents.
Click Next (or press Alt+N) to continue, and the installer asks you to select one of 31 different languages for the installation, as shown in Figure 1.9.
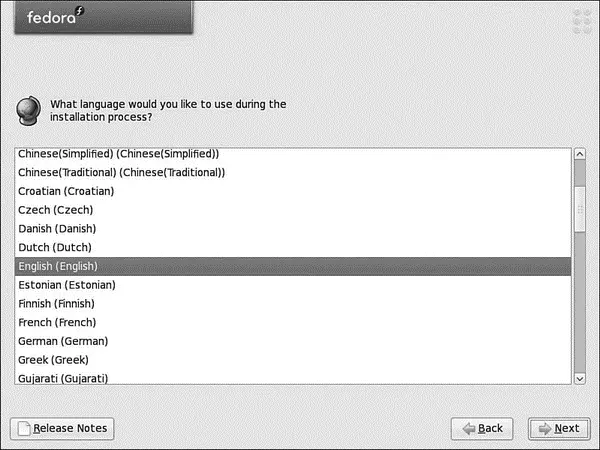
FIGURE 1.9 Select a language to use when installing Fedora.
You can navigate the installer's dialogs (during a text-based or graphical install) by using the Tab key. You can scroll through lists by using your cursor keys. Note that you can now step backward through the install by using a Back button. Select a language and click the Next button.
You'll then be asked to select a keyboard for the install, as shown in Figure 1.10.
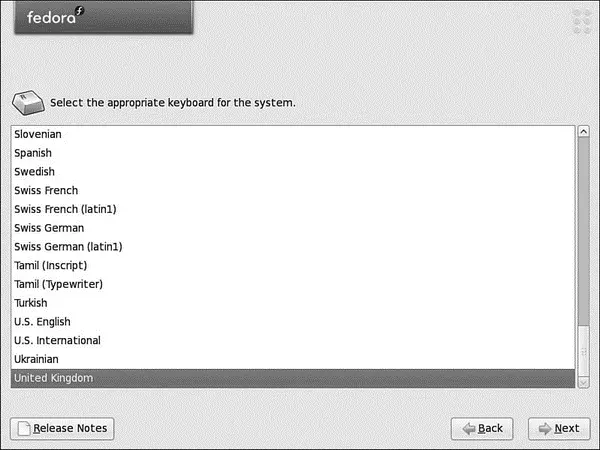
FIGURE 1.10 Select a default keyboard to use when installing and using Fedora.
Scroll to the appropriate keyboard option. You use this option to configure the install to support one of 53 different language keyboards. Click Next after making your selection.
At this point, if you are installing Fedora to a brand new hard drive, you will get a warning that Fedora was unable to read the partition table. By clicking Yes, you are giving Fedora permission to initialize the disk and use it for installation. If you are happy that it is a totally blank drive, feel free to proceed; otherwise, we recommend using the Live CD to install Fedora.
If an existing Linux install is detected, you are asked whether you want to upgrade and reinstall; otherwise, you are asked to partition your disk to make room for Fedora, as shown in Figure 1.11.
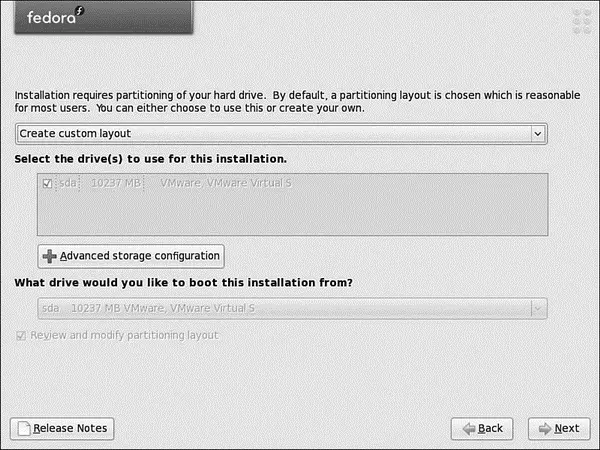
FIGURE 1.11 Select how you want to partition your drive.
Partitioning Your Hard Drive
For the moment, select Create Custom Layout and click Next to move to the screen shown in Figure 1.12. You could, however, opt to delete all partitions (including Windows partitions) on the drive, remove only Linux partitions on the drive, or use only unallocated space.
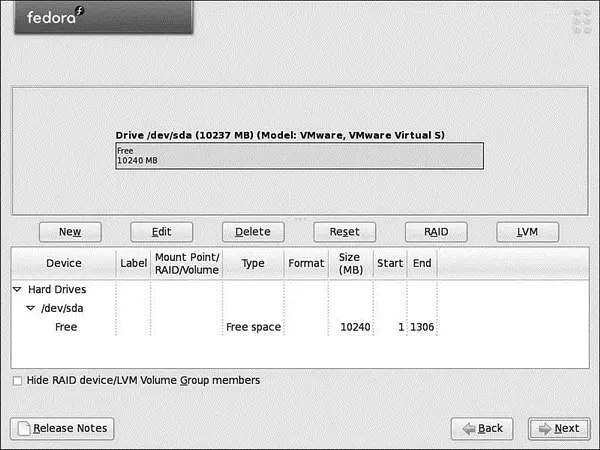
FIGURE 1.12 Fedora's powerful partitioning tool enables you to create a partition scheme unique to your requirements.
If you followed the earlier partitioning instructions, choose to Use Free Space on Selected Drives and Create Default Layout.
If you choose one of these three, you get a default layout that uses logical volume management. This is a special type of partitioning that makes disk partitions much easier to work with.
Logical volume management sounds a lot more difficult than it is. In effect, what it does is allow you to produce single logical partitions that can be made up of multiple physical drives. Logical volumes can also be resized as required, something that is usually difficult when dealing with ext3 partitions (Fedora's native partition type). There is one thing that you need to remember: Create a separate /boot partition independent of the logical volumes; otherwise, your system will not boot!
This example looks at creating a partition table on one hard drive. To get started, click the New button to bring up the screen shown in Figure 1.13. First of all, you need to create a small partition that has the mount point /boot. This is to enable Fedora to actually boot and needs to be a maximum of only about 100MB in size. Make sure that only the first disk is checked ( sdain the example) and select /bootfrom the drop-down mount point menu. Finally, change the size of the partition to 100MB and click the OK button to create the first partition.
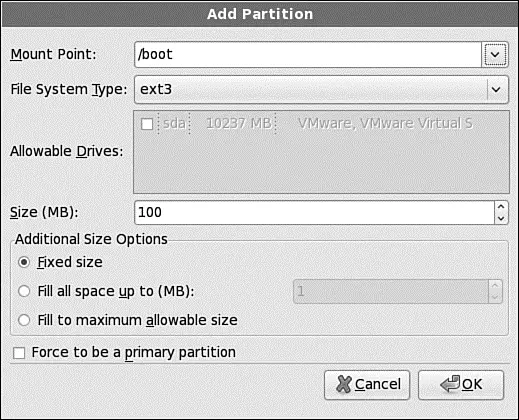
FIGURE 1.13 Make sure to create your boot partition; otherwise, all your good work will be in vain!
Now we need to create physical volumes that will allow Fedora to combine them into a logical volume. Click the New button again to bring up the same window as Figure 1.13, but this time you want to change the File System Type to physical volume (LVM). Make sure that only one drive is checked, and finally select the option Fill to Maximum Allowable Size to instruct Fedora to use all available space.
When you have created the physical volumes, you now need to bind them together through a logical volume. Click the LVM button in the partitioner's main window to bring up the LVM options (see Figure 1.14). You can give your logical volume group a more meaningful name than VolGroup00, but you must ensure that there are no spaces in the name. Next you can choose a physical extent size for your volumes, or rather the size of chunks that the disks will be "cut up into." Unless you really have a specific need to change this setting, you should leave it at 32.

FIGURE 1.14 Harness the flexibility of logical volumes through Fedora's easy-to-use utility.
Now you need to create your partitions within your logical volume group, and you do this as you would any other Linux distribution, making sure that you at least have a /partition and a swap partition. In the example, click the Add button to be taken to the Make Logical Volume screen (see Figure 1.15) where you can specify a mount point, file system type, volume name (again no spaces), and finally the size of the partition.

FIGURE 1.15 Use this screen to define the logical volumes that make up your logical group.
You have to create at least two partitions: the /partition and the swappartition. However, you can add several mount points, depending on your specific requirements. Some users find it helpful to create a separate /homepartition, which we do in the example. As you add each logical volume, it appears in the main LVM Group options screen (refer to Figure 1.14). When you are finished, click the OK button to return to the main partition screen, which should look similar to Figure 1.16.
Интервал:
Закладка:
Похожие книги на «Fedora™ Unleashed, 2008 edition»
Представляем Вашему вниманию похожие книги на «Fedora™ Unleashed, 2008 edition» списком для выбора. Мы отобрали схожую по названию и смыслу литературу в надежде предоставить читателям больше вариантов отыскать новые, интересные, ещё непрочитанные произведения.


![Andrew Radford - Linguistics An Introduction [Second Edition]](/books/397851/andrew-radford-linguistics-an-introduction-second-thumb.webp)


Обсуждение, отзывы о книге «Fedora™ Unleashed, 2008 edition» и просто собственные мнения читателей. Оставьте ваши комментарии, напишите, что Вы думаете о произведении, его смысле или главных героях. Укажите что конкретно понравилось, а что нет, и почему Вы так считаете.