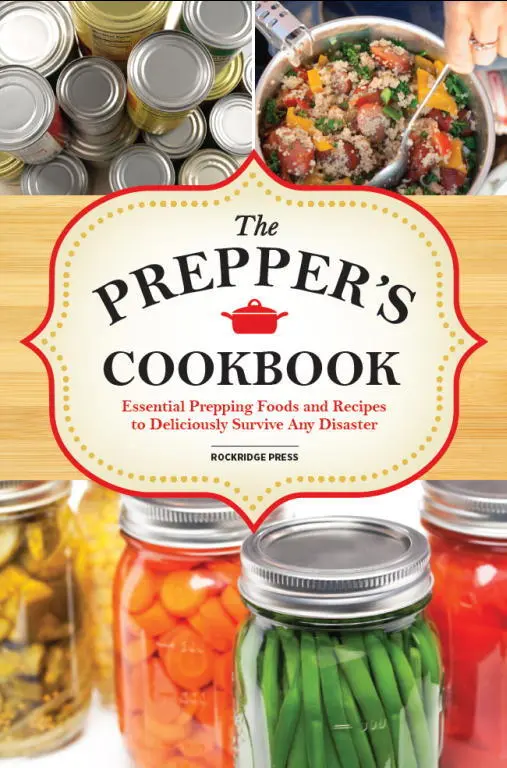
Rockridge Press - The Preppers Cookbook
Здесь есть возможность читать онлайн «Rockridge Press - The Preppers Cookbook» весь текст электронной книги совершенно бесплатно (целиком полную версию без сокращений). В некоторых случаях можно слушать аудио, скачать через торрент в формате fb2 и присутствует краткое содержание. Город: Berkeley, Год выпуска: 2013, ISBN: 2013, Издательство: Rockridge Press, Жанр: Кулинария, на английском языке. Описание произведения, (предисловие) а так же отзывы посетителей доступны на портале библиотеки ЛибКат.
- Название:The Preppers Cookbook
- Автор:
- Издательство:Rockridge Press
- Жанр:
- Год:2013
- Город:Berkeley
- ISBN:978-1-62315-197-3
- Рейтинг книги:3 / 5. Голосов: 1
-
Избранное:Добавить в избранное
- Отзывы:
-
Ваша оценка:
The Preppers Cookbook: краткое содержание, описание и аннотация
Предлагаем к чтению аннотацию, описание, краткое содержание или предисловие (зависит от того, что написал сам автор книги «The Preppers Cookbook»). Если вы не нашли необходимую информацию о книге — напишите в комментариях, мы постараемся отыскать её.
.
Prepping your own food—choosing the right ingredients, in the right quantities, with the right methods—is the best way to ensure that you and your family will be ready for any disaster. This is the ultimate preppers cookbook for preparing in a safe and smart way.
With the help of
you’ll be able to:
• Get started with handy checklists and instructions to begin preparing immediately
• Use
to quickly learn and start using different food-preservation methods such as canning, pickling, and dehydrating
• Choose from delicious recipes from the
for every meal and situation, including breakfast, dessert, and snacks
• Keep track of your calories, water supply, and macronutrients using proper guidelines
• Easily organize your disaster response with helpful tips and suggestions from Regardless of what reality TV would have you believe, most preppers are real-world people just like you, who simply want to be prepared to survive any emergency that may arise. Advance preparation will be crucial to making it through a disaster, even if it’s for only a few days. With dozens of useful recipes, and with tutorials on crucial topics such as alternate food sources, reliable cooking methods, and water purification,
will help get your family prepared for any situation.
The Preppers Cookbook — читать онлайн бесплатно полную книгу (весь текст) целиком
Ниже представлен текст книги, разбитый по страницам. Система сохранения места последней прочитанной страницы, позволяет с удобством читать онлайн бесплатно книгу «The Preppers Cookbook», без необходимости каждый раз заново искать на чём Вы остановились. Поставьте закладку, и сможете в любой момент перейти на страницу, на которой закончили чтение.
Интервал:
Закладка:
• 1½ cups sliced carrots
• 1 cup diced onion
• 2 teaspoons salt
• 1 teaspoon freshly ground black pepper
• ½ cup chopped fresh parsley
• 2 tablespoons chopped fresh thyme
• 1½ teaspoons ground turmeric
• Chicken bouillon cubes (optional)
• 4 quart jars, lids, and bands
1. Prepare your jars by bringing them to a boil in a large pot. Once they reach a boil, reduce the heat to low, and allow them to simmer until you’re ready to use them. Prepare the lids and bands by simmering (not boiling) them over low heat in a small saucepan.
2. Prepare your canner by filling it with 2 to 3 inches of water and bringing it to a boil over high heat.
3. In a large stockpot over medium-high heat, combine the chicken stock, chicken, celery, carrots, and onion. Bring to a boil, reduce the heat to medium, and add the salt, pepper, parsley, thyme, and turmeric, stirring well.
4. Cover and simmer for 30 minutes. Add bouillon cubes, if desired. Cook until the bouillon cubes are dissolved.
5. Ladle the hot soup into the jars, leaving 1 inch of headspace.
6. Remove air bubbles, wipe rims, center the lids, and screw on the bands and adjust until they are fingertip tight. Place the jars in the canner.
7. Cover, vent, and pressurize the canner according to its manufacturer’s directions.
8. Process for 90 minutes at 10 pounds of pressure, adjusting for altitude. Remove the canner from the burner, and allow to cool before removing the jars.
Garden Fresh Veggie Soup
• 2 cups chopped baby carrots
• 2 baking potatoes, cut into cubes
• 1 small sweet onion, chopped
• 2 stalks celery, chopped
• One-half small head cabbage, chopped
• 2 cups chopped tomatoes
• 2 cups green beans, cut into ½-inch pieces
• 2½ quarts chicken broth
• 1 quart vegetable stock
• 2 cups water
• 1½ teaspoons dried basil
• Pinch of rubbed sage
• Pinch of dried thyme
• Salt to taste
• 8 pint jars, lids, and bands
1. Prepare your jars by bringing them to a boil in a large pot. Once they reach a boil, reduce the heat to low, and allow them to simmer until you’re ready to use them. Prepare the lids and bands by simmering (not boiling) them over low heat in a small saucepan.
2. Prepare your canner by filling it with 2 to 3 inches of water and bringing it to a boil over high heat.
3. In a large stockpot over medium-high heat, combine all the ingredients except the salt and bring to a boil.
4. Cover, reduce the heat, and simmer 30 minutes. Season to taste with salt, if desired.
5. Ladle the hot soup into the jars, leaving 1 inch of headspace.
6. Remove air bubbles, wipe rims, center the lids, and screw on the bands and adjust until they are fingertip tight. Place the jars in the canner.
7. Cover, vent, and pressurize the canner according to its manufacturer’s directions.
8. Process for 90 minutes at 10 pounds of pressure, adjusting for altitude. Remove the canner from the burner, and allow to cool before removing the jars.
Basic Vegetable Stock
• 1 tablespoon olive oil
• 1 large onion
• 2 stalks celery, including leaves
• 2 large carrots
• 1 bunch green onions, chopped in long sections
• 8 cloves garlic, minced
• 8 sprigs fresh parsley
• 6 sprigs fresh thyme
• 2 bay leaves
• 1 teaspoon salt
• 2 quarts water
• 3 quart jars, lids, and bands
1. Prepare your jars by bringing them to a boil in a large pot. Once they reach a boil, reduce the heat to low, and allow them to simmer until you’re ready to use them. Prepare the lids and bands by simmering (not boiling) them over low heat in a small saucepan.
2. Prepare your canner by filling it with 2 to 3 inches of water and bringing it to a boil over high heat.
3. In a large stockpot over medium-high heat, combine all the ingredients and bring to a boil.
4. Cover, reduce the heat, and simmer for 30 minutes.
5. Strain the vegetables and spices, and discard the solids.
6. Ladle the hot stock into the jars, leaving 1 inch of headspace.
7. Remove air bubbles, wipe rims, center the lids, and screw on the bands and adjust until they are fingertip tight. Place the jars in the canner.
8. Cover, vent, and pressurize the canner according to its manufacturer’s directions.
9. Process for 90 minutes at 10 pounds of pressure, adjusting for altitude. Remove the canner from the burner, and allow to cool before removing the jars.
Hearty Chili
People don’t just like chili; they love it. Fortunately, it’s a filling and economical meal that’s great for lunch or dinner in any season. This chili is especially hearty and will be a big hit with your chili fans.
• 4 pounds boneless beef chuck roast or steak
• ¼ cup vegetable oil
• 3 cups chopped yellow onion
• 2 large garlic cloves, chopped
• 5 tablespoons chili powder
• 2 teaspoons cumin seed
• 2 teaspoons salt
• 1 teaspoon dried oregano
• ½ teaspoon freshly ground pepper
• ½ teaspoon ground coriander
• ½ teaspoon crushed red pepper
• 6 cups diced canned tomatoes with their juice
• 4 quart jars, lids, and bands
1. Prepare your jars by bringing them to a boil in a large pot. Once they reach a boil, reduce the heat to low, and allow them to simmer until you’re ready to use them. Prepare the lids and bands by simmering (not boiling) them over low heat in a small saucepan.
2. Prepare your canner by filling it with 2 to 3 inches of water and bringing it to a boil over high heat.
3. Cut the beef chuck into ½-inch cubes, removing any sinew or extra fat.
4. Heat the oil in a large, heavy stockpot and lightly brown the meat. Add the onions and garlic, and continue to cook until the onions are slightly soft.
5. Add all of the seasoning and spices, and cook for 5 minutes. Stir in the diced tomatoes, together with their juices.
6. Bring to a boil, reduce the heat to medium, and simmer for 50 minutes, stirring occasionally.
7. Ladle the hot chili into the jars, leaving 1 inch of headspace.
8. Remove air bubbles, wipe rims, center the lids, and screw on the bands and adjust until they are fingertip tight. Place the jars in the canner.
9. Cover, vent, and pressurize the canner according to its manufacturer’s directions.
10. Process for 90 minutes at 10 pounds of pressure, adjusting for altitude. Remove the canner from the burner, and allow to cool before removing the jars.
SECTION 3
Drying and Storing Your Food

12
DRYING RECIPES: PRODUCE, HERBS, AND MEATS
Drying is one of the earliest methods of preserving food, and it’s a fairly simple process. Native Americans used it all the time to cure meat and preserve stores of food for winter use to keep from starving. This simple, effective method allows you to save food in a manner that’s delicious, portable, and lasting: exactly the traits that you’re looking for in survival situations. Little equipment is needed, and most of it you probably already own or can pick up for minimal cost. The secret to the way dry foods work is the moisture levels are so low that the organisms that spoil food are unable to live.
Drying is a great way to preserve your harvest. Dried fruits and vegetables are delicious, lightweight, easy to make, and packed with nutrition. One important thing about drying your own food is that it saves a great deal of space. For instance, you can store 16 to 20 dried tomatoes in one quart-sized jar or resealable bag.
Читать дальшеИнтервал:
Закладка:
Похожие книги на «The Preppers Cookbook»
Представляем Вашему вниманию похожие книги на «The Preppers Cookbook» списком для выбора. Мы отобрали схожую по названию и смыслу литературу в надежде предоставить читателям больше вариантов отыскать новые, интересные, ещё непрочитанные произведения.


Обсуждение, отзывы о книге «The Preppers Cookbook» и просто собственные мнения читателей. Оставьте ваши комментарии, напишите, что Вы думаете о произведении, его смысле или главных героях. Укажите что конкретно понравилось, а что нет, и почему Вы так считаете.