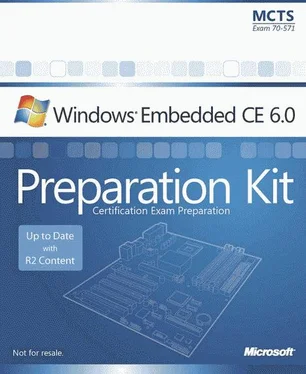
Nicolas Besson - Microsoft Windows Embedded CE 6.0 Exam Preparation Kit
Здесь есть возможность читать онлайн «Nicolas Besson - Microsoft Windows Embedded CE 6.0 Exam Preparation Kit» весь текст электронной книги совершенно бесплатно (целиком полную версию без сокращений). В некоторых случаях можно слушать аудио, скачать через торрент в формате fb2 и присутствует краткое содержание. Город: Redmond, Год выпуска: 2008, Издательство: Microsoft, Жанр: Руководства, ОС и Сети, Программы, на английском языке. Описание произведения, (предисловие) а так же отзывы посетителей доступны на портале библиотеки ЛибКат.
- Название:Microsoft Windows Embedded CE 6.0 Exam Preparation Kit
- Автор:
- Издательство:Microsoft
- Жанр:
- Год:2008
- Город:Redmond
- ISBN:нет данных
- Рейтинг книги:5 / 5. Голосов: 1
-
Избранное:Добавить в избранное
- Отзывы:
-
Ваша оценка:
- 100
- 1
- 2
- 3
- 4
- 5
Microsoft Windows Embedded CE 6.0 Exam Preparation Kit: краткое содержание, описание и аннотация
Предлагаем к чтению аннотацию, описание, краткое содержание или предисловие (зависит от того, что написал сам автор книги «Microsoft Windows Embedded CE 6.0 Exam Preparation Kit»). Если вы не нашли необходимую информацию о книге — напишите в комментариях, мы постараемся отыскать её.
Microsoft Windows Embedded CE 6.0 Exam Preparation Kit — читать онлайн бесплатно полную книгу (весь текст) целиком
Ниже представлен текст книги, разбитый по страницам. Система сохранения места последней прочитанной страницы, позволяет с удобством читать онлайн бесплатно книгу «Microsoft Windows Embedded CE 6.0 Exam Preparation Kit», без необходимости каждый раз заново искать на чём Вы остановились. Поставьте закладку, и сможете в любой момент перейти на страницу, на которой закончили чтение.
Интервал:
Закладка:
► Perform Mouse Driver Tests by Using the CETK<\/p> <\/div>
1. Open the Windows CE Test Kit application from the Start menu on your development computer (open the Windows Embedded CE 6.0 menu and click Windows Embedded CE Test Kit).<\/p>
2. In the Windows Embedded CE Test Kit window, open the Connection menu and click Start Client to establish a connection to the target device.<\/p>
3. Click Connect and select the device in the Connection Manager window.<\/p>
4. Verify that the workstation server application connects successfully to the device, deploys the required CETK binaries, detects available device drivers, and displays a list of all components in a hierarchical tree, as shown in Figure 4-16.<\/p>
5. Right-click the Windows CE Test Catalog node and click Deselect All Tests.<\/p>
6. Open each node in the list and select the Mouse Test check box.<\/p>
7. Open the Test menu and then clock on Start/Stop Test to perform a mouse test.<\/p>
8. On the target device perform the required mouse actions.<\/p>
9. Complete the test and then can access the test report by right-clicking the test entry and selecting View Results.<\/p>
10. Examine the results in the CETK parser and notice successful, skipped, and failed test procedures.<\/p>
Chapter Review<\/p> <\/div>
Platform Builder for Windows Embedded CE ships with a comprehensive set of debugging and testing tools to diagnose and eliminate root causes of errors, and validate the system in its final configuration prior to its release to production. The debugging tools integrate with Visual Studio and communicate over KITL connections with the target device. Alternatively, you can create a memory dump and use the CE Dump File Reader to debug the system in offline mode, which is particularly useful for postmortem debugging. The debugging environment is also extensible by means of eXDI drivers to perform hardware-assisted debugging beyond the capabilities of the standard Kernel Debugger.<\/p>
The Kernel Debugger is a hybrid debugger for kernel components and applications. Debugging starts automatically if you attach to a target device with KdStub and KITL enabled. You can use the Target Control window to start applications for debugging and perform advanced system tests based on CEDebugX commands. However, it is important to keep in mind that you cannot set breakpoints in interrupt handlers or OAL modules because at these levels, the kernel operates in single-thread mode and stops communicating with the development workstation if code execution halts. To debug interrupt handlers, use a hardware debugger or debug messages. The debug messages feature supports debug zones to control the information output without having the rebuild the run-time image. You can also use debug messages to debug the C-code portion of a boot loader, yet for the assembly code portion you must use a hardware debugger or an LED panel.<\/p>
KITL is also a requirement if you want to centralize system testing based on the CETK Test application, although it is also possible to run CETK tests in standalone mode. If you are developing a custom BSP for a target device, you can use the CETK to perform automated or semi-automated component tests based on custom Tux DLLs. Platform Builder includes a WCE TUX DLL template to create a skeleton Tux module that you can extend to meet your specific testing needs. You can integrate the custom Tux DLL in the CETK test application and run tests individually or as part of a larger test suite. Because all CETK tests use the same logging engine and log file format, you can use the same parser tool to analyze the results of default and user-defined tests.<\/p>
Key Terms<\/p> <\/div>
Do you know what these key terms mean? You can check your answers by looking up the terms in the glossary at the end of the book.<\/p>
■ Debug Zones<\/p>
■ KITL<\/p>
■ Hardware debugger<\/p>
■ dpCurSettings<\/p>
■ DebugX<\/p>
■ Target Control<\/p>
■ Tux<\/p>
■ Kato<\/p>
Suggested Practices<\/p> <\/div>
To help you successfully master the exam objectives presented in this chapter, complete the following tasks.<\/p>
Detect Memory Leaks<\/p> <\/div>
Add a subproject to the OS design for a console application that generates memory leaks by allocating memory blocks and never freeing them. Using the tools discussed in this chapter, isolate the issue and fix it.<\/p>
Custom CETK Test<\/p> <\/div>
Add a subproject to the OS design for a WCE TUX DLL. Build the Tux DLL and register it in the Windows Embedded CE Test Kit application. Run a CETK test and verify the test results. Set breakpoints in your Tux DLL and debug the code by running a CETK test in standalone mode.<\/p>
Chapter 5<\/p>
Customizing a Board Support Package<\/p> <\/div>
Application developers do not often need to create a Board Support Package (BSP). However, Original Equipment Manufacturers (OEMs) face this requirement when porting Microsoft® Windows® Embedded CE 6.0 R2 to a new hardware platform. To help OEMs accomplish this task efficiently, Windows Embedded CE features a production-quality OEM adaptation layer (PQOAL) architecture that promotes code reuse based on a collection of OAL libraries organized by processor model and OAL function. Microsoft encourages OEM developers to clone and customize an existing BSP to meet their specific requirements and take full advantage of tested and proven production features for power management, performance optimizations, and input/ output controls (IOCTL). This chapter covers the PQOAL architecture, explains how to clone BSPs, and lists the functions that OEM developers must implement in order to adapt Windows Embedded CE to new hardware architectures and models. It is advantageous to understand the various aspects of customizing a BSP even if you do not intend to develop your own. This chapter will provide an overview of the aspects of BSP customization, ranging from modifications of the startup process and implementing kernel initialization routines, to adding device drivers, power management capabilities, and support for performance optimization.<\/p>
Exam objectives in this chapter:<\/strong> <\/p>
■ Understanding the BSP architecture of Windows Embedded CE<\/p>
■ Modifying and adapting BSPs and boot loaders for specific target devices<\/p>
■ Understanding memory management and layout<\/p>
■ Enabling power management in a BSP<\/p>
To complete the lessons in this chapter, you must have the following:<\/p>
■ At least some basic knowledge about Windows Embedded CE software development.<\/p>
■ A thorough understanding of hardware architectures for embedded devices.<\/p>
■ Basic knowledge about power management and how to implement it in drivers and applications.<\/p>
■ A development computer with Microsoft Visual Studio® 2005 Service Pack 1 and Platform Builder for Windows Embedded CE 6.0 R2 installed.<\/p>
Lesson 1: Adapting and Configuring a Board Support Package<\/p> <\/div>
The BSP development process for a new hardware platform typically begins after performing functional tests of the hardware by using a ROM monitor, by cloning an appropriate reference BSP, followed by implementing a boot loader and the core OAL functions to support the kernel. The goal is to create a bootable system with the least possible amount of custom code. You can then add device drivers to the BSP to support integrated and peripheral hardware and expand the system by implementing power management and other advanced operating system (OS) features according to the capabilities of the target device.<\/p>
Интервал:
Закладка:
Похожие книги на «Microsoft Windows Embedded CE 6.0 Exam Preparation Kit»
Представляем Вашему вниманию похожие книги на «Microsoft Windows Embedded CE 6.0 Exam Preparation Kit» списком для выбора. Мы отобрали схожую по названию и смыслу литературу в надежде предоставить читателям больше вариантов отыскать новые, интересные, ещё непрочитанные произведения.
Обсуждение, отзывы о книге «Microsoft Windows Embedded CE 6.0 Exam Preparation Kit» и просто собственные мнения читателей. Оставьте ваши комментарии, напишите, что Вы думаете о произведении, его смысле или главных героях. Укажите что конкретно понравилось, а что нет, и почему Вы так считаете.
