CHAPTER 13
Proper Curing and Storage of Your Harvest
Harvest is a very exciting time of year, especially on the outdoor grower’s annual cycle. The indoor grower has the option of several harvests throughout the year and can look forward to safely curing, storing, and sampling each one. How you handle the plants now will have great effect on the quality of the harvest. Inattention can result in molds, overdrying, or improper curing that can destroy the aroma and taste. For many health and aesthetic reasons, moldy cannabis should never be used.
Preparing Plants for Curing
There are a few different thoughts on how to properly hang cannabis for curing. Some growers prefer to hang the entire plant. This requires a fair amount of height in your drying shed, as well as more space in between plants. Since the first-time grower is unlikely to possess an empty barn, you’ll probably cut your first crop into branches and dry them in sections. Some growers even take each individual cola and hang them to dry, but, due to space requirements, this is only advisable with small harvests.
Start prepping your drying area well before harvest time. Not being ready takes a lot of the fun out of the process, and being disorganized can cause you to lose track of which plants are which, especially if you cut the plants into branches for hanging. You will need:
• Heavy-duty eye bolts
• Heavy-gauge wire (size 17 gauge or larger)
• Wire cutters
• Stepladder
• Drill
• Screwdriver
• Paper grocery bags
• Electricity
• Multiple oscillating fans
• Good light
Setting up your drying shed will require a little visualization and measuring. You will be amazed at how large the plants appear to become when you bring them indoors. This is just the visual contrast created by enclosing them. This volume will only last a few days; much of it is water contained in the plants, plus you will be trimming the remaining fan leaves as you hang the plants. Bear in mind that you most likely will be bringing the outdoor plants in a few at a time, as each individual plant should be harvested as near to peak maturity as possible.

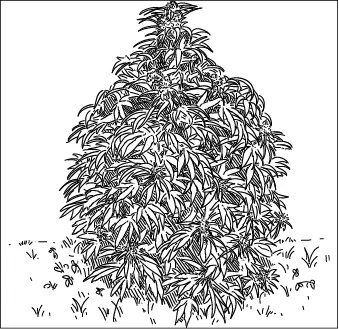
Plant almost ready to harvest.
Note that proper drying requires a cool, dry place with no direct sunlight. If there are windows in your shed, make sure to cover them with curtains or shutters. A good overhead electric light is important so that you can closely examine the plants daily for mold, but direct sunlight will degrade the quality of your harvest.
Depending on genetics and placement in the garden, different plants will be ready to harvest within a few weeks of each other. This gradual harvesting is helpful, as you will have plants that have been hanging and drying and already using less space. These can be moved closer to each other as the newly harvested, bulkier plants come in.
Preparing Your Drying Space
To prepare your drying shed, first make certain the cobwebs and other dust and debris have been vacuumed out with a Shop-Vac or vigorous work with a broom. Wash the flooring and make the shed as clean as possible. You may occasionally drop a branch or even an entire plant, and avoiding contamination and dirt are the name of the game.
You will be placing your eyebolts to support long runs of the taut hanging wires. Do not try to use heavy-duty fishing line or rope; these will bow in the middle of your run and cause the hanging plants to slide together. Until the plants shed their water weight, the hanging lines will be supporting an enormous weight. Always hang plants or branches top down. Never hang with the roots still attached; retaining the roots will not help the quality of the harvest and may add dirt to your flowers.
Because an average axial branch can easily reach five to six feet in length, estimate the height needed to have the branch tips clear your floor by at least a foot; two feet is better. This is where your stepladder comes into play; you will need it for setup and for attending to the hanging plants. Of course, if your shed has more length than height available, it is perfectly fine to cut the longer branches in half and to hang them lower.
Allow enough space to move in between the rows, as you will be checking the plants for mold from all angles at least once per day, as well as continuing to trim fan leaves.

Hang plants leaving enough space to move between the rows.
As soon as your first plant comes into the drying shed, begin using the oscillating fans. The fans should be placed to maximize airflow around the hanging plants while avoiding a direct blast continually blowing on them. Avoid having the fans positioned too low, as they may blow up dust from the shed floor. As the wet plants come in, set the fans on high; as the plants dry out more, lower the fan settings to maintain a gentle continual cycling of air.
Ideally, you will have harvested outdoor plants under clear skies, but frequently plants are brought in based on the weather and the ongoing forecast. If it has been raining for a week and the plants are close to or completely finished, you will most likely bring them in to dry. The chance of a few extra days of finishing is offset by the threat of mold.
As noted earlier, wet plants are very, very heavy. Before bringing them into the drying space, give the plant a good shaking to shed as much external moisture as possible. New growers should not worry about shaking the newly harvested plants; the resins are super-sticky and cannot be shaken off at this stage.
If the plants are truly rain soaked, be prepared to cut the plants in pieces for hanging. At this time you will start stripping the fan leaves that remain; this will help reduce weight and keep the large, wet fan leaves from touching the flowers and inducing mold. The big paper grocery bags on your list are for these leaves. Removing the fan leaves also makes it much easier to quickly check the flowers for molding; otherwise, you will need to lift leaves to examine the flowers.
Many growers do not bother with fan leaves; in part this depends on the size of the harvest. If your harvest is small, you will want to use every part of the plants. The fan leaves can be useful for producing bubble hash.
Bear in mind that law enforcement views large fan leaves as cannabis and will count them for weight should they try to enforce a legal limit or prosecute you for growing cannabis. So stay tidy, keep track, and either process to hash, destroy, or donate the leaves to someone who can use them immediately.
If you plan on using the leaves, stir the bags daily to help them dry. Otherwise, remove the bags as they fill up and destroy the fan leaves. This will speed drying, as the fan leaves will not be releasing additional moisture into the air of the drying shed. You can either feed them to goats (they love cannabis leaves) or burn them. Composting the leaves is not advised, as, again, these can be seized by law enforcement as supposedly useable cannabis.
The Importance of Proper Handling Practices
Always bear in mind that you are producing a product that will be ingested by humans, either by smoking or eating the cannabis. Particularly for medical cannabis patients (whose health is often greatly impaired), cannabis should never be allowed to mold. Even with the best practices, hanging cannabis is very, very vulnerable to molds and great care must be taken to identify and remove problem spots immediately.
Читать дальше


